I have completed many modifications on my previous Steam Deck, including a full reskinning, thanks to the team at JSAUX, so I have become adept at pulling apart and putting it back together. This time, I have Extreme Rate to thank for the chance to try something new: Clicky Face Buttons for OLED Steam Deck.
I’ve been considering the best modifications to make after upgrading to the OLED model. The new model has great features like a nicer screen and a better battery, making it more enjoyable to use than the previous generation. However, one area that could be improved is the contacts for the ABXY buttons and D-pad buttons. Fortunately, Valve does a great job of making these upgrades accessible to those who want to try them.
I started my journey to replace the contacts for the ABXY and D-pad buttons. Although Extreme Rate did provide screws, springs, a prying tool, and a screwdriver, I utilised my iFixit screwdriver kit, which thankfully has the driver tips needed to complete the task; on top of this kit, I also have a range of other useful plastic prying tools, but the supplied one worked just fine. Once I had myself set and the stream running for a curious buddy to watch, I was on my way.
With a clean desk and tools at hand, I stripped the Mod Case off the Deck and pulled the SD card, and I had to use a utility knife to trim the previously installed grips so that the rear panel could be removed. Using a Torx 6 screwdriver head, I removed the eight screws from the rear and then used the pry tool to remove the back. Notably, it was harder than the previous model, but with a slight effort, I got it off. From here, it was time to work on the left side, placing the device on the front cover of the mod case to ensure that the joysticks and screen were not damaged during this modification. I removed the screws around the shielding and made sure to pull the battery cable.
What's In The Box?
- 1* FPC board for Dpad & View buttons
- 1* FPC board for ABXY & Menu buttons
- 2* Rubber pads set
- 1* Screwdriver
- 1* Prying tool
- 32* Screws 4* Springs
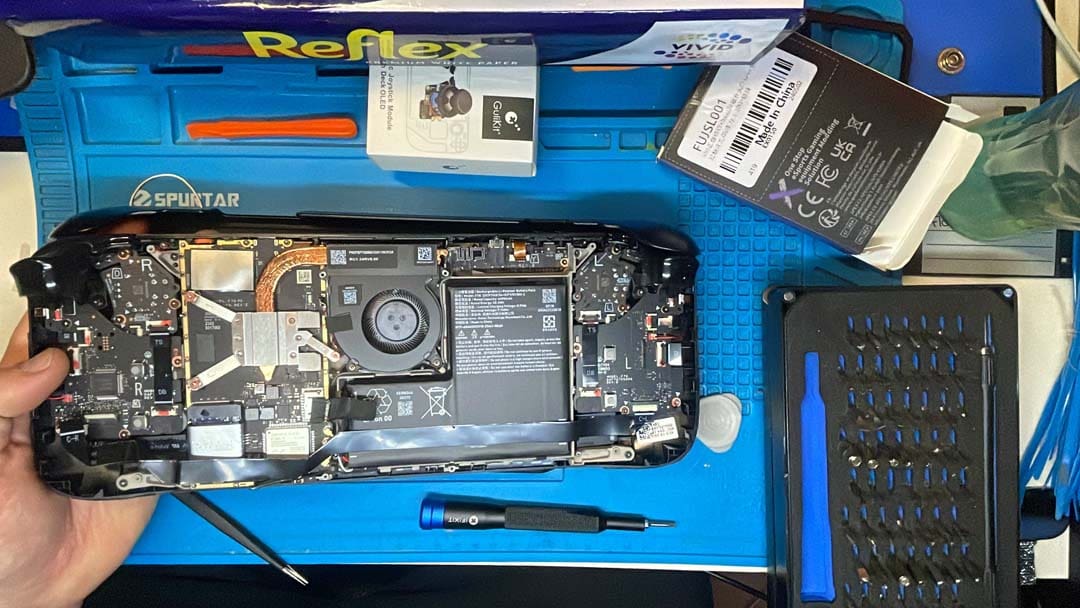
Once the power had been cut from the device, it was time to get into the real work. The deck is put together in a way that makes this process simple. While I was following the guide, it was straightforward, with only a few small chances of missing a screw or a cable when returning the unit to functionality. It is something I appreciate greatly. The hardest part was the removal of the trigger; it was stiff, and it took almost twenty minutes to get the correct angle to pop it off; once that was out of the way, I pulled the ribbon cables and removed the screws as per the instructions until the ABXY buttons were exposed. Then, using a heat gun, I was able to remove the current contacts and replace them with the new ones, peeling the 3m tape with ease and ensuring they were firmly stuck down before replacing the rubber and then putting the buttons back into their home. Again, I did have a little trouble here, but that was due to the leftmost corner having a small lip, which the plastic needed to be placed under as it was reinstalled. Once this was back in place, it was as simple as reversing the previous steps. While the device was open, I also replaced the joysticks with a haptic version.
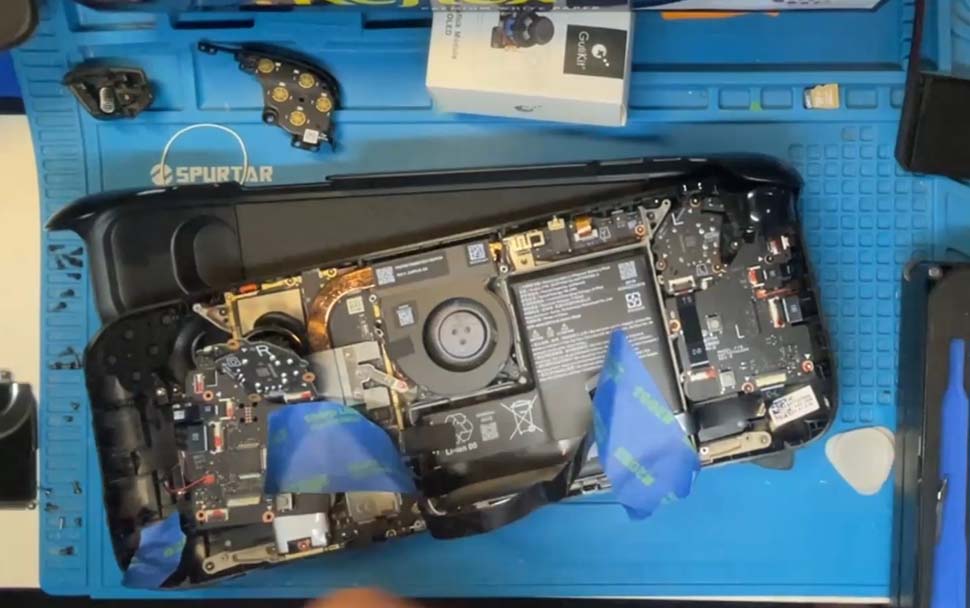
With the left side done and returned to its original state, it was time to move to the other side of the device. With less fanfare, I had the other trigger removed and began removing the screws and cables to access the DPad the procedure was almost identical, except that I also needed to place a starburst-looking plastic item on the rear of the DPad button. Once that was complete, I worked backwards, returning the screws and cables, and then it was time to test the device while leaving the rear case open. I turned on the deck and ensured the buttons were working as intended. With everything functioning, I powered off the device and replaced the rear panel.
With this completed, I booted up the Steam Deck and have spent the last month or more testing the feel of the clicky buttons. I have been happy with their responsiveness and quality. The added sound is like a mechanical keyboard and is a delight to hear unless you are trying to play with others sleeping nearby. While I found the original buttons to be a bit softer and with little to no noise, the upgrade has improved my gaming experience and has been suitable for games requiring rapid presses and quick movement around the DPad.
Due to the moderately complicated process, I recommend that those who are a little more tech-savvy attempt the installation. Having said that, it was one of the easier modifications I have completed, and I am very pleased with the overall results.
The full installation can be seen at high speed in the video below.
A big thank you to Moose with a Scarf for allowing me to use his music. If you like it, please follow up on his website. I grabbed these songs from the Neon Kingdom Album.
https://www.anthonysabatinomusic.com/moosescarf.
(A review unit was supplied for the purposes of this article.)