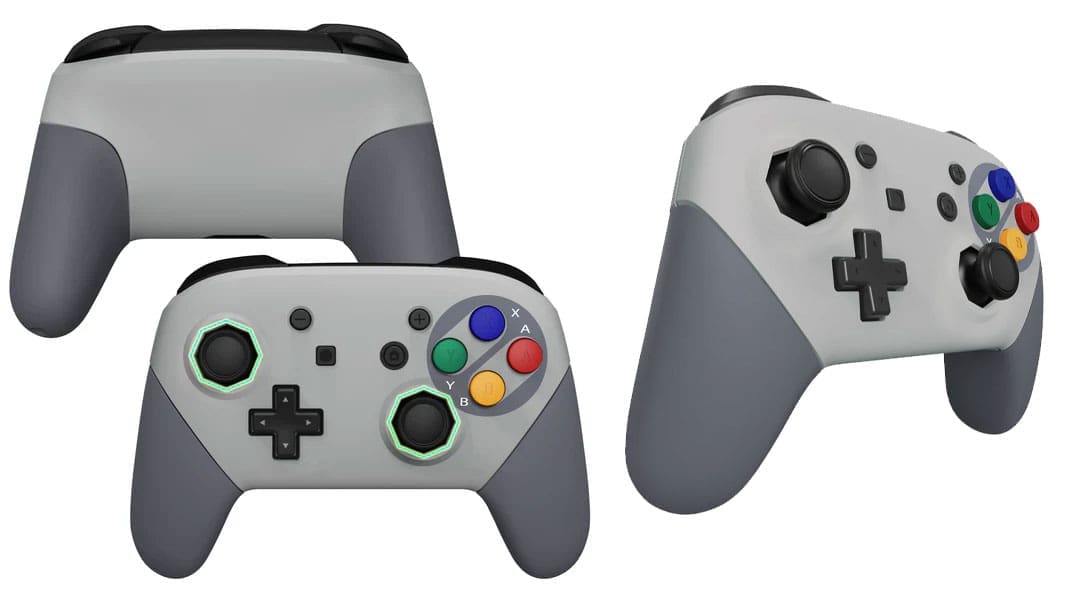
I have been modifying my gear for a while now, so when I had the chance to test out some items from Extreme Rate, I jumped at the opportunity. The idea of having a controller that looks like the original SNES was appealing to the nostalgia in me. I grabbed my normal gear, including the iFixit screwdriver set, and got to work.
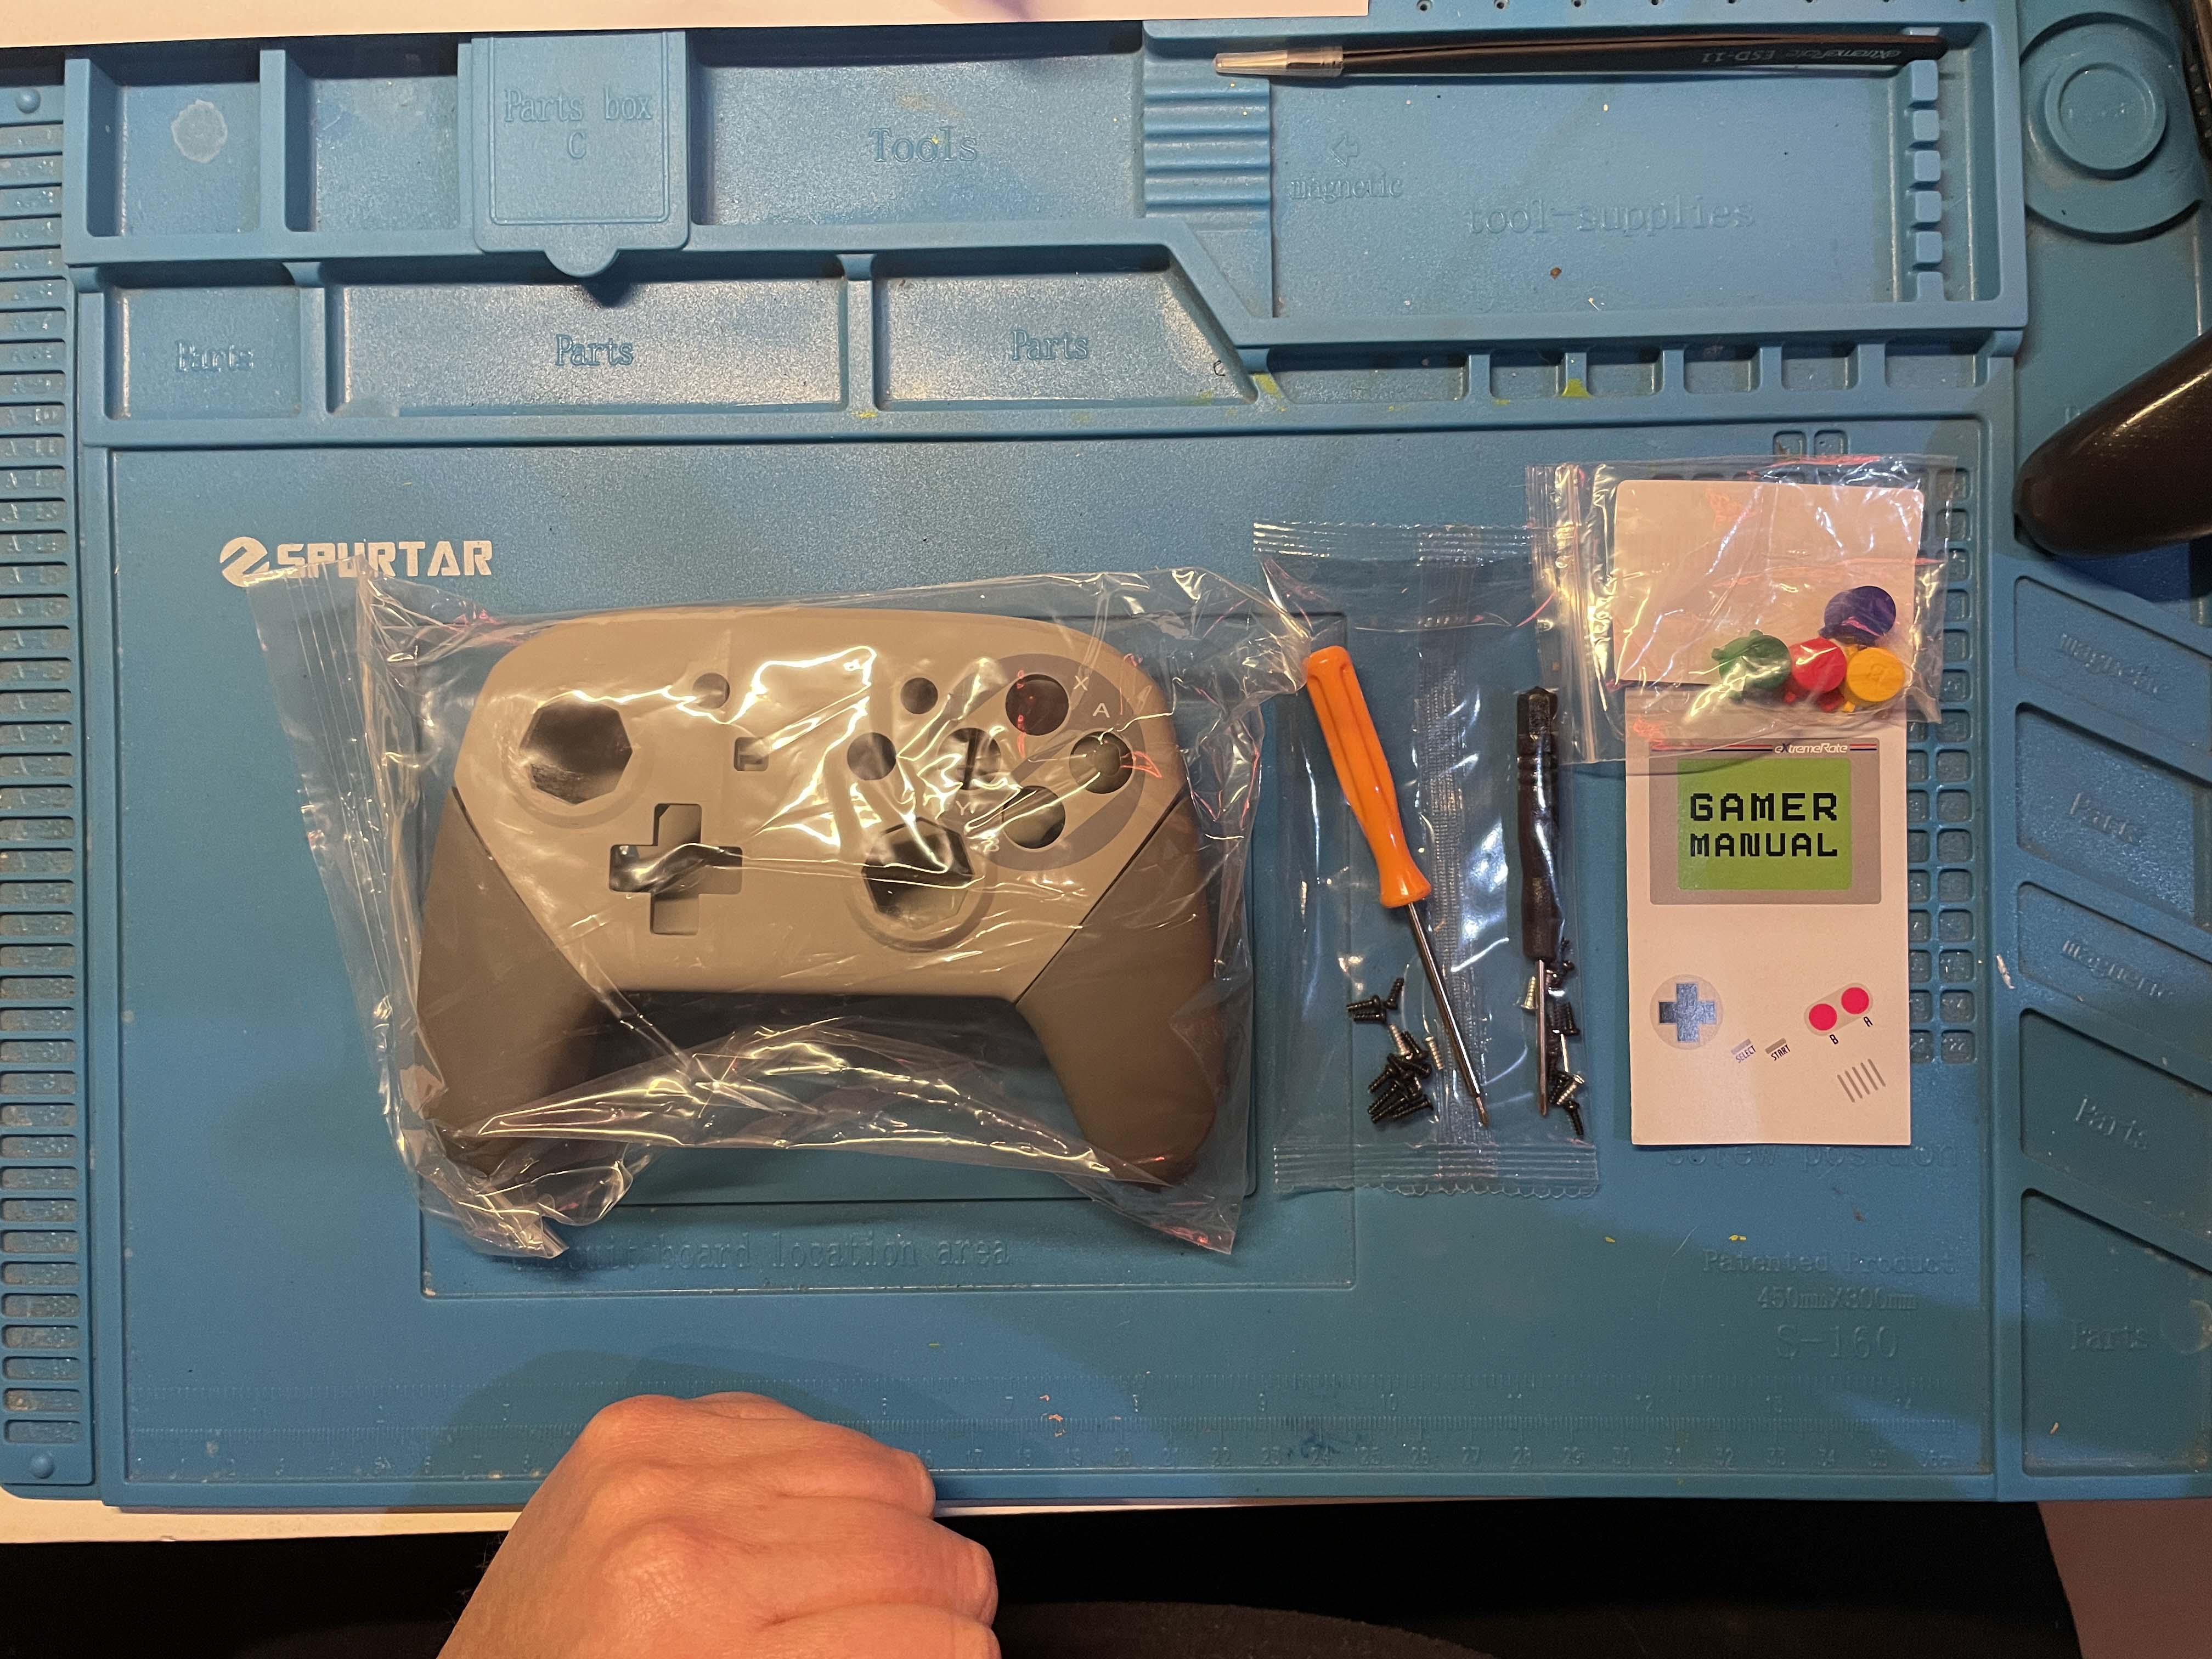
Of the items I received from Extreme Rate, this was the easiest modification because the controller was easy to pull apart, and the process was straightforward. While I made a few mistakes, the overall process took about half an hour, and the controller functions and feels new. I started by laying the component of the box on my desk, including the shell, a full set of screws, and two screwdrivers. There is a guide on the manufacturer’s website, but I tackled this mostly without it, only using it in a couple of spots to check my progress or screw placement when putting the device back together.
I located my screwdriver and pulled out the first two screws located on the base of the grips. Following this action, I moved to remove the next set of screws to allow access to the battery and internal circuitry. I used a plastic prying tool to pop the back cover and removed the battery. I then removed the three screws and tried to remove the front cover and joysticks. I found it still stuck hard and had to refer to the video and found I had missed the two other screws hidden at the top of the battery compartment. Once these other screws were removed, the cover pried off easily, and I just had to pull the ribbon cable to separate the two circuit boards.
Now that the top was removed, I then had to remove four more screws, and that was it. Now that I had removed all the screws, I then moved the components being retransferred to the new case and replaced the YXBA buttons with the green, blue, yellow, and red alternatives. The new buttons are made to fit only in their holes, making the process even easier. With the buttons moved over, I placed the silicon backing in their place and began to put the controller back together.
As I put in the first four screws, I realised I had placed two in too early and had to remove them and put them in after placing them on the other component. I had a little trouble with both ribbon cables but eventually got them set correctly. Once this was completed, I got the front shell back onto the middle section and then placed the rear section on. Noticing that it wasn’t wholly clicked together, I removed the last two screws I had placed and checked the edges, ensuring it was clicked together correctly. Once this was done, all that was left was the grips. Matching the tracks and sliding them on was nice and straightforward finishing it off with a tightening of the last two screws, it was complete.
Overall, this modification is easy to complete and requires no additional soldering; I always suggest that those who attempt this modification have some light technical skills. There are only a few components that may cause amateurs issues. The guide created is very good and easy to follow for those wishing to do so. After completing this, I went into the Switch settings and tested the controller’s full range of buttons. Finding no errors or issues, I placed the controller on charge and was happy to see it functioning normally.
The modification mainly improves the controller’s visual appeal. I find the new look attractive. Extreme Rate offers various shells, including clear and Game Cube purple. Be sure to check out the different options available. Now, I’m going to use the controller for some switch games.
(A review unit was supplied for the purposes of this article.)