Have you ever thought the Steam Decks colour scheme is a bit bland or thought it could use some additional protection? Then, one of the latest releases from JSAUX might be right for you. While there are various skins on the market, they vary in quality. When I noticed that JSAUX had developed its take on these skins, I had to try them out. The timing couldn’t have been better, as I had just upgraded to the newer OLED Steam Deck, and it was looking rather naked.
The skins arrived in a subtle but thick envelope and sat on my shelf for about a week while I awaited the Steam Deck. I removed the tear tab and peeked inside while I waited; what I saw made me happy. If you don’t know, Spiderman is one of my favourite superheroes, so the spider-themed or, more accurately, “Spider Dance” skin was my first and only choice. While this is my preferred option, five available skins are available in the store, all with their unique twist. The themes are as follows, Ice Blast – White, Retro Boy – Original Gameboy stylings, Mondrian – A colourful artsy pattern, Spider Dance – A red and blue style, and finally Berserk – A purple and green delight. On top of the variety of designs, the pack also includes some thumbstick covers, tactile covers for the rear buttons and touchpads, and some non-slip grip stickers.
About a week or so later, when the OLED Steam Deck arrived, and I had time to sit down, I pulled out the skins and got to work. Noticing a lack of instructions on how to install it in the package, I decided to tackle the installation without them. I later discovered the install video on the skins product page. Even without the instructions, I found the installation super easy, starting with the right side front, moving to the left and then applying the rear section.
See the video below for the full installation. It took me just over thirty minutes to complete, but it could have been done in less time.
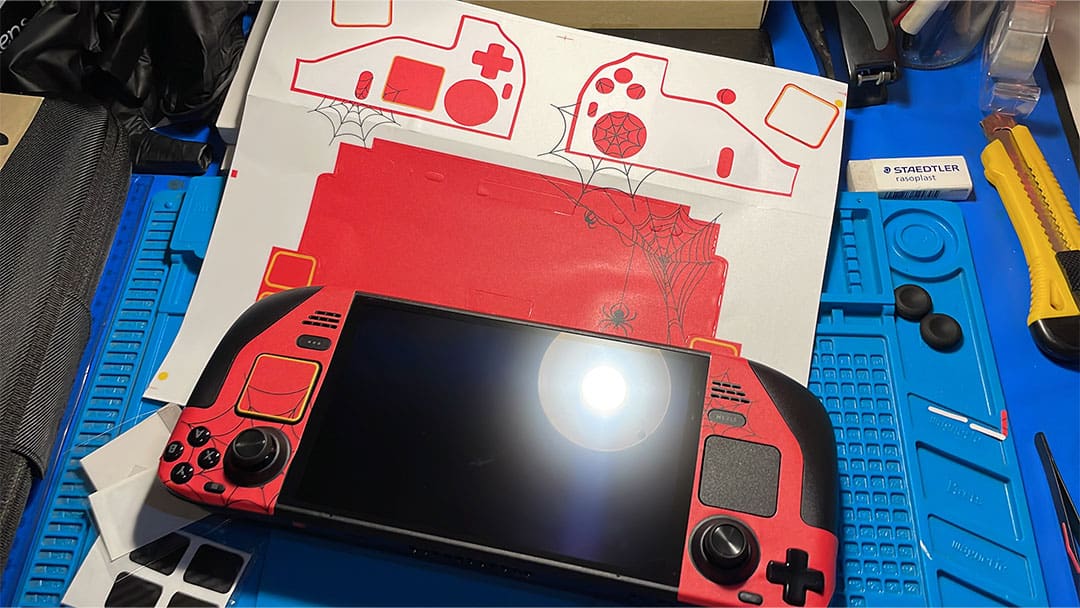
I started by opening the package and laying out the items on my desk. Included in the package were two skins covering the front and rear of the unit. Next were the grips; there was only one set of these, and the thumb stick covers were the same. The other items included stylised carbon fibre skins for the trackpads, rear buttons, and application tools. These tools included a hard cardboard square, a cleaning kit, and a user guide.
I decided to use the Spider Dance skins for the trackpads and the rear buttons. I put on gloves, later choosing to remove them due to constantly getting stuck. I cleaned the Steam Deck with the supplied cloth and dried it with the other provided cloth. I then started with the right side of the deck, peeling the panel and pushing out the small holes that didn’t peel away with the backing. Once the sticker was cleared of debris, I applied it onto the deck, taking a few attempts to get it into the correct position, which made it harder while wearing gloves. I then applied the skin to the trackpad, lining it up with the web design. Once the first side was in place and I was happy, it was time to move to the left side.
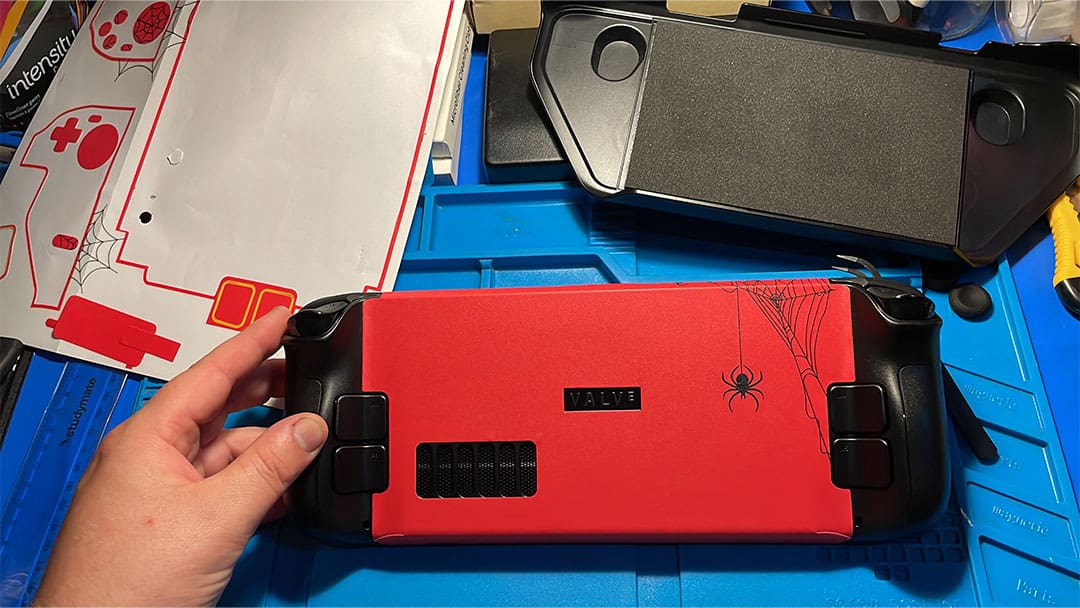
Following the same procedure, I removed the gloves halfway through, making it slightly quicker and easier to apply. Once these front stickers were applied and in the correct position, it was time to move to the larger sticker. The large sticker covers the top of the screen over the deck, wrapping around the back and finishing at the base of the screen. I installed it from the middle, lining up with the valve logo, only to realise later that it was meant to be applied to the area at the top of the screen and wrapped around to the base. In saying that it worked, and I didn’t end up with any wrinkles, I did however end up with the areas around the screen peeling slightly. I then applied the last four stickers to the four rear buttons, noticing that I had attached the left to the right-hand side. I quickly fixed that.
SPECIFICATIONS
Material: PVC
Printing process: Digital printing
Installation Type: Self-Adhesive
Reusability: Single-Use
What You Get: You will get Skin stickers*2, Non-slip Stickers*1, Thumb Grips Caps*2, Touchpad Stickers*2, Button Stickers*2, Manual*1
The design of the stickers allows them to be removed and restrained multiple times during the installation process, so there isn’t much worry about messing it up. Having the spare sheets is also an added security blanket if you make a big mistake or decide to remove and reapply them later. The next job was to install the grip tape, these were much more malleable making bending around the edges much more precise. I didn’t get mine perfect. However, I can always remove them at a later stage.
After about a week or two I removed the stickers and tried to apply the other set that came in the box, I followed the video and found that the other set of stickers did not apply as easily. The parcel only came with one set of cleaning wipes, and I think there may have been traces of oils from my hands on the unit that prevented the installation from occurring. I did find that the stickers were peeling from around the screen area in both installation cases. I removed the original stickers because my recording footage was not what I wanted, and I wanted to reshoot. The grip stickers however have stayed extremely well, I have not removed them since the original install. The other trackpads and rear button stickers have also stayed in place with no issues. I would also note that I was using the mod case over the stickers which lifted the right side of the front stickers, this was due to some less-than-smooth application.
I had installed D Brand skins on my previous unit and found that the process was much harder than using the hair dryer. The other reason I liked these skins over the other was the front came in two pieces, and the middle part wrapped around the deck, making for a much easier installation process. The JSAUX skins were much more forgiving when mistakes during installation were made.
Overall, the installation process was very easy; as mentioned, I didn’t use the guide the first time and only found it after the skins were installed. Using these and a screen protector would make for a good barrier for the bumps and scratches of everyday life. The easy application and removability make them great for beginners and professionals alike to install. As I have iterated above, the installation was very easy, and the stickers looked great, but after my first instalment, I did find the stickers lifting near the screen. I am not sure what occurred to make this happen, but I assume it was a bit of oil from my fingers and the sticker adhesion being messed with when I tried to reapply the protective skin.
(A review unit was supplied for the purposes of this article.)