Are you struggling with any of the boss fights in Death’s Door? Well, you’ve come to the best place if you are, or simply want to see some videos of the boss fights.
Below you’ll find a video and a deeper text guide explaining the battle for each boss fight in Death’s Door.
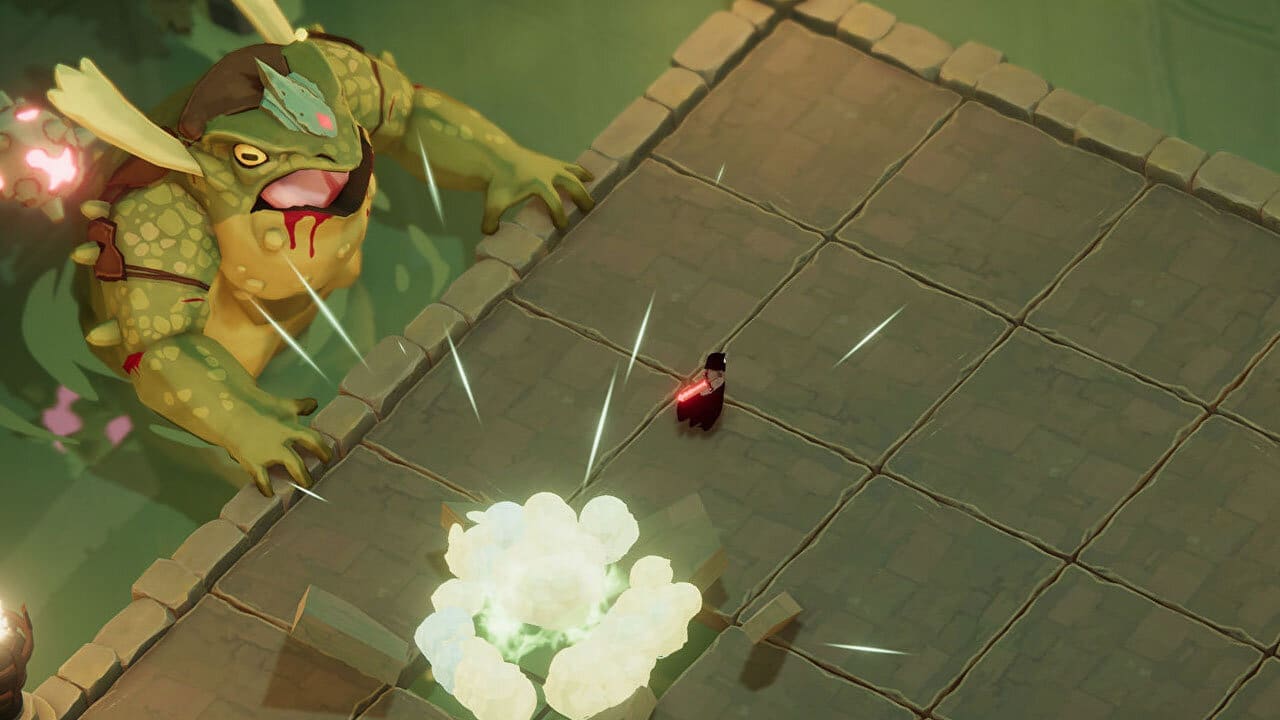
Urn Witch
Here’s a video of the Urn Witch fight, with a deeper explanation below.
As the fight begins, blast the Urn Witch with your fire spell quickly before she can throw a projectile at you.
For the first phase of the fight, the Urn Witch will throw pots on the ground that shoot the green projectiles you can hit back at enemies. Attempt to hit these at the Urn Witch, or otherwise get a sword hit, or two in while making sure you’re clear of her when she makes a spinning attack across the battlefield.
When the Urn Witch jumps into the pot, you can set her on fire while in the pot with enough fire spells. If you can’t do this, get some attacks in while she hops slowly around. However, when the pot lays down, beware she’s about to begin a massive spinning-projectile attack you’ll need to dodge.
If you’ve damaged her enough to trigger the second stage of the fight, you’ll notice the Urn Witch is more aggressive now and throwing more pots at you than before. Get damage in between attacking her, dodging the pots, and hitting the green projectiles back at her; eventually, she’ll go back inside the pot, and again, I suggest setting it on fire so you can get some free and easy damage in on the witch.
In the last phase of the fight, the Urn Witch adds in an aggressive AOE blast attack, so look out for that one. Otherwise, you’re near the end. Follow through with what you’d been doing, and the fight will be over in no time.
Frog King
Here’s a video of the Frog King fight, with a deeper explanation below.
When the Frog King fight begins, he’ll hop around like Ripper Roo from Crash Bandicoot. When he lands, quickly get behind him and attack his backside to send him flying into the water.
After a few of these, the Frog King will transition into the water, where he’ll make two attacks. The first is when he sucks things towards his open mouth, and this one lets you get some attacks in before you’ll need to make sure the degree doesn’t hit you and you don’t get sucked into his mouth. The other attack has the Frog King sending projectiles down from above on top of the Crow and destroying the platforms around you. Whichever attack the Frog King does, it ends the same as he launches himself towards you from the water, and when he lands, you can dodge and get some attacks in before the Frog King throws himself to the water on the other side of you. It’s at this stage you need to quickly aim at the mace on his back and hit it with your magic spell to reset the blocks around you.
Besides speeding up his attacks, you don’t need to worry about any surprises from the Frog King from this stage onwards.
Betty
Here’s a video of the Betty fight, with a deeper explanation below.
Betty is the fastest and most challenging boss you’ve faced so far and will likely take you several attempts before you understand its attack pattern.
For the first half of the fight, Betty will swipe and jump towards you a couple of times before eventually making three attacks where it rolls up into a ball. There is always three of these attacks, though, so you don’t have to fear a fourth. Get your attacks in one or two slashes at a time as Betty lands from jumping towards you or swiping at you. Don’t attempt to attack as Betty is making the ball attacks.
The second phase of the fight is a more aggressive step-up. Betty is now angrier, faster and also will let off a road that sends snow falling from above that can damage you.
There’s no real tactic to this fight other than mastering Betty’s attack pattern.
Old Crow
Here’s a video of the Old Crow fight, with a deeper explanation below.
The old and fragile crow has transformed into a best that seems like it belongs in Bloodborne. The Old Crow is now super-faster, and most of its attacks are based on this fact.
As the fight begins, run up beside the crow and get as many attacks in as you can; beware that it starts creating missiles that look like crows to attack you, but you can hit these back at the Old Crow, just like the green spells in the first boss fight.
Always trying to get in attacks as you can, make sure never to get too close as the Old Crow is wild and can move quickly and damage you if they do. When chains begin appearing on the screen, dodge out of their way as the Old Crow is about to attack down their path. As the last chain finishes, the Old Crow will dive at you from the sky.
Continue trying to get sword attacks in as you deem safely, but another way is to attack the Old Crow with the fire spell. Hitting any of the missiles it creates will re-charge one bar of your magic metre, so you should always be able to fire off some fire spells.
The next phase of the Old Crow’s attack will create a small portal in the room, and you’ll be sucked towards it, so run away from it and draw the Old Crow away with you, so you’re not having to fight around it, especially as it still repeats the attacks you’d just gotten used to trying to remember.
In the final stage of the fight, the Old Crow will let loose these tiny swam of crows that follow you. Keep moving as you would usually to make sure they don’t surround you while also hacking away at them as you can. Otherwise, the rest of the fight is more of the same, just slightly more aggressive.
The Lord of Doors
Here’s a video of The Lord of Doors fight, with a deeper explanation below.
The Lord of Doors has three stages, and there are two checkpoints in the fight, so don’t think you have to do all of this without dying once.
When the fight with The Lord of Doors begins, they’re a bit of a pushover. Easily telegraphed and slow jump-smash attacks are all they have, and you can easily roll out of the way and attack them. Eventually, you’ll wear them down, and they’ll disappear into a door, so follow them through.
This next section is all about survival, with minimal fighting between you and The Lord of Doors. I’d highly suggest watching the video above for this section as it’ll show you precisely what paths to take to get around some of the bull-doors.
Follow The Lord of Doors and dodge the bull-doors they send at you and jump across the gaps using the hook-tool. Enter the door at the end, and you’ll be in the Urn Witch’s courtyard. The Lord of Doors has the same attacks as before, but this time will call in 3 grenade blasts from doors, so make sure to dodge those.
Head into the next door and dodge the bull-doors and push-forward again. When you reach the end, enter the door, and you’ll be in the Frog King area. The Lord of Door has introduced a jumping attack that sends out three blast waves as it lands. Do enough damage, and they’ll retreat into the door again, so follow once again.
Dodge the bull-doors quickly in this section as the platforms you’re standing on fall. Enter the door at the end, and you’ll be on Betty’s mountain. This time The Lord of Door is copying Betty’s roll attack, so make sure to have some patience and remember it’s three roll attacks at a time. Once again, The Lord of Doors will head into a door and retreat.
This next part is the last section, so be as careful as you can and dodge the doors, and use the hook-shot toe to make your way to the last door, of which you’ll have a checkpoint on the other side.
After a cutscene, you’ll be facing The Last Lord.
In this showdown, you’ll be facing a combination of all of the moves you’ve seen The Last Lord use previously. The easy to dodge slam attacks are perfect opportunities to attack.
However, there are a few new attacks here to beware of as well. The first of which is a lock-on attack that appears at the Crow’s feet. To get out of this, simply spam any button, and you’ll break the seal. The next is the most annoying as The Last Lord targets you with a laser while bull-doors spawn all around you and charge.
In the final stage of the fight, The Last Lord will begin the ball attacks and a new attack in which they’ll charge up a small red ball in front of them before performing an AOE attack that you’ll need to be outside of so you don’t take any damage.
This fight is all about learning and mastering the different types of attacks The Last Lord uses. Once you have that down, you’ll be dodging them with ease, and when you strike that final blow, it’s game over for The Last Lord, and you’ll have beaten Death’s Door.
Thank you for using this guide for Death’s Door! If it was helpful, please let me know in the comments section below and share it on social media.


