Explosion Network may receive a commission when you purchase something via a link on our site
In this article, you’ll find all 100 entries of the Bugapedia and where to find each Bugsnax you can catch in Bugsnax.
The majority of these are pretty self-explanatory and you won’t need help finding or capturing them, but for the harder one’s I’ve listed some tips. Each page of the Bugapedia lists what sauce each Bugsnax likes and if they only come out at a certain time of day.
If this guide is helpful to you please let me know in the comment section below and share with your friends.
Index:
- Flavor Falls
- Garden Grove
- Simmering Springs
- Boiling Bay
- Scorched Gorge
- Sizzlin’ Sands
- Sugarpine Woods
- Frosted Peak
FLAVOR FALLS

Strabby
You’ll catch one of these as part of the main campaign.

Pinkle
Come back when you have the Grabber gadget to pull the jar off its head.
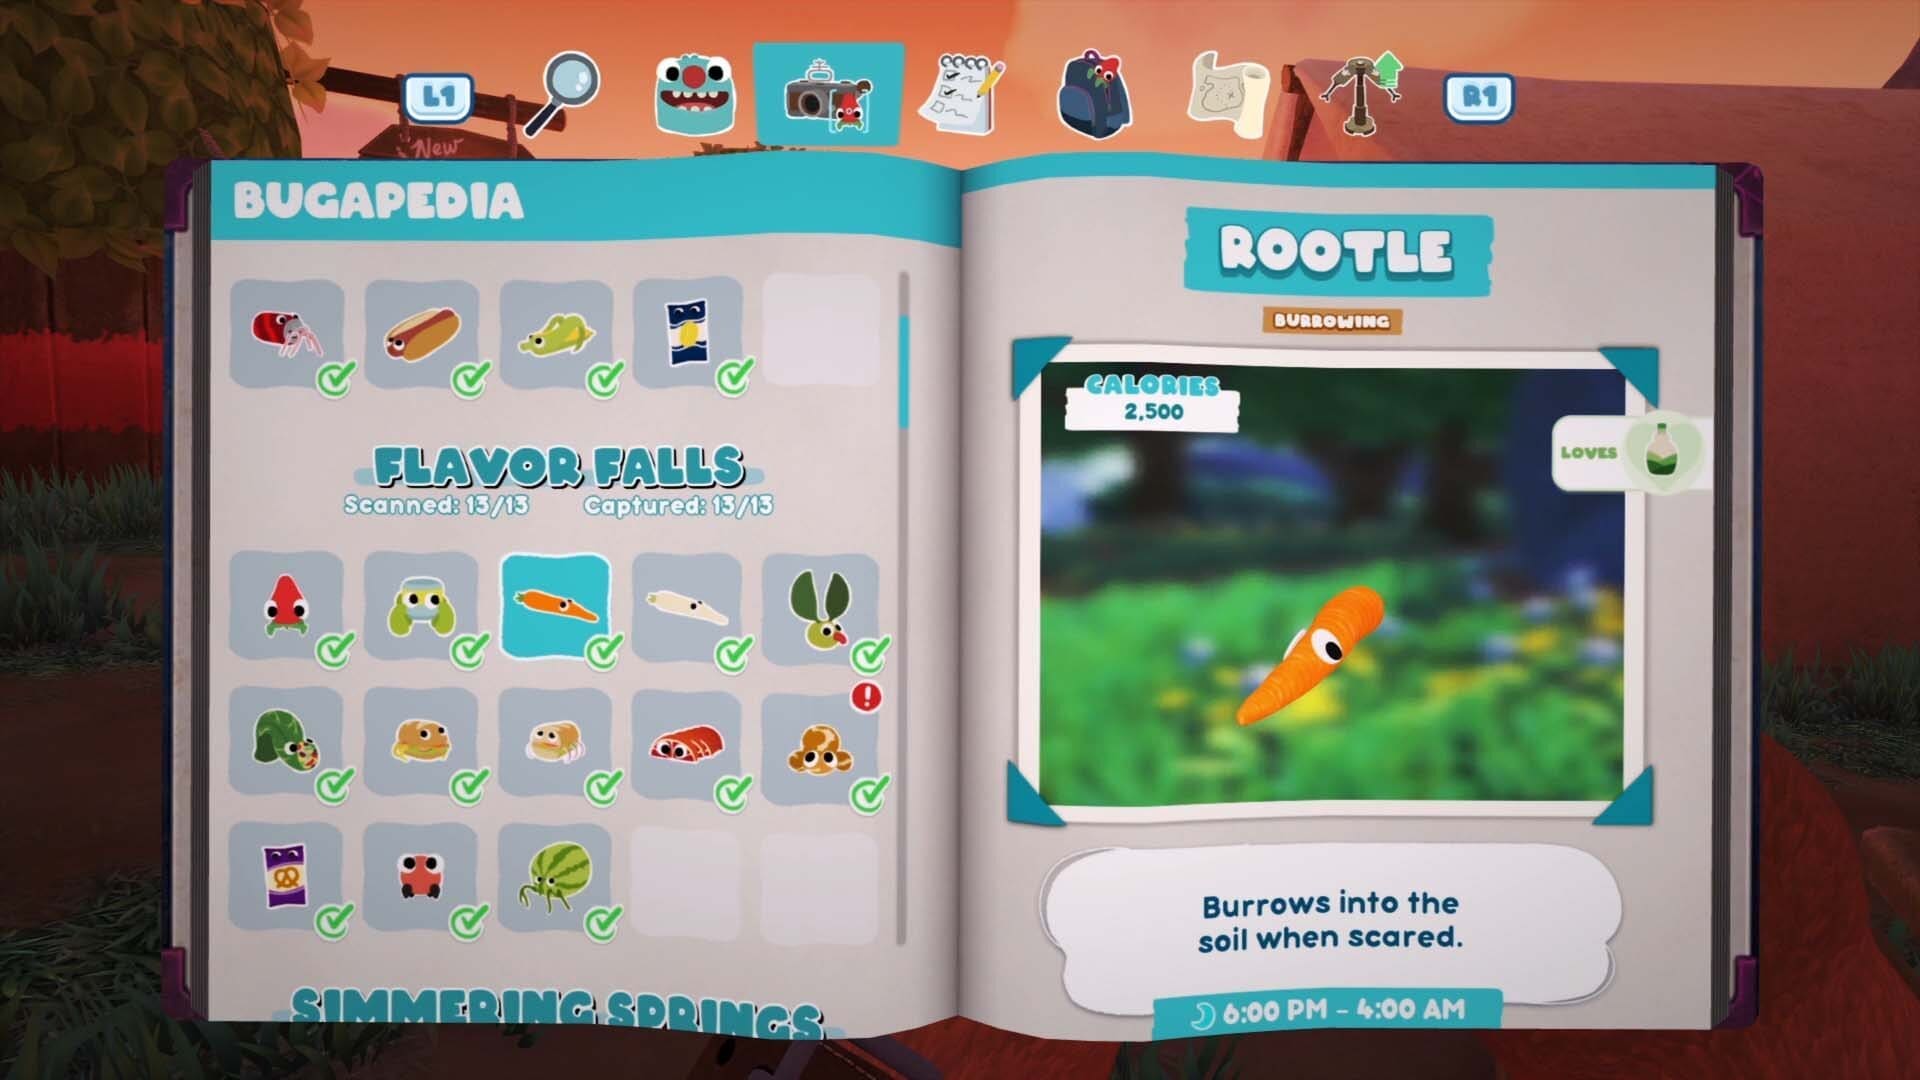
Rootle
On the side the exits to Garden Grove, only available between 6PM-4AM

White Rootle
Same area as the normal Rootle but between 6AM-4PM

Green Lollive
Come back when you have the launcher and use it to throw your trap it in the air and capture it.
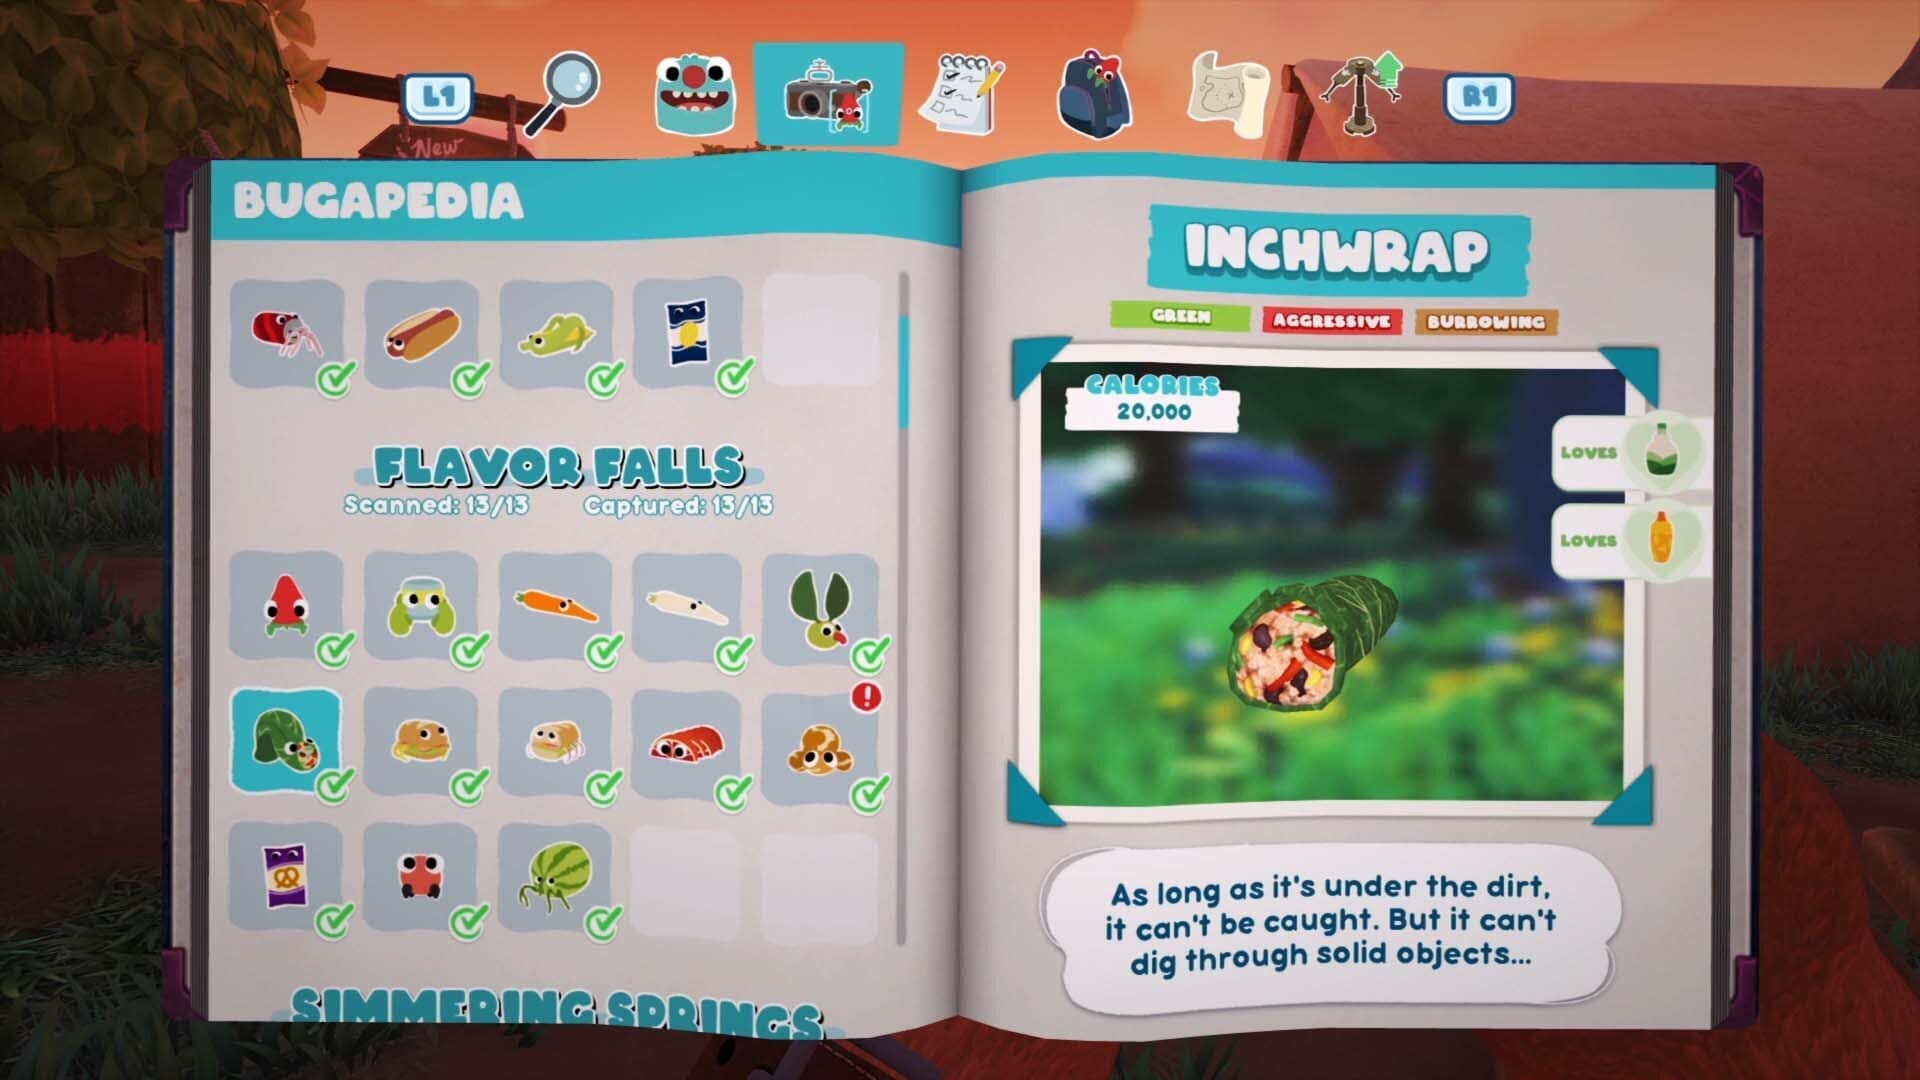
Inchwrap
As part of the Legendary quest to fight the Mama Mewon (see below) you’ll go through the waterfall and see one of those burrowed underground. Launch one of the sauces it loves to trick it into coming into your trap to capture it.

Sandopede
Both parts of the Sandopede need to be pulled into the air by the Green Lollive. Launch some sauce that the Green Lollive loves onto the Sandopede to get it to grab a part of the Sandopede and then capture it by launching your trap.

Sub Sandopede
See above.

Ruby Peelbug
There’s a hole that goes between the two sides of Flavor Falls. You need to send your ball gadget through the hole to force it to come out on one side.
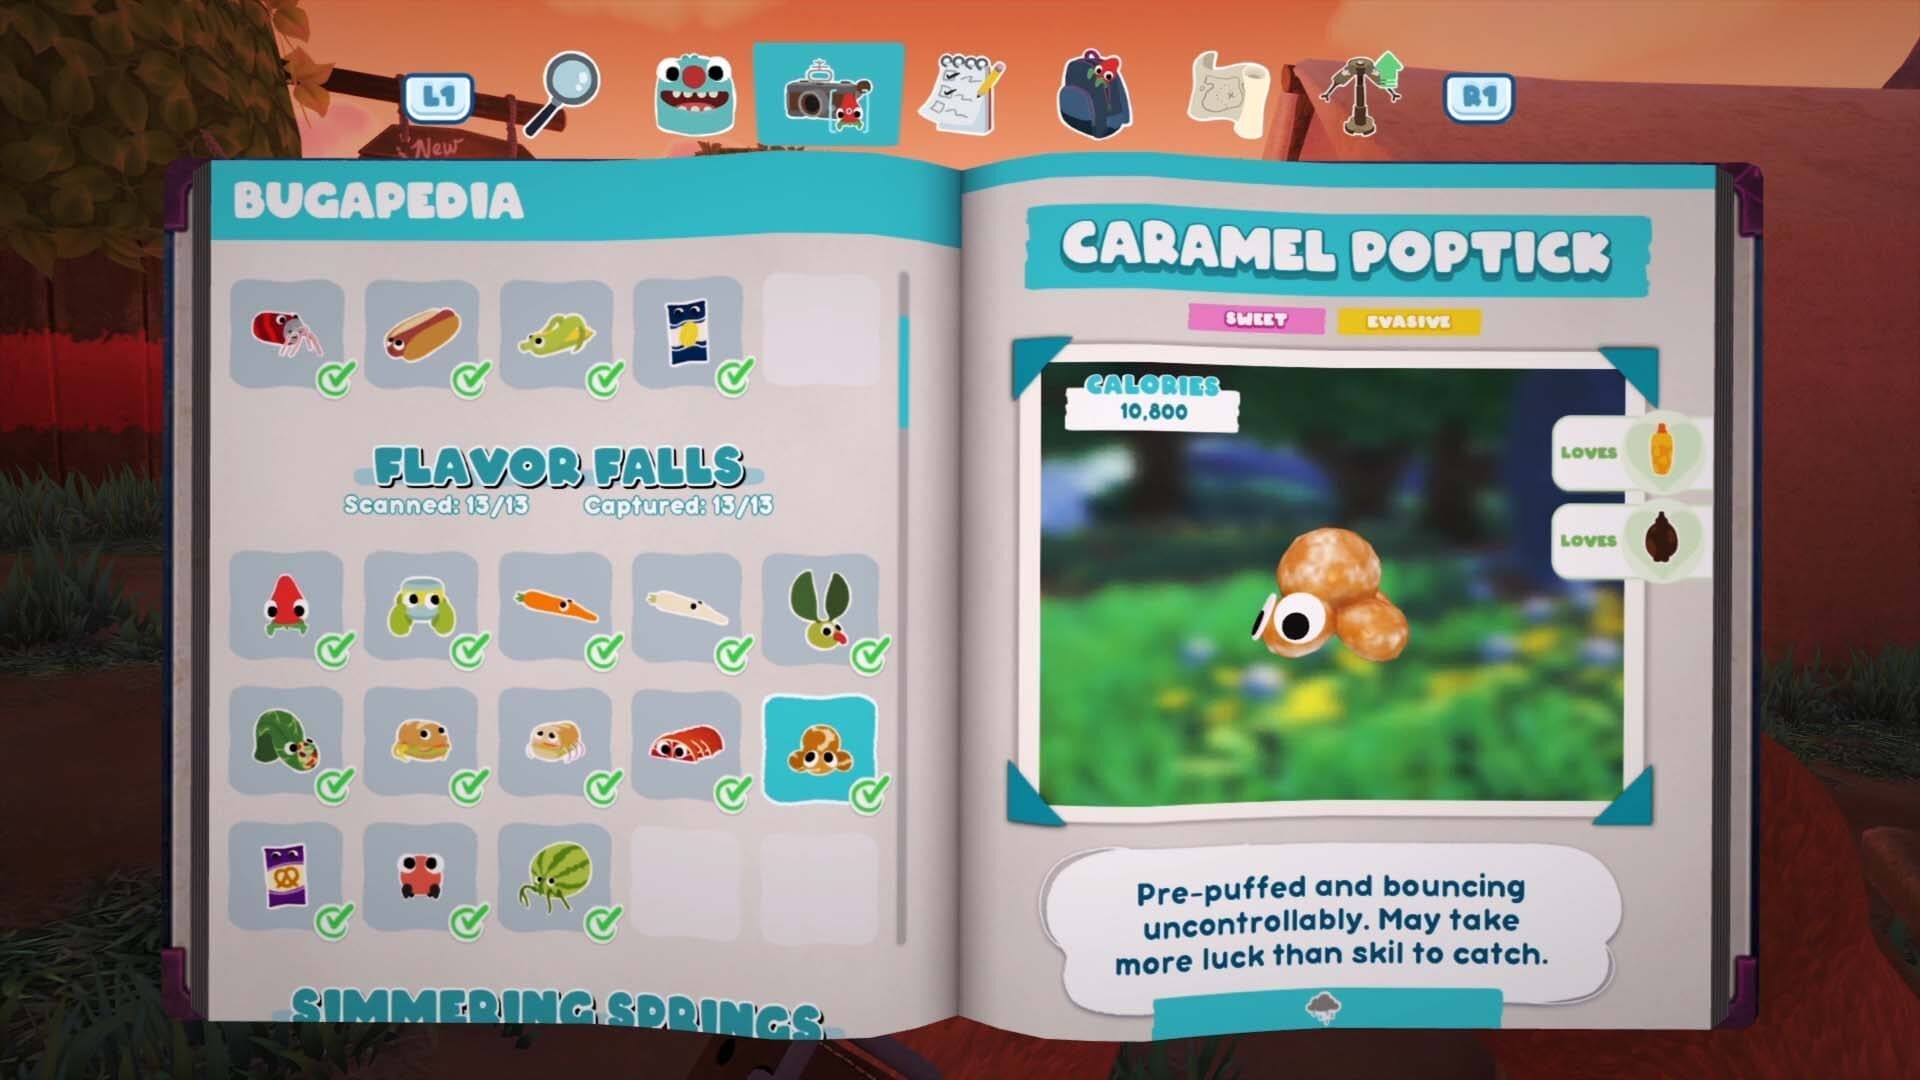
Caramel Poptick
One of the most annoying Bugsnax to catch in the game. They only appear in the cave section of the first area in the game and only when it’s raining. There’s no way I found to force the game into making it rain so I waited inside the cave for a full cycle. See below for an example.
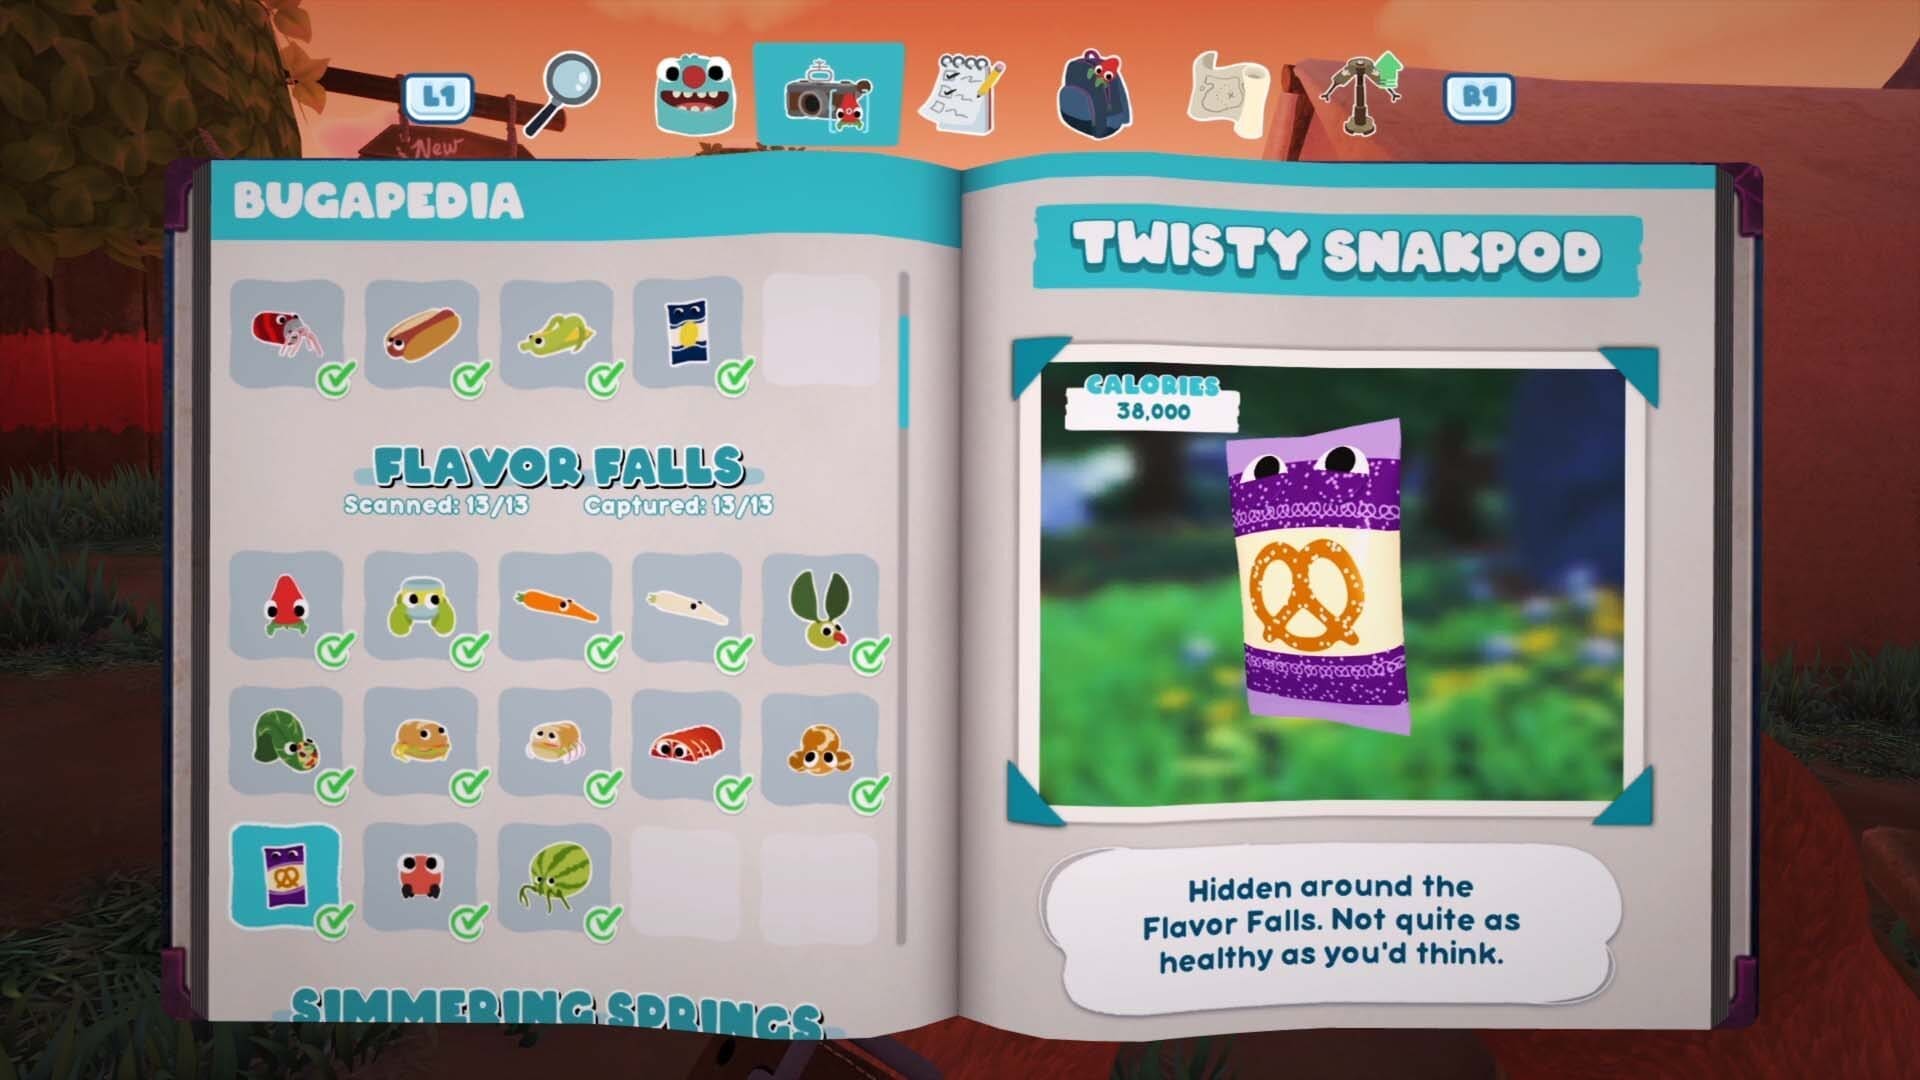
Twisty Snakpod
You can find one in right above you where you start the game.
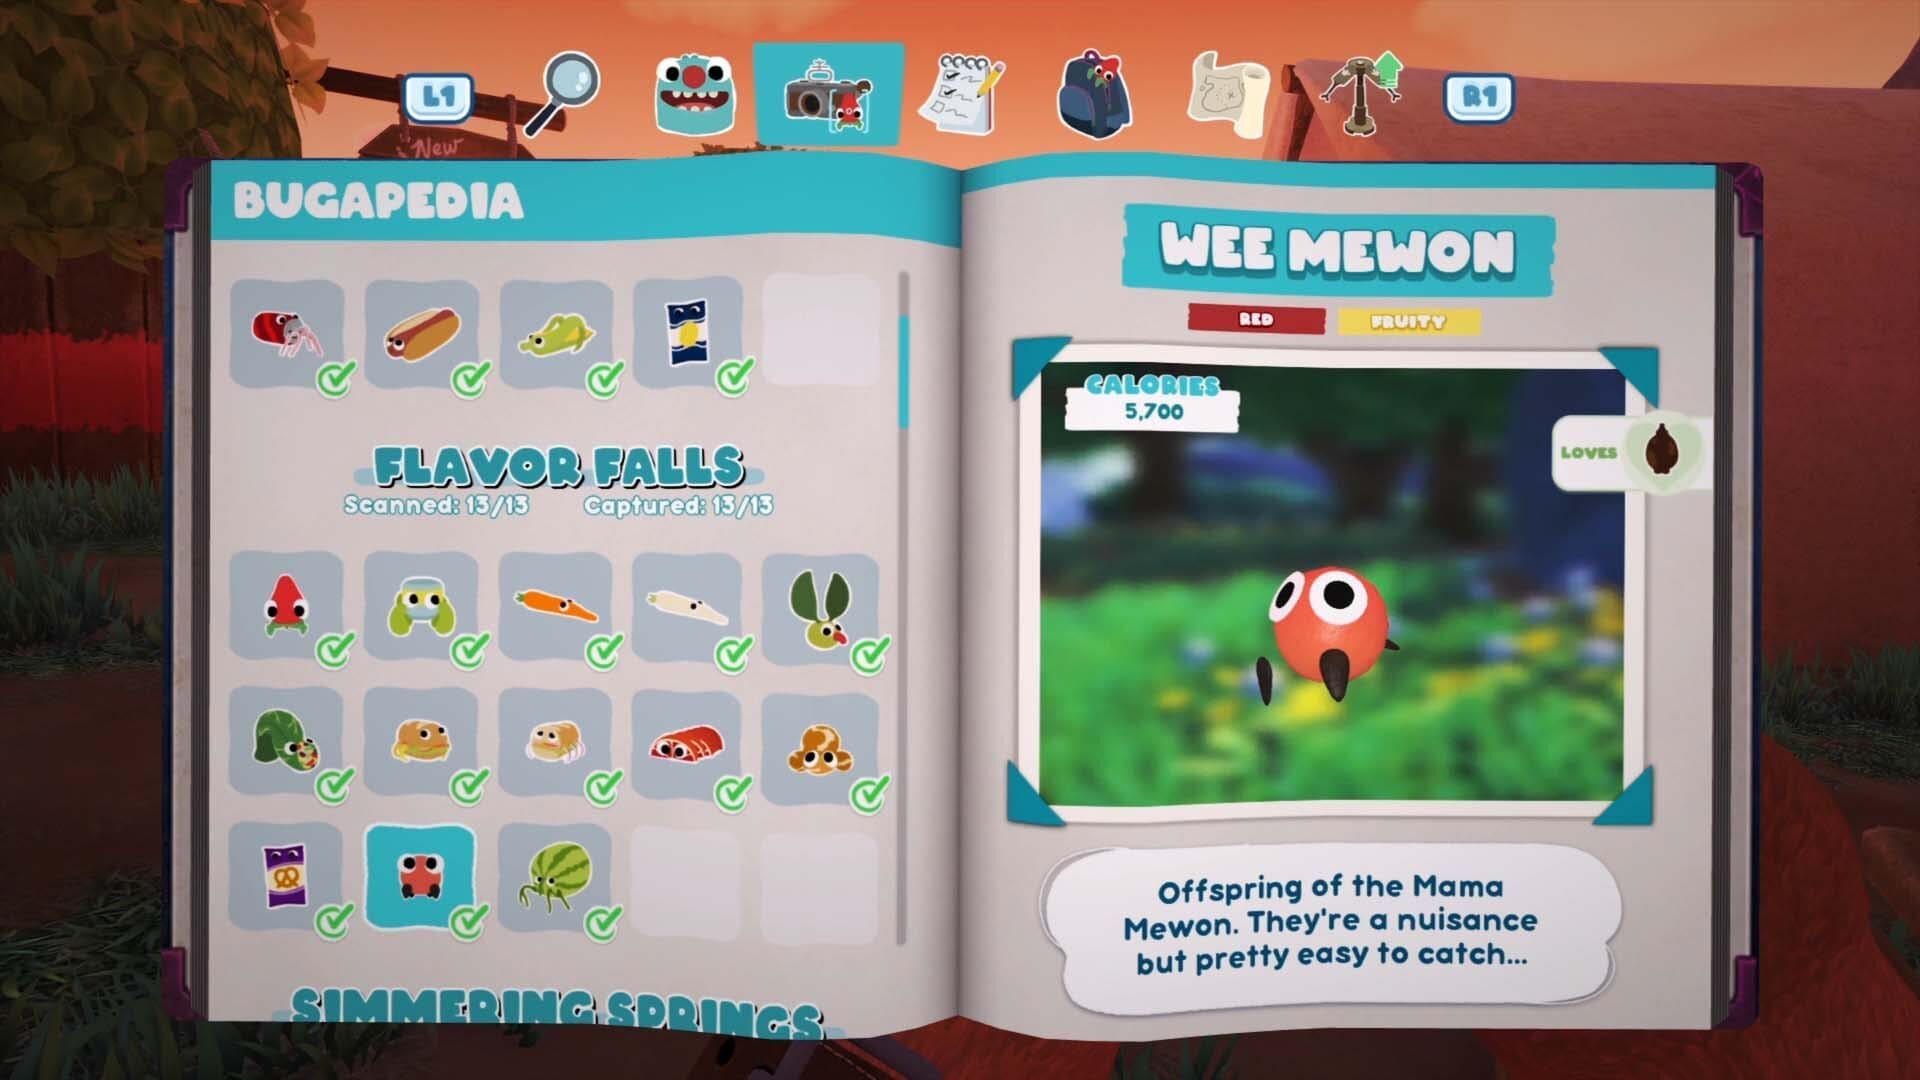
Wee Mewon
You can catch these while fighting the Mama Mewon (see below.)

Mama Mewon
One of the Legendary Bugsnax in the game. You’ll fight and capture it as part Chandlo’s side quests in the game.
For more help with the Legendary Bugsnax check out this guide.
GARDEN GROVE
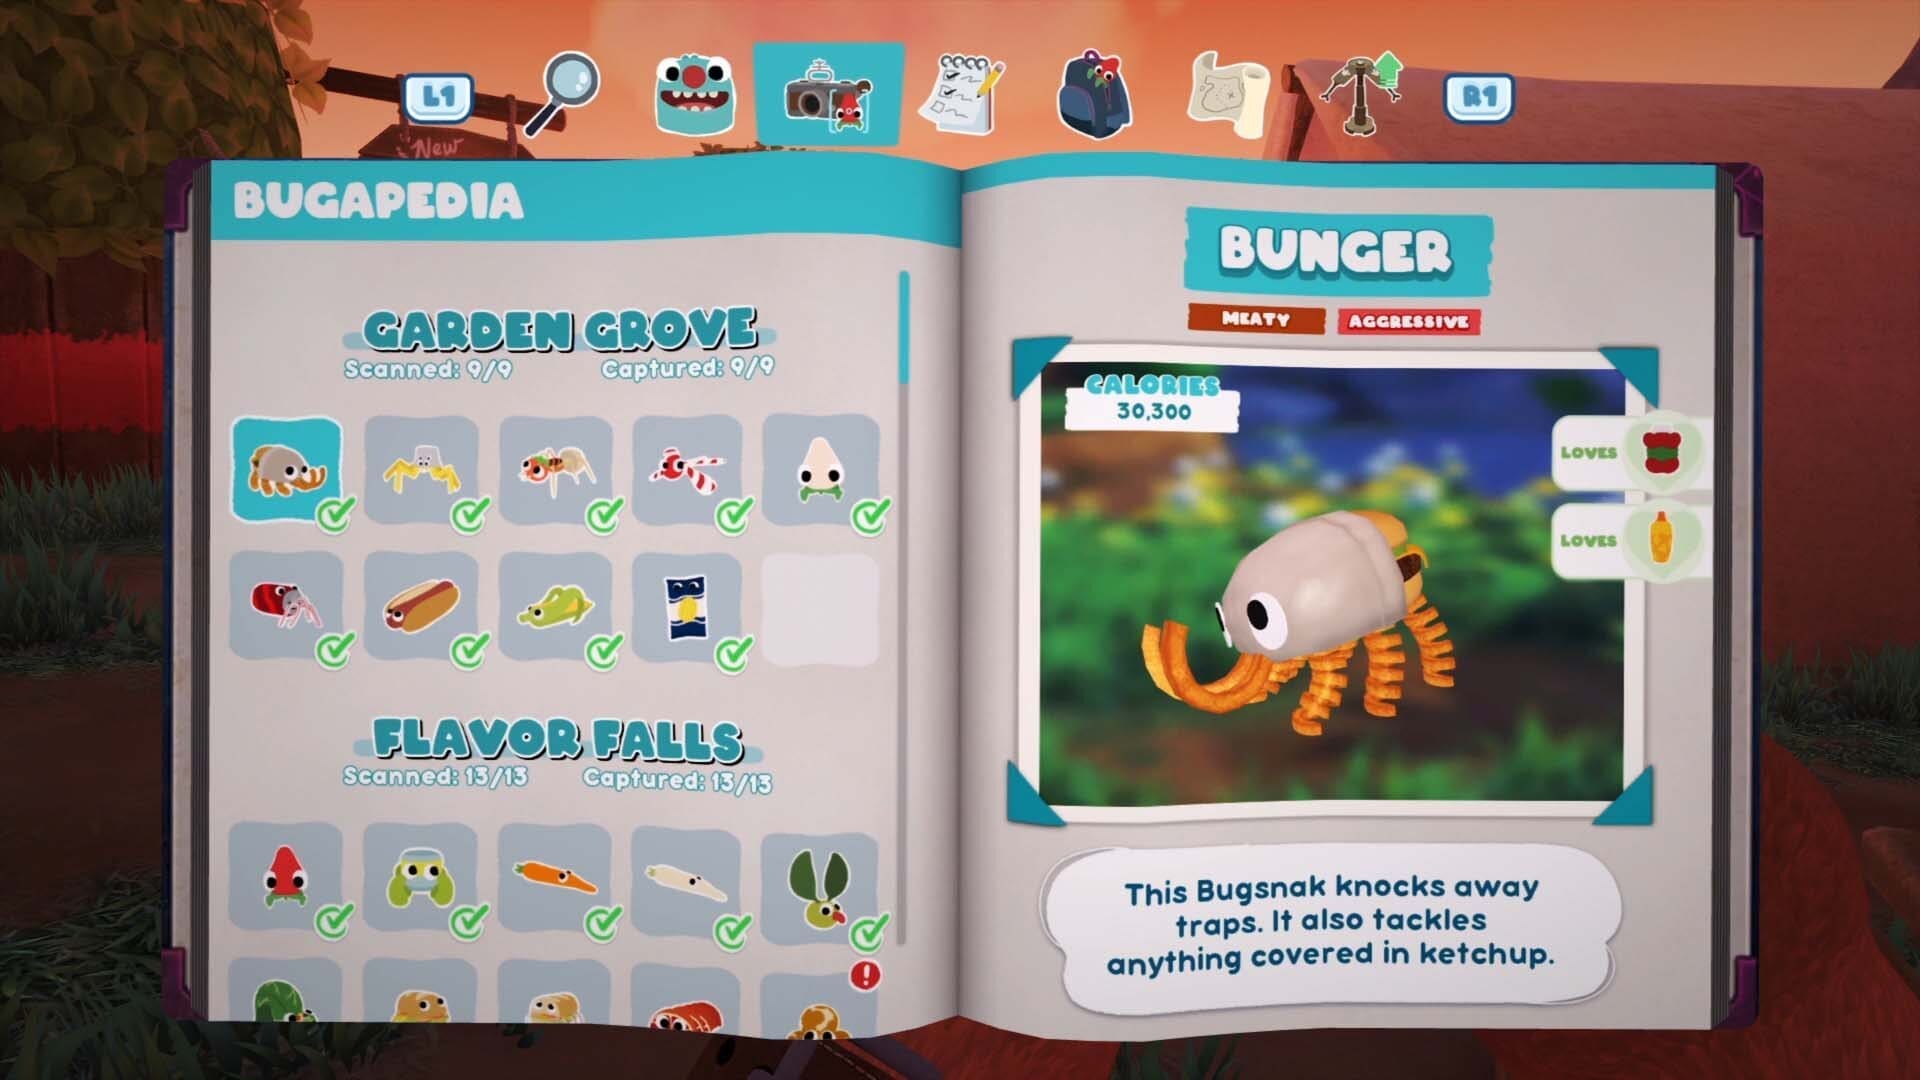
Bunger
You’ll catch one of these as part of the main campaign.

Fryder
You’ll catch one of these as part of the main campaign.

Shishkabug
You’ll catch one of these as part of the main campaign.
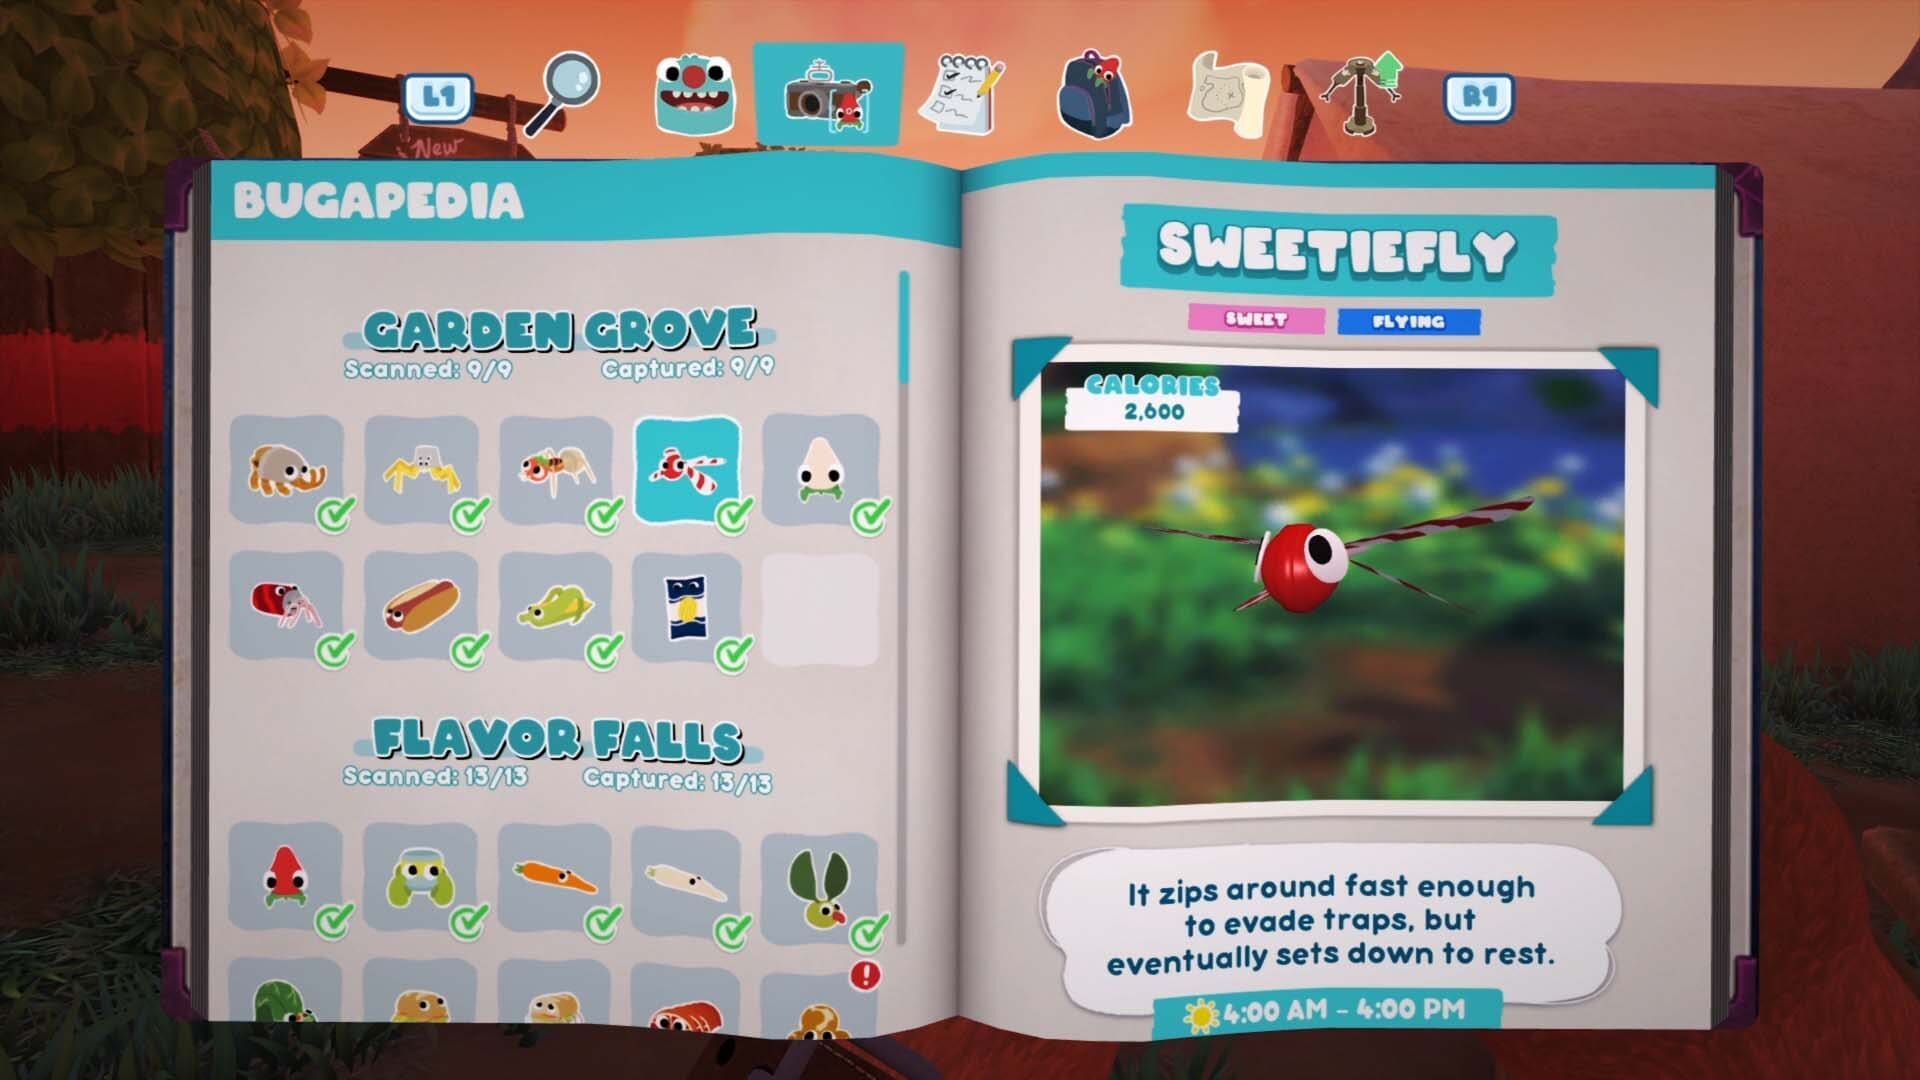
Sweetiefly
When you get the launcher gadget, come back and throw your trap up to where they rest.

White Strabby
In the top farm area of Garden Grove.
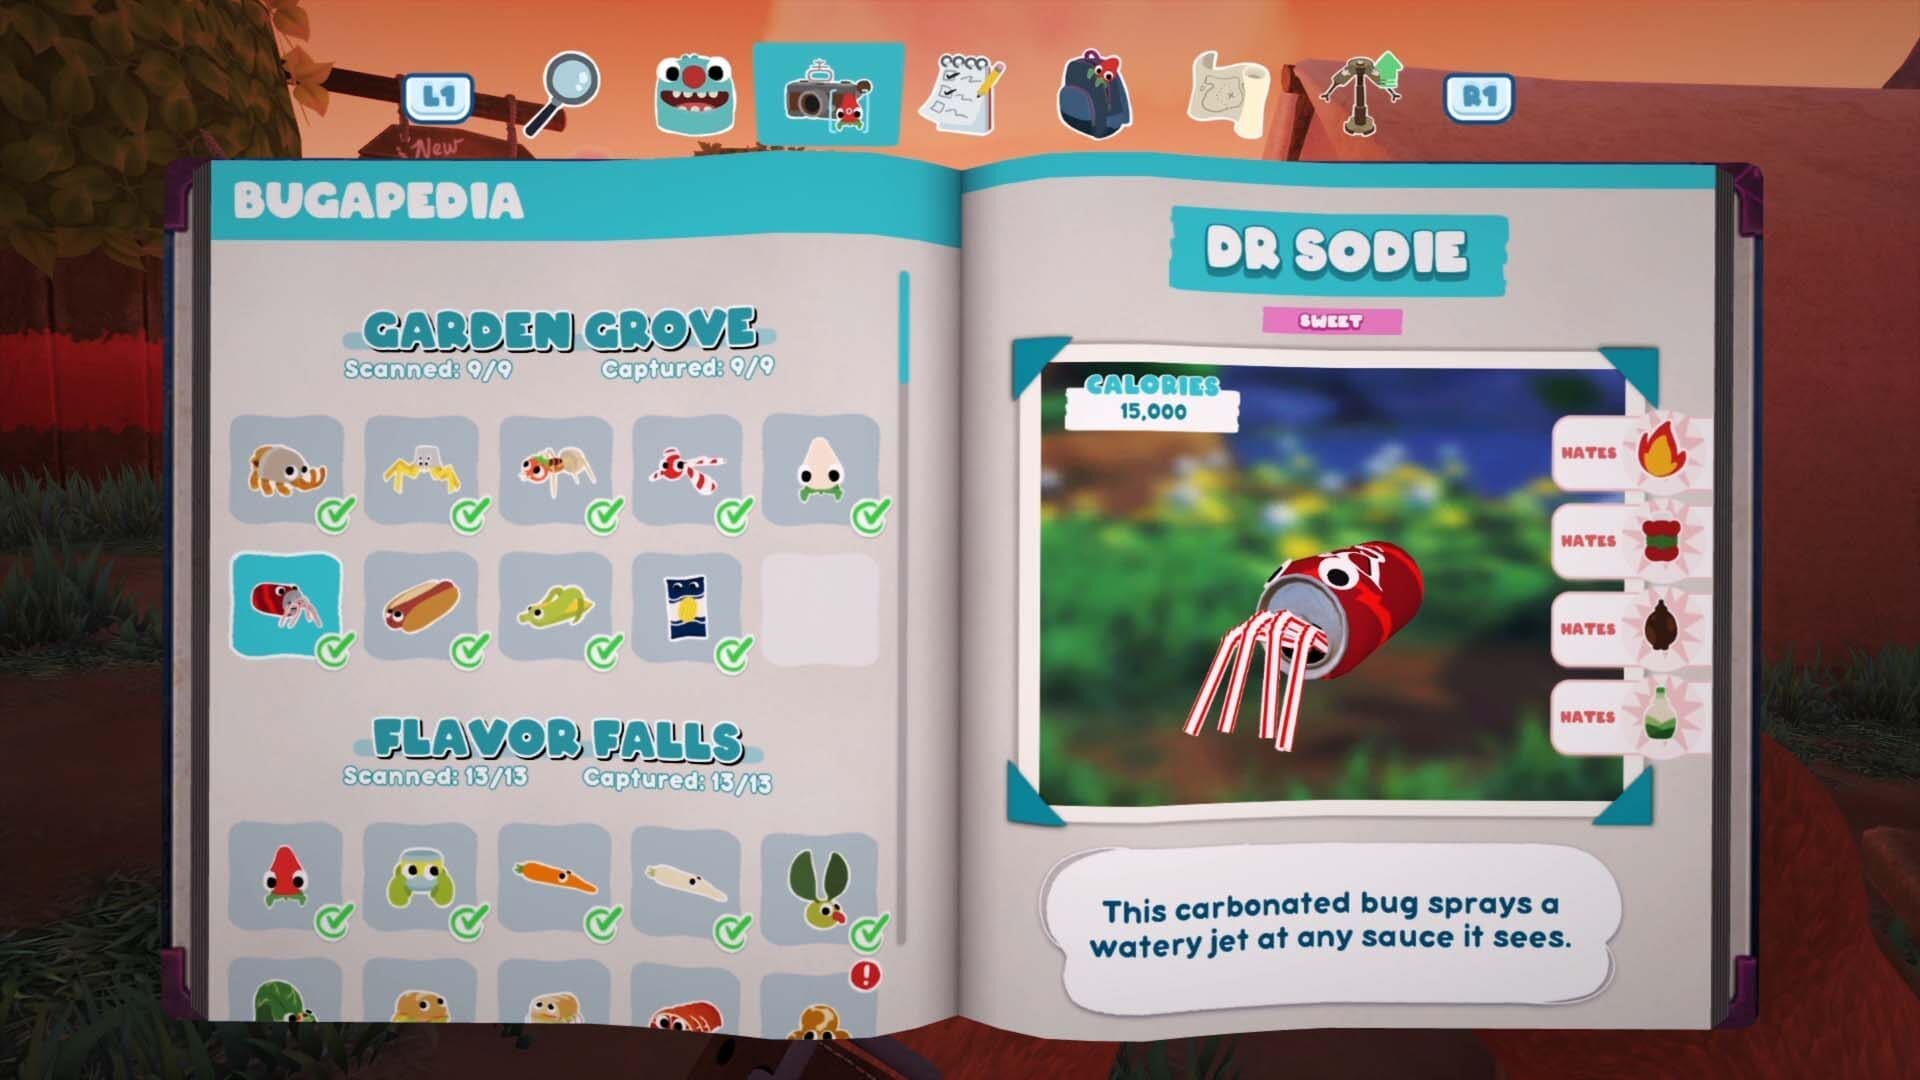
Dr Sodie
Floating in the river.
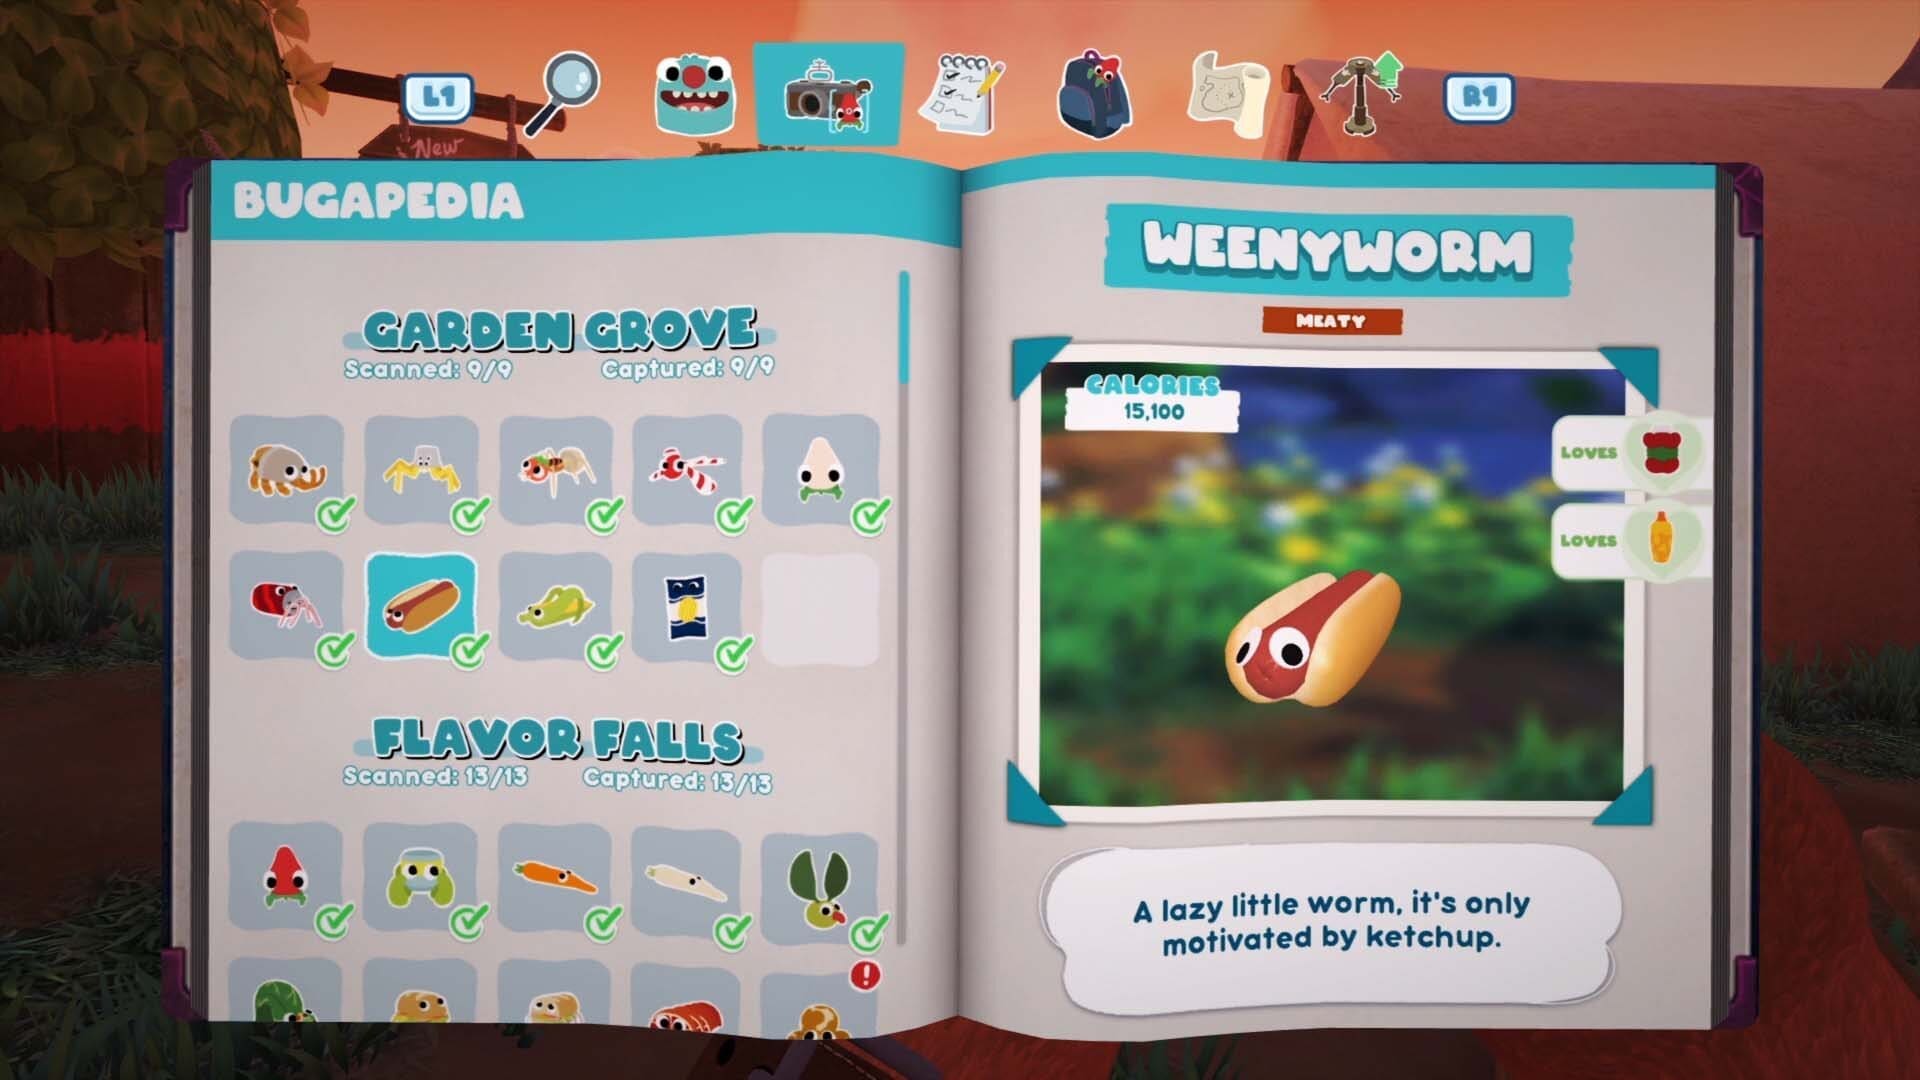
Weenyworm
You’ll have to lead one of this into a gated zone as part of the game, but you can come back later to the same area to catch one.

Cobhopper
Come back when you have the Trip-Line and line it up between two of the tree’s the Cobhopper is jumping between.
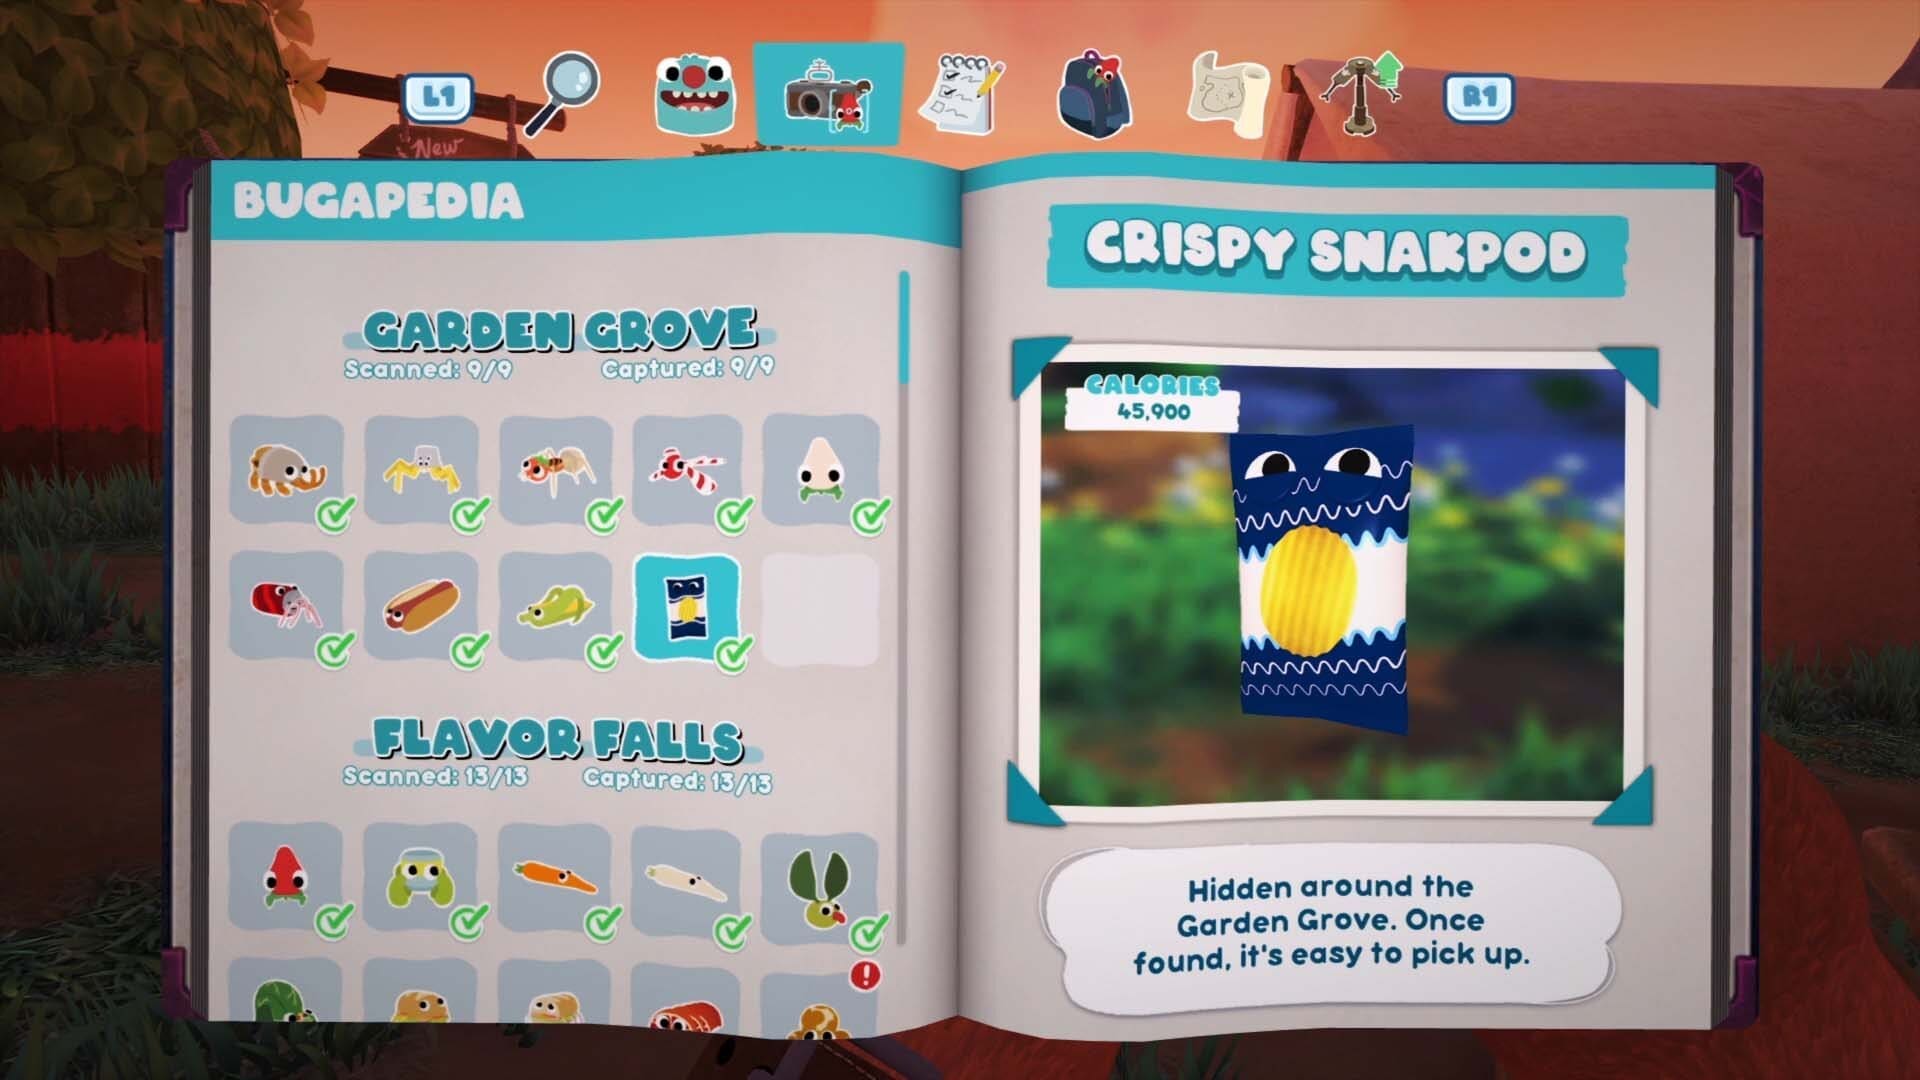
Crispy Snakpod
One of these is located in the cave where Triffany Lottablog was living.
SIMMERING SPRINGS
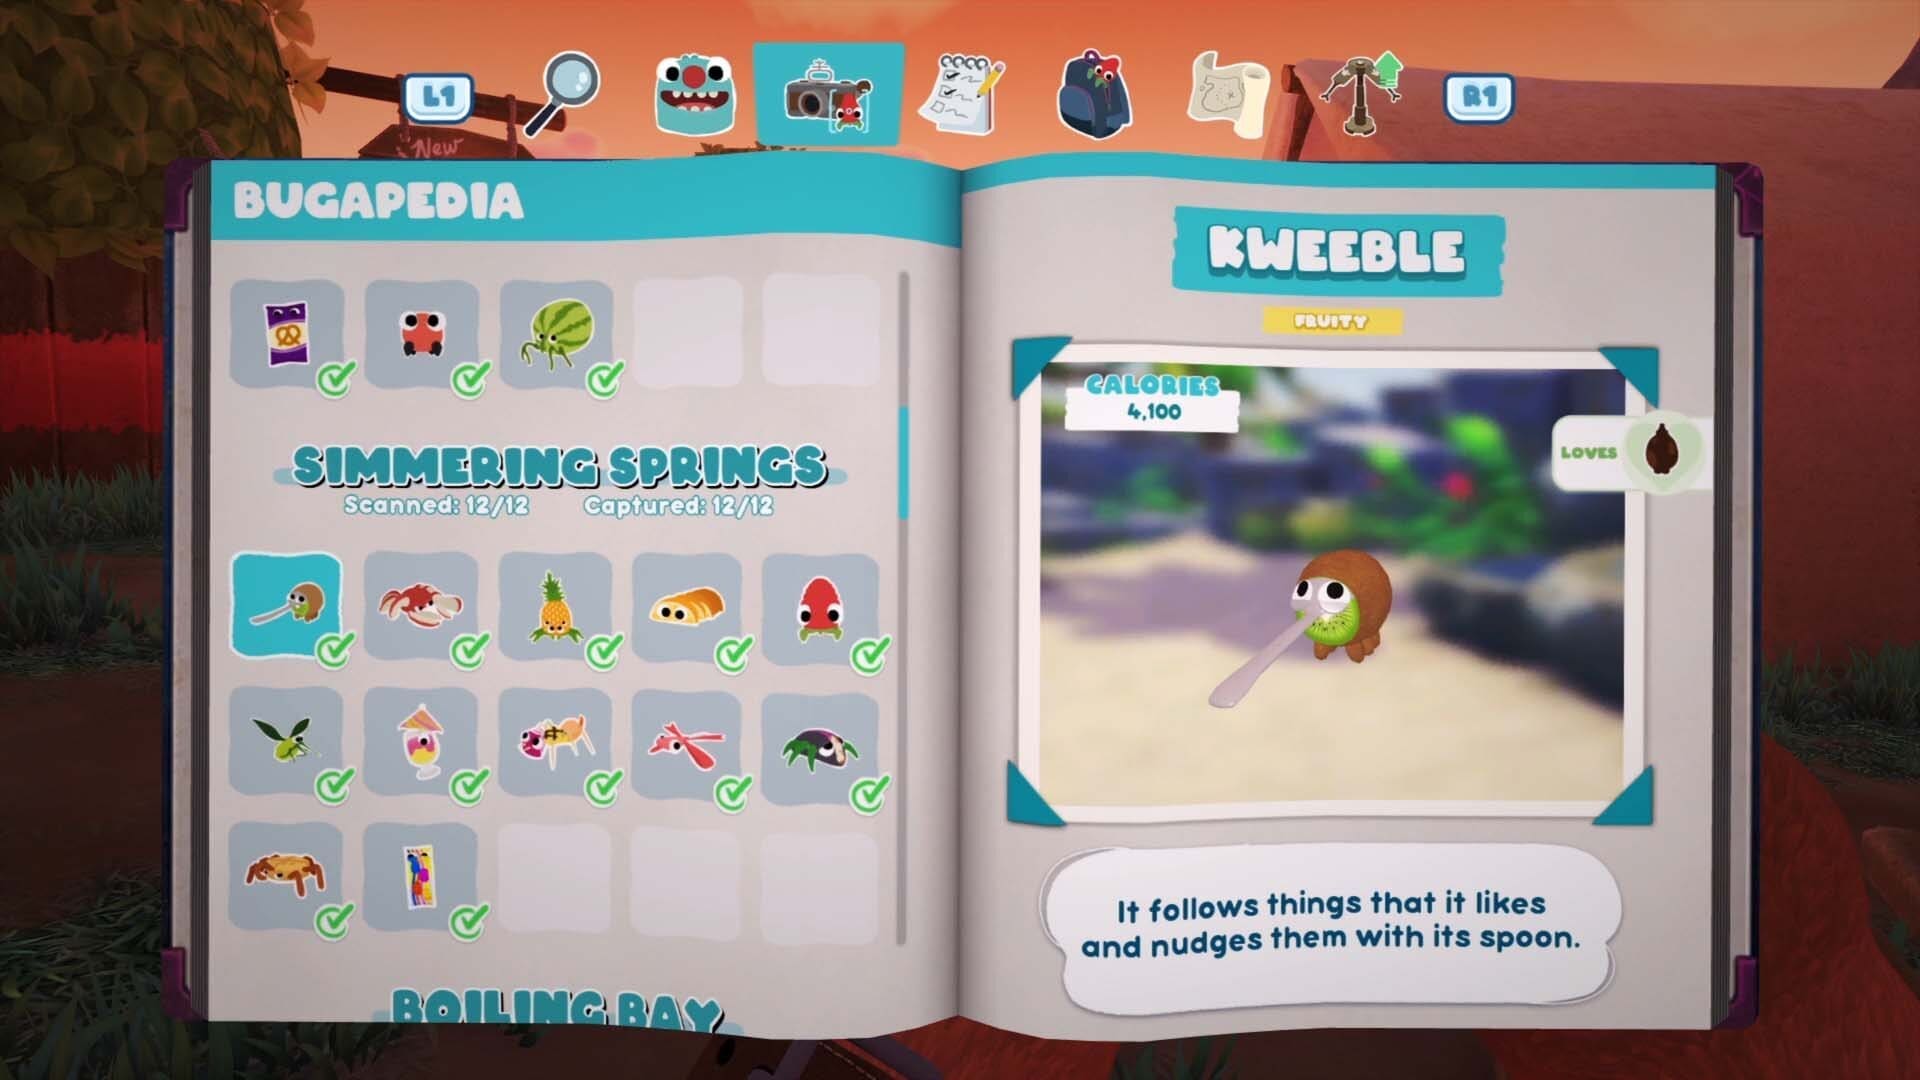
Kweeble
You’ll catch one of these as part of the main campaign.

Crapple
You’ll catch one of these as part of the main campaign.

Pineantula
You’ll catch one of these as part of the main campaign.
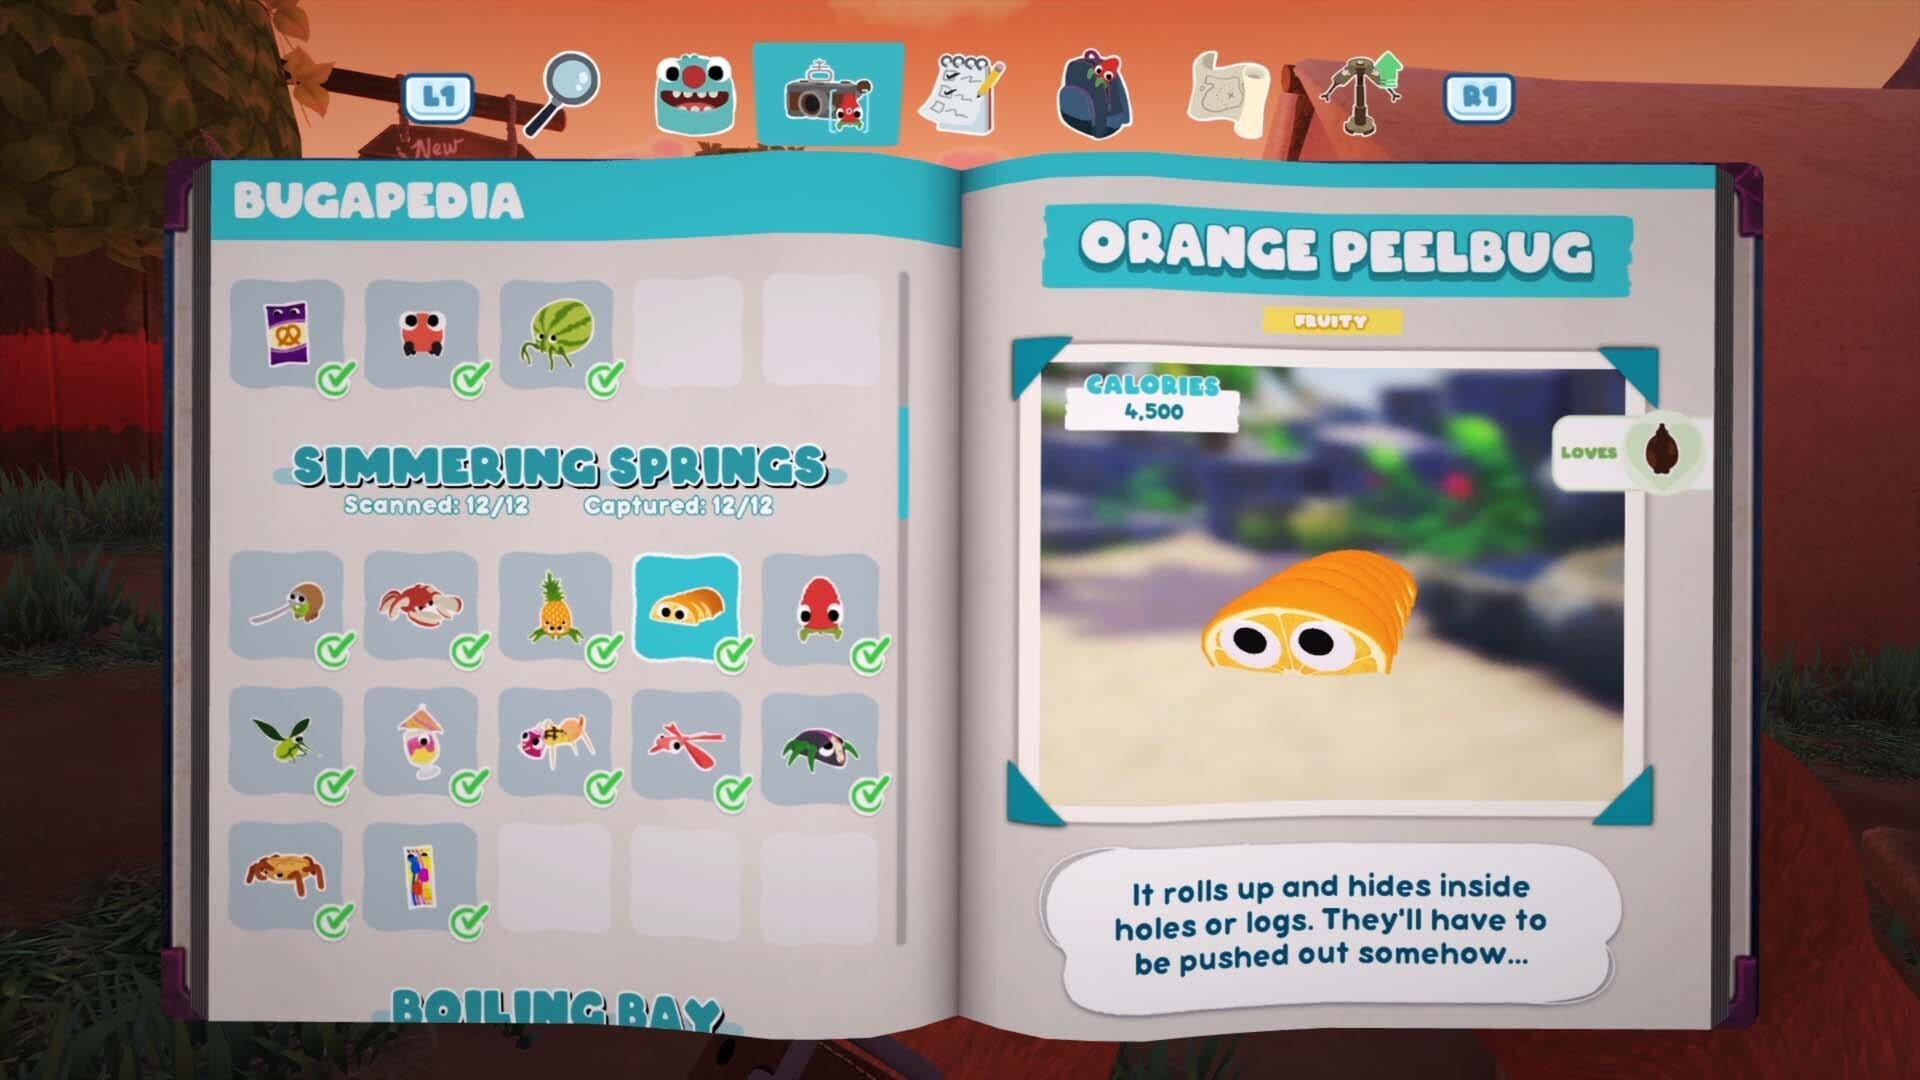
Orange Peelbug
Hiding inside one the holes between the beach and Gramble Gigglefunny’s home. Use the ball to force it out.
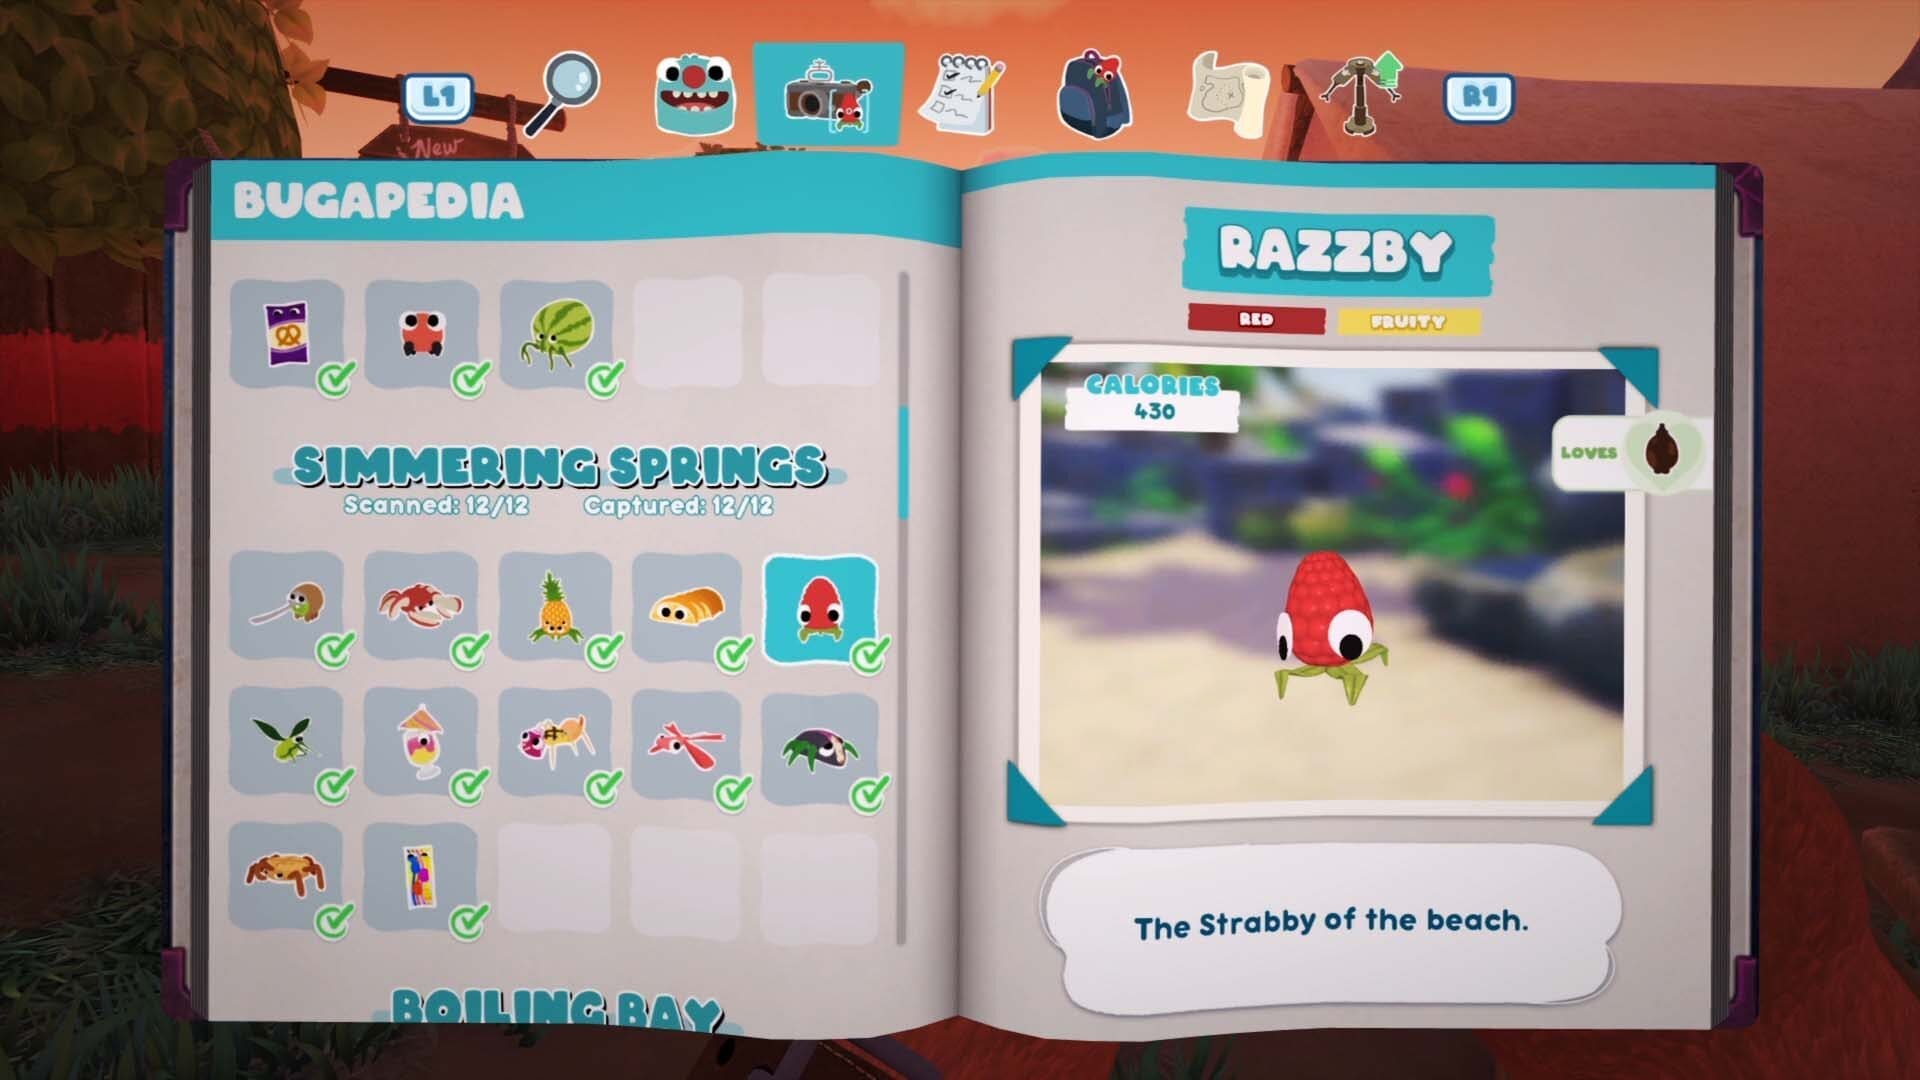
Razzby
You’ll catch one of these as part of the main campaign.

Green Grapeskeeto
Throw some chocolate down on one of the Razzby’s below and it’ll come feed and stun itself.
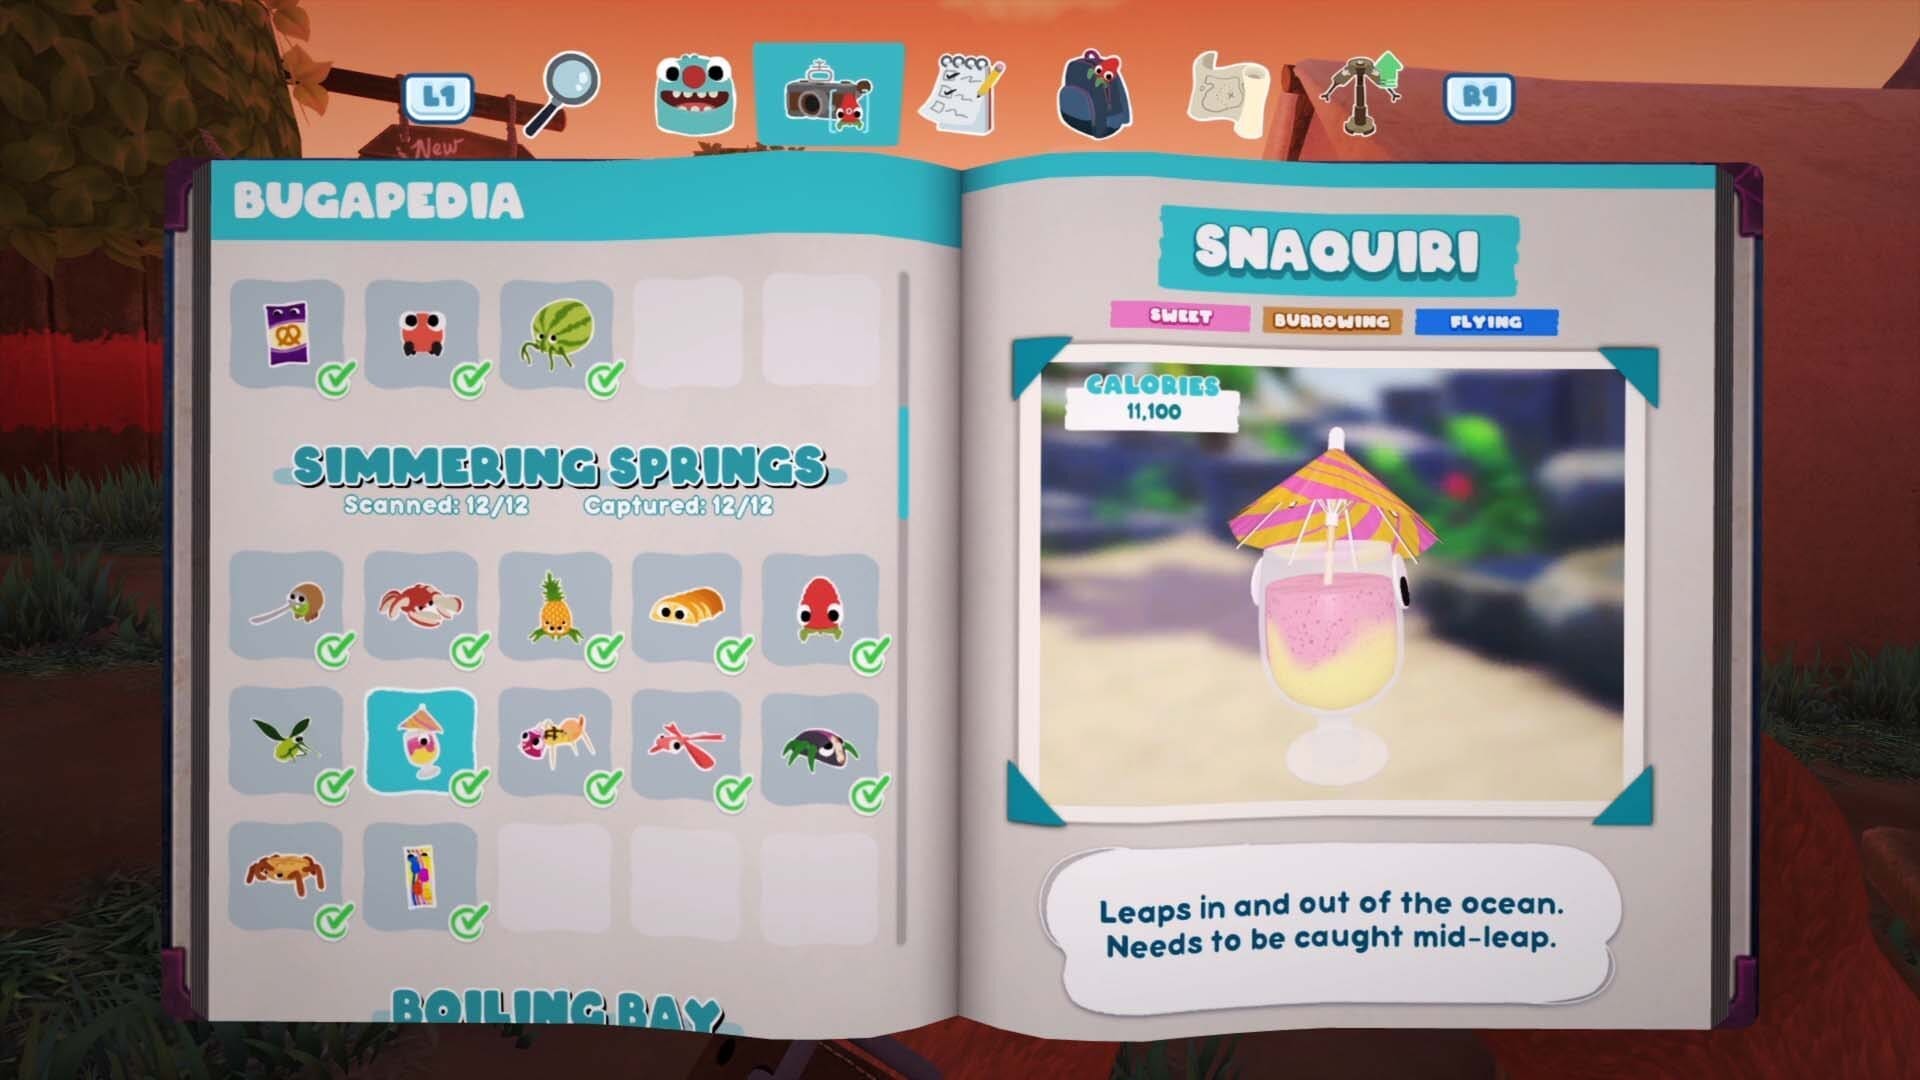
Snaquiri
You need to launcher to be able to fling your trap at it in mid-air and capture it.

Tropicabug
In the furthest left area of Grambe’s home. If scared it’ll hide in the bush. Easiest to capture by using chocolate to lead it towards your trap.

Lovely Sweetiefly
There’s a couple of these around the area. One of them is near the Tropicabug area. You’ll need the launcher to fling your trap at it when it sits down.
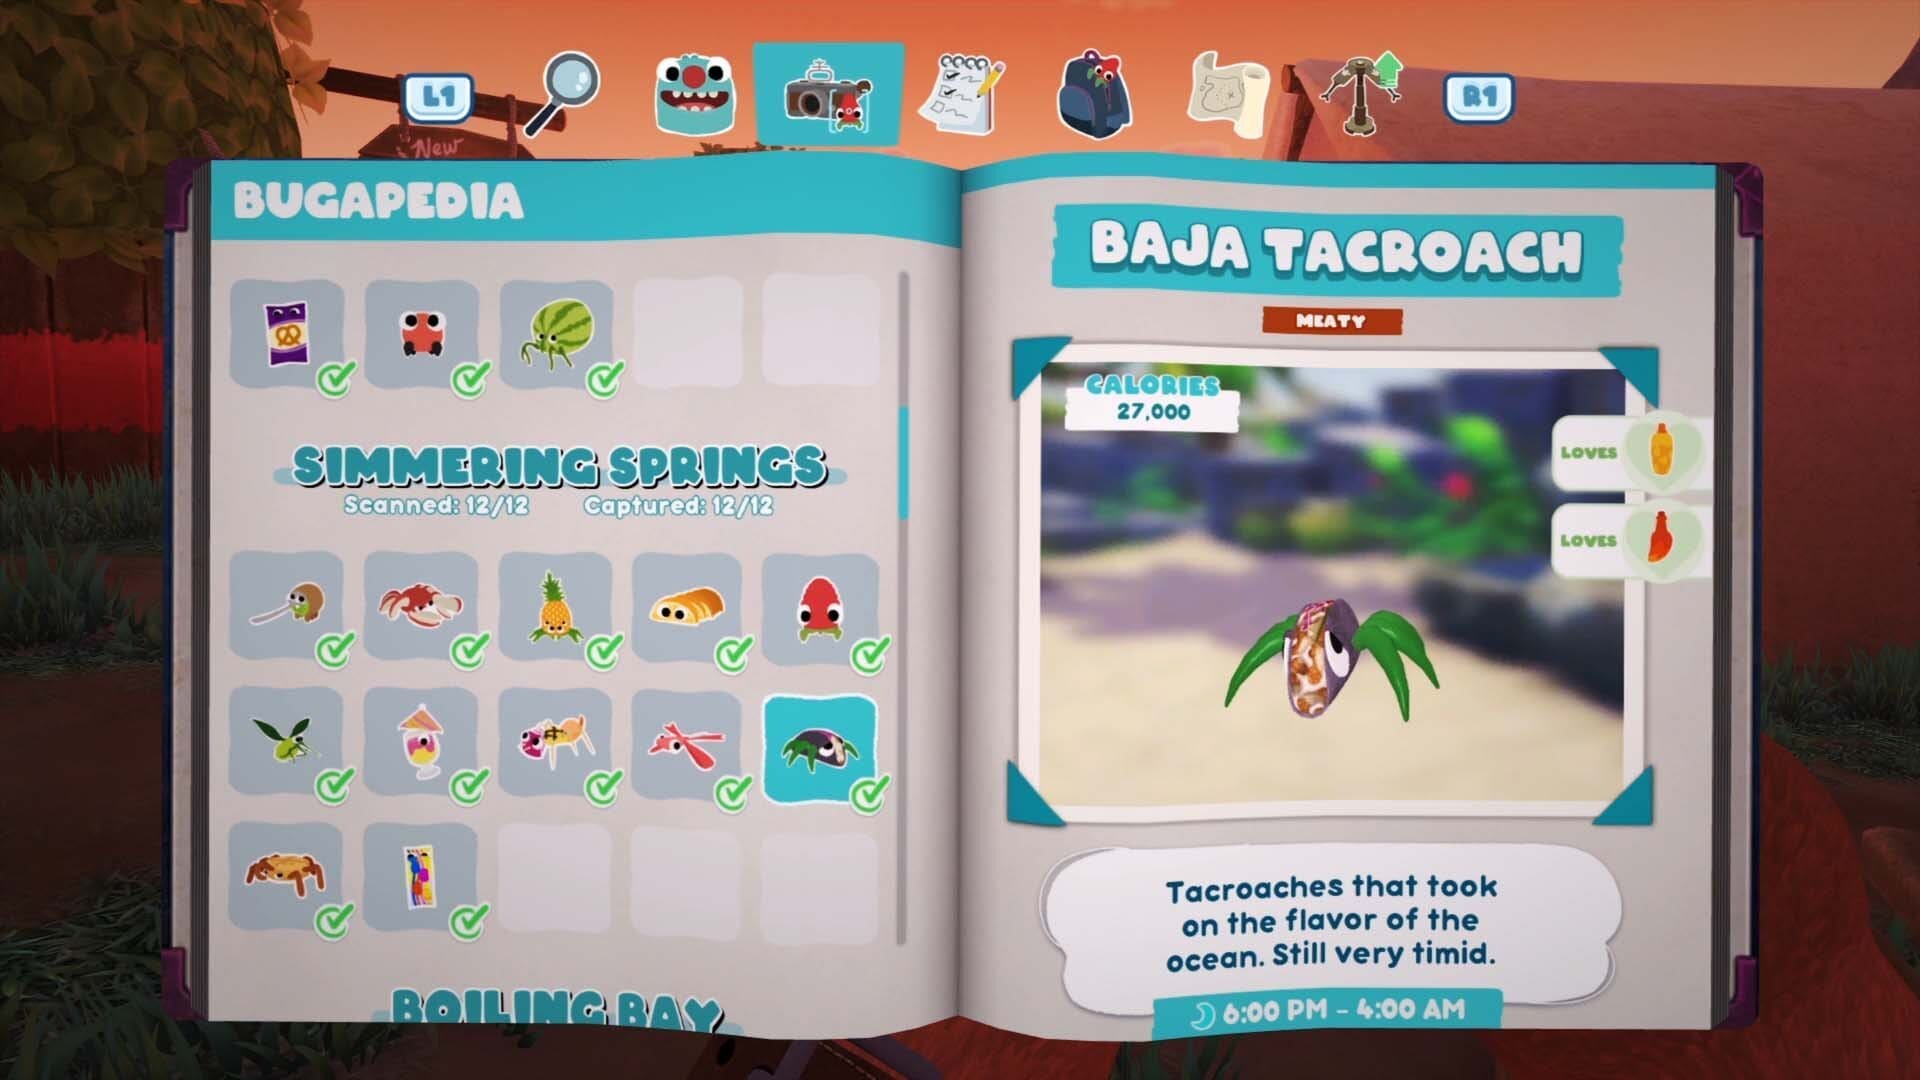
Baja Tacroach
In the hot-springs area where you speak to Wiggle. They only come out between 4 PM and 4 AM.

Waffstackarak
In the area mentioned above, there’s a dinner bell. Ring it between 4 AM and 11 AM and the Waffstackarak will be summoned to the beach.

Grumpy Snakpod
One can be found in the middle of the map, another in the water to your right when you first enter Simmering Springs from Snaxburg.
SCORCHED GORGE
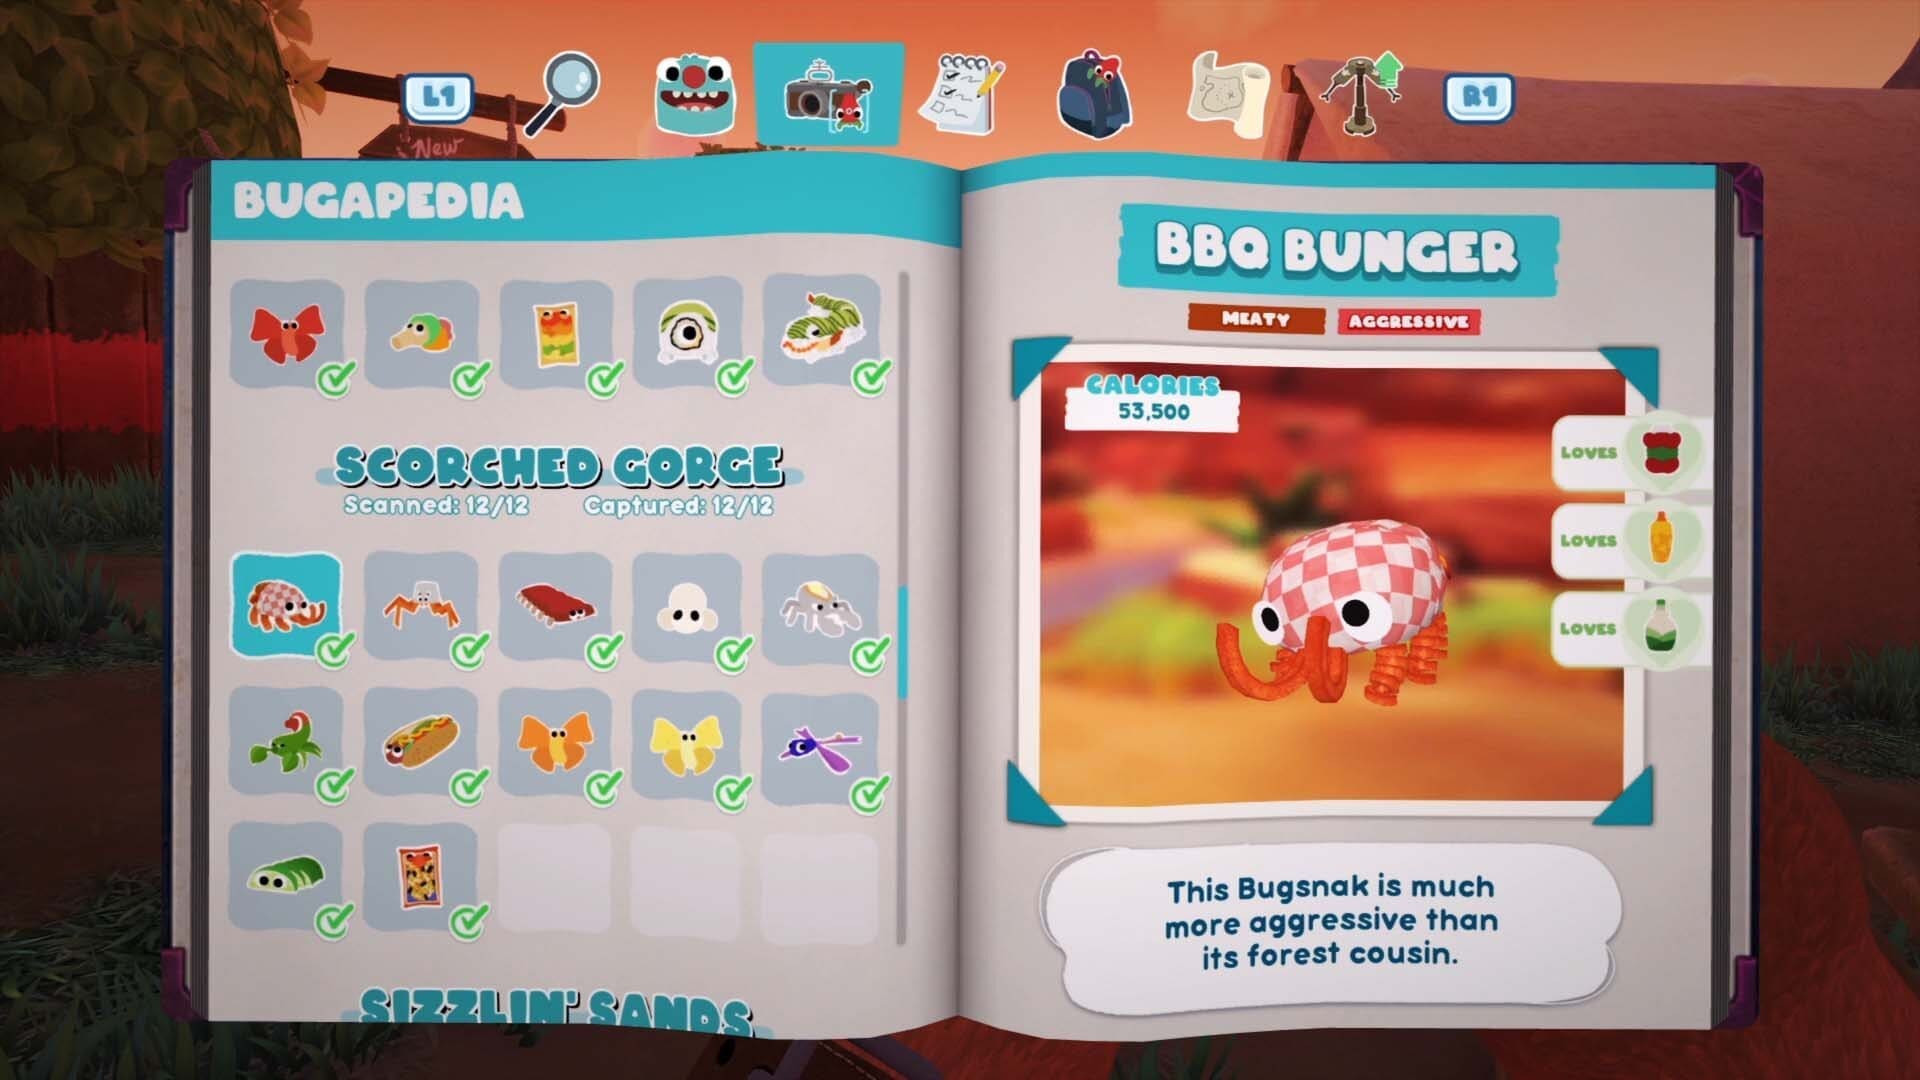
BBQ Bunger
In the middle of the map on top of the platform. Use the Trip Wire to trip it up.

Sweet Fryder
Catch em like the other Fryders.

Ribblepede
You’ll catch one of these as part of the main campaign.
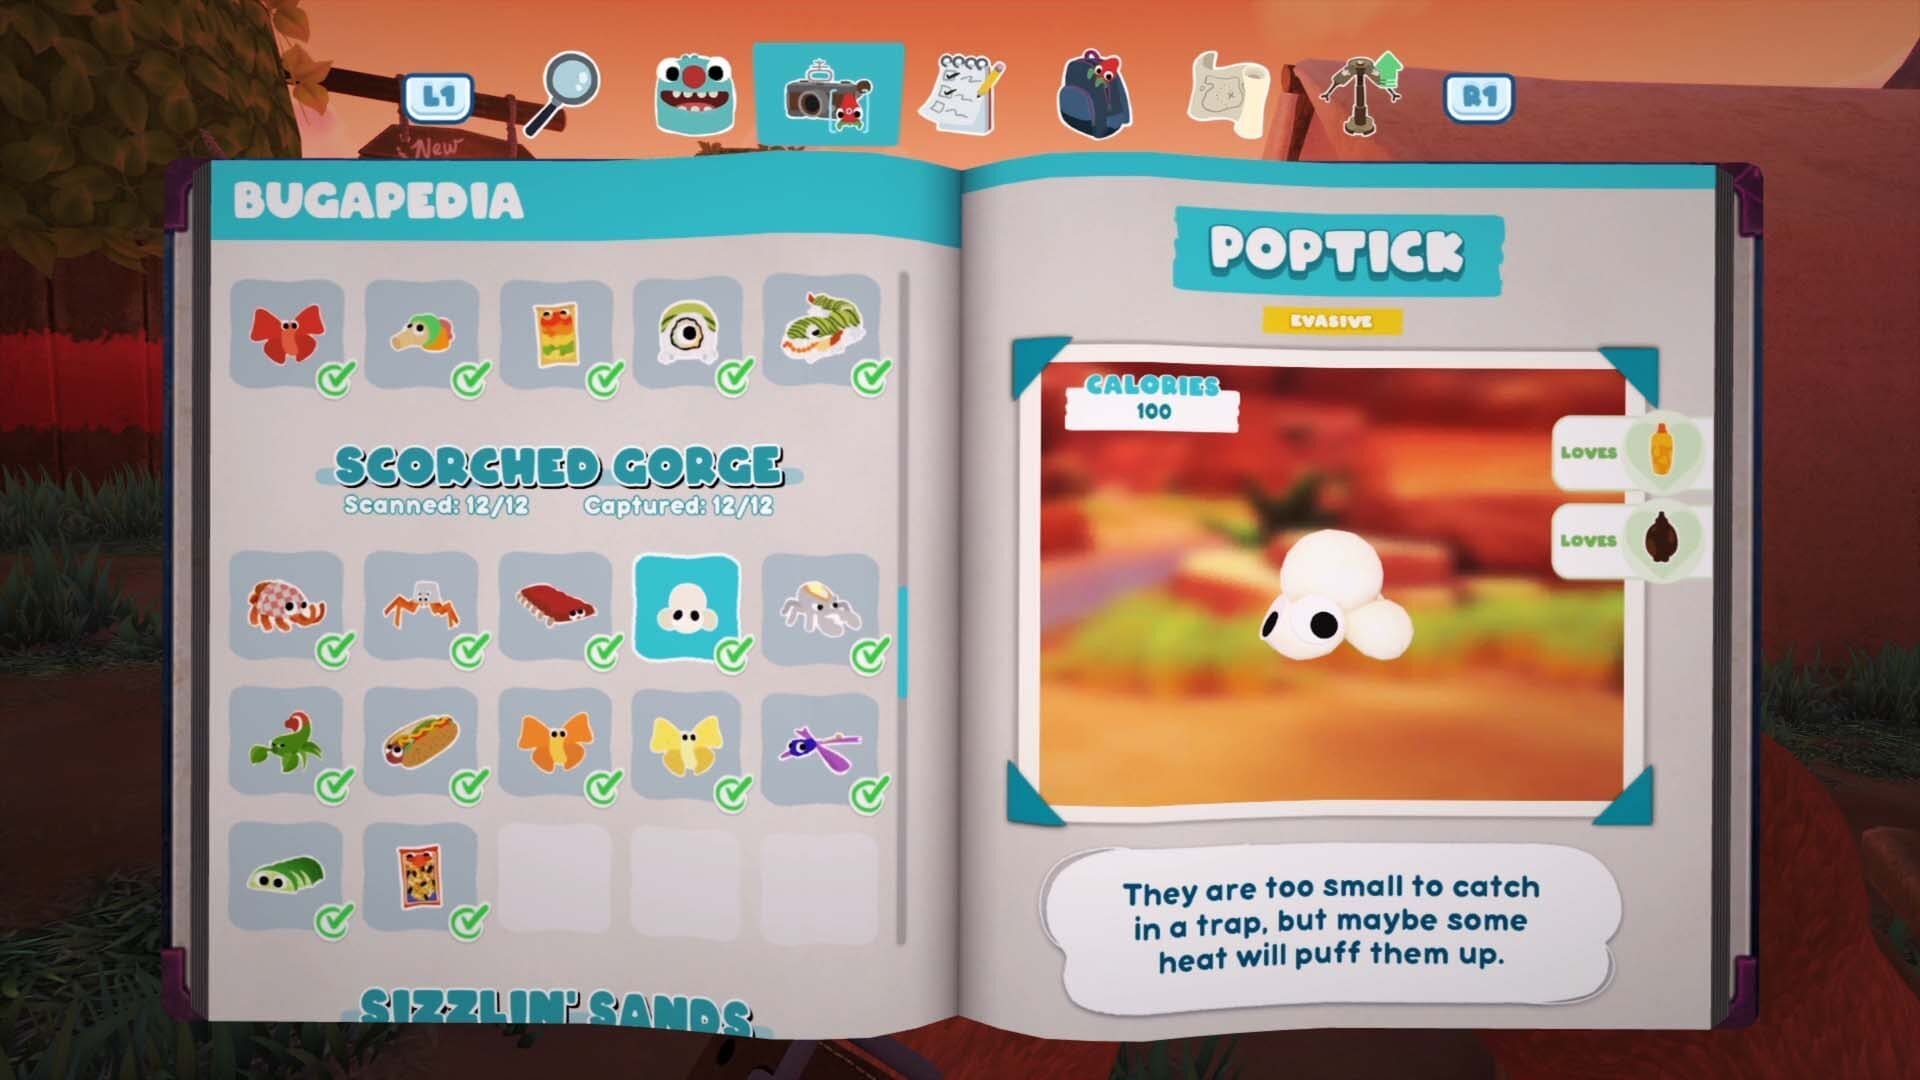
Poptick
These are moving about in the water and the Scorpenyo’s are on the wall next to them. When the Poptick isn’t in the water throw some hot sauce on them to cause the Scorpenyo to throw fire at them. You’ll then be able to catch them in your trap.
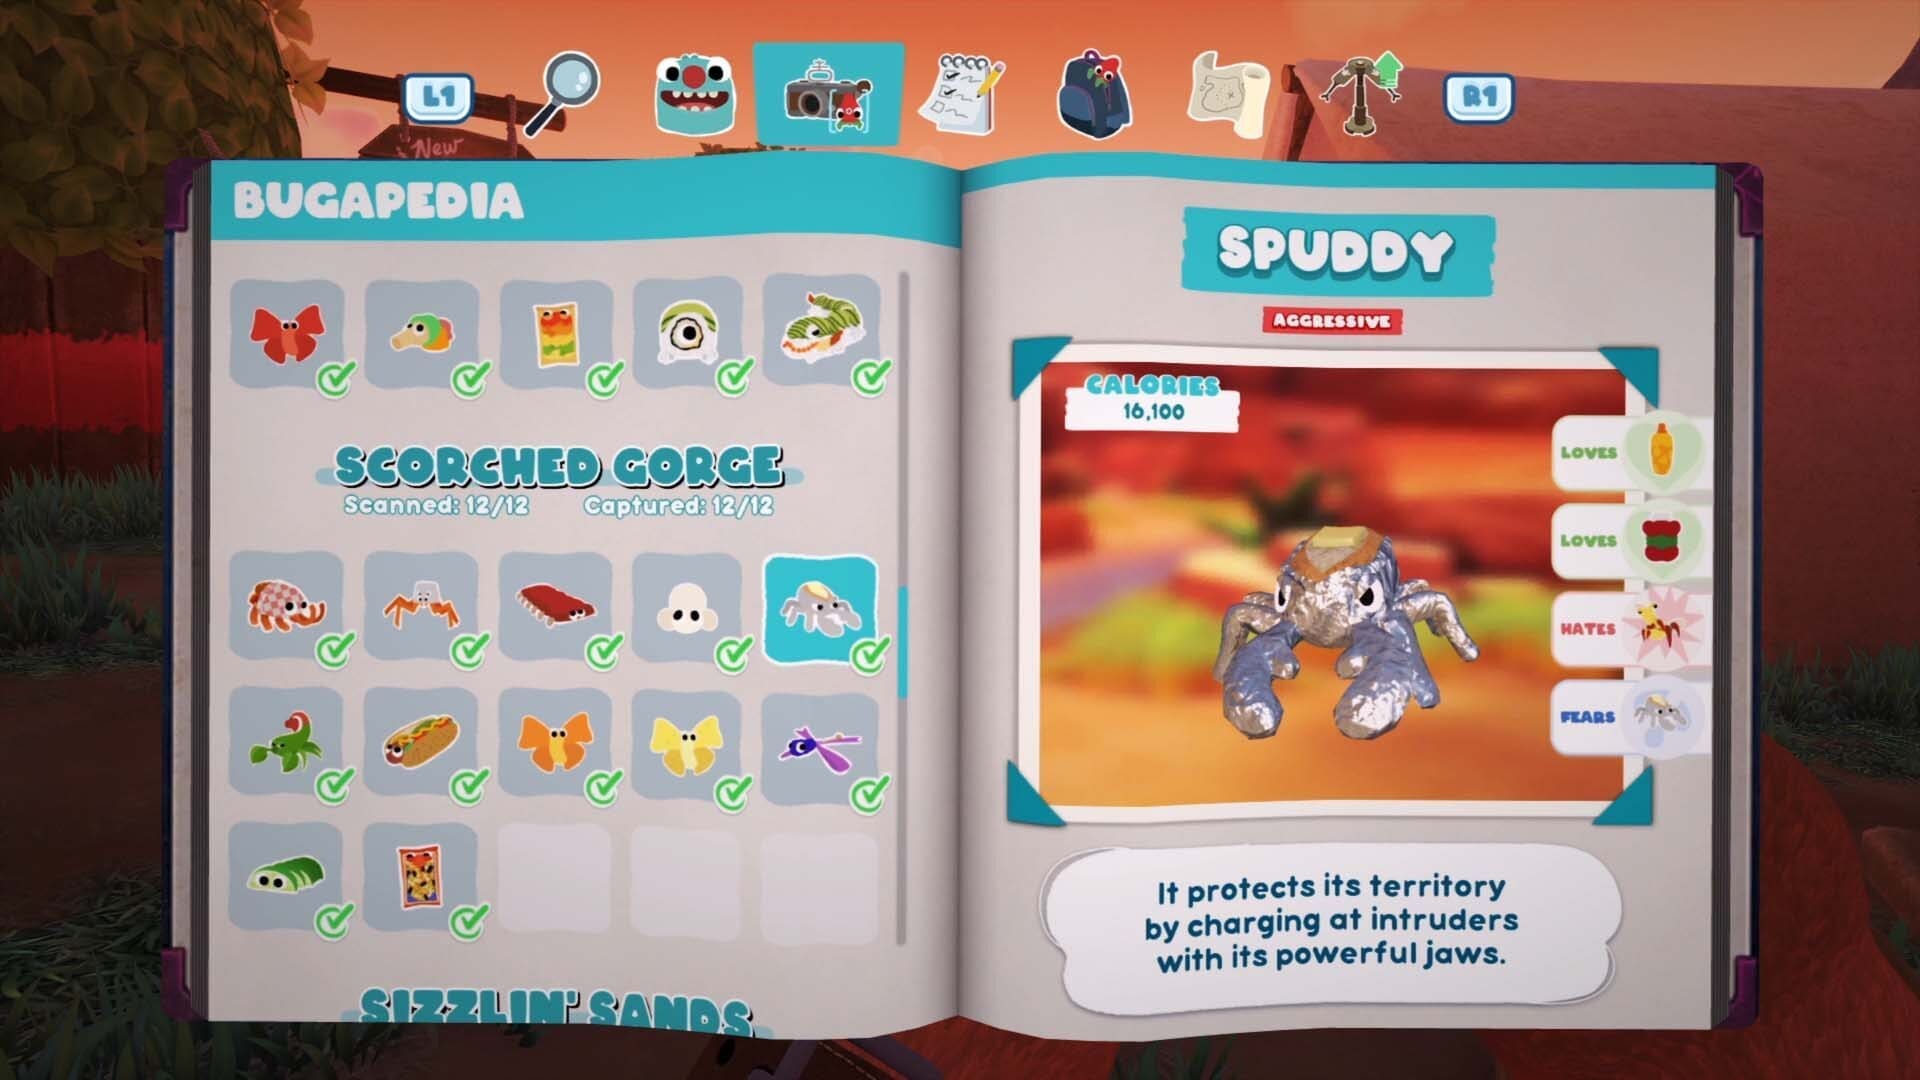
Spuddy
Use the Trip Wire to knock it over and then catch it with your net.
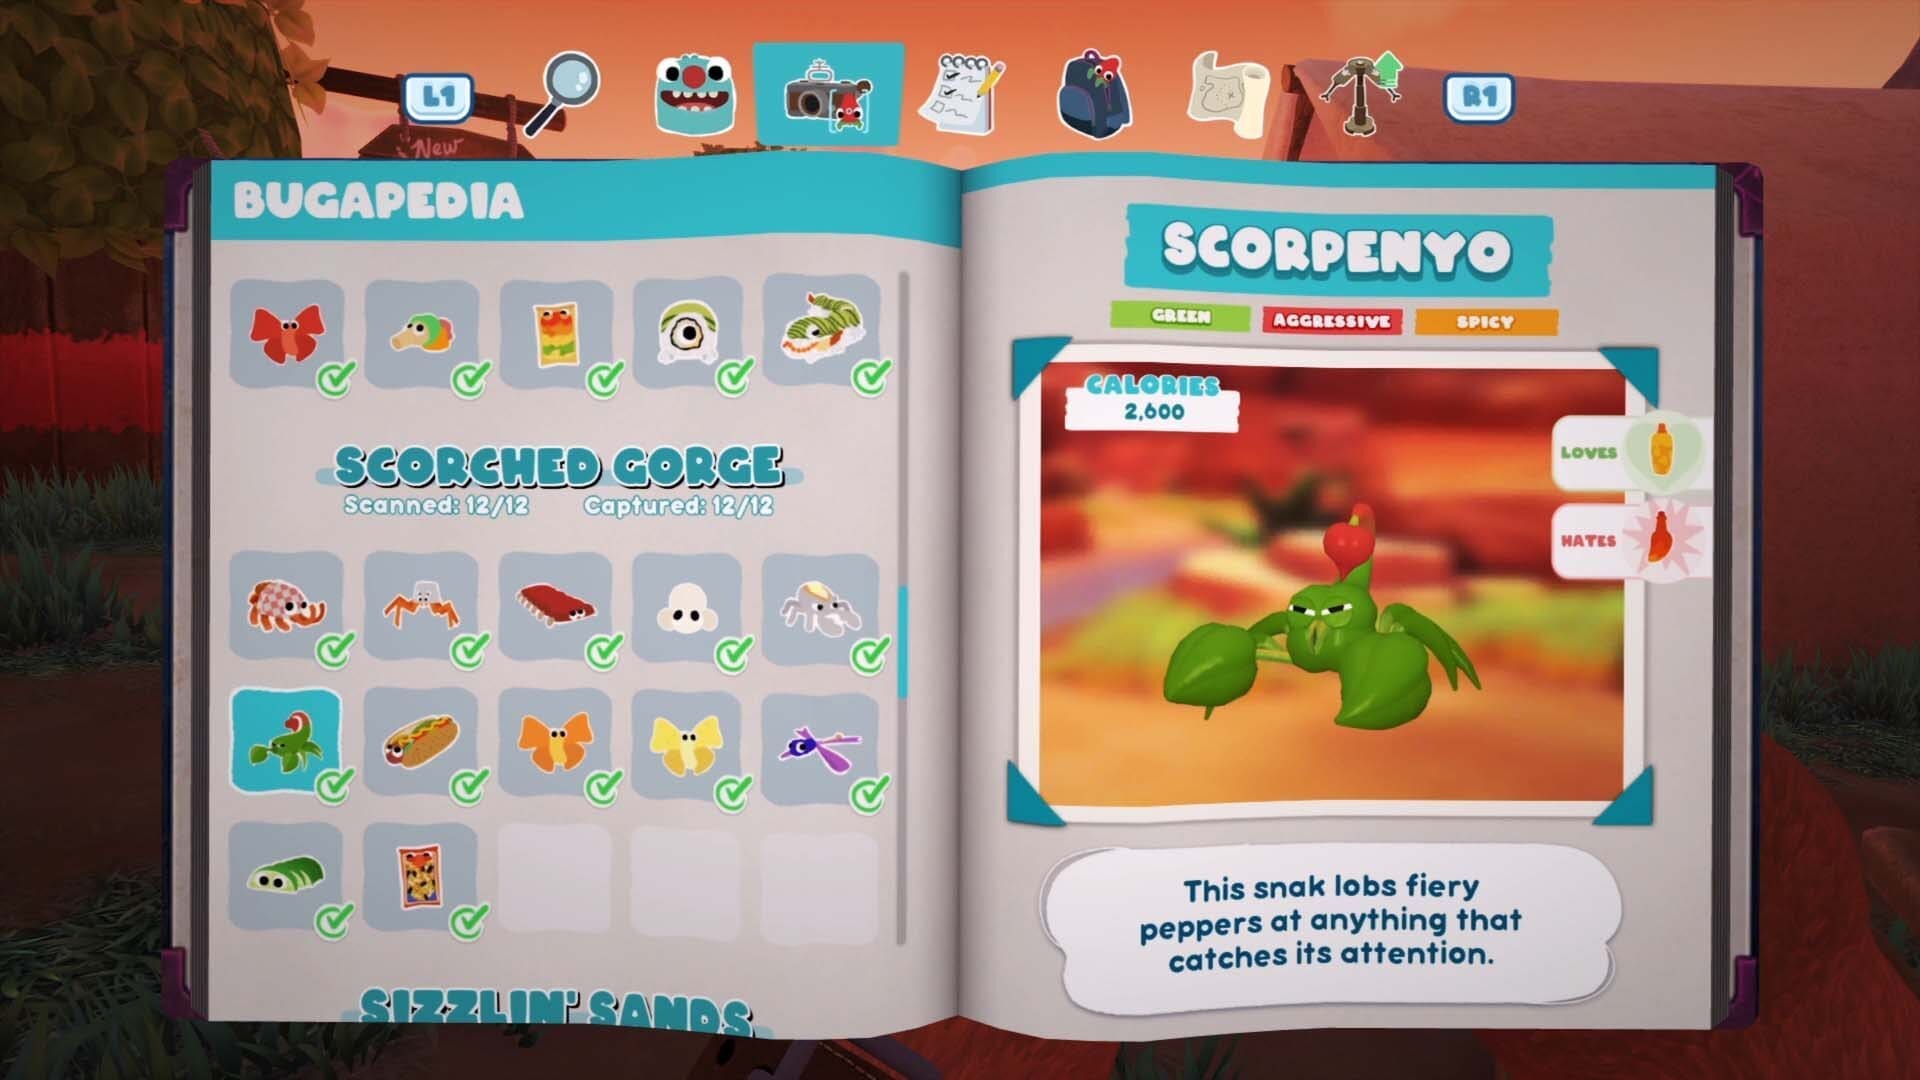
Scorpenyo
Using the Trip Wire you can fling some water on it, or use the ball to lead it into the rive with its favourite sauce on top. Either way, get it wet and then go pick it up.
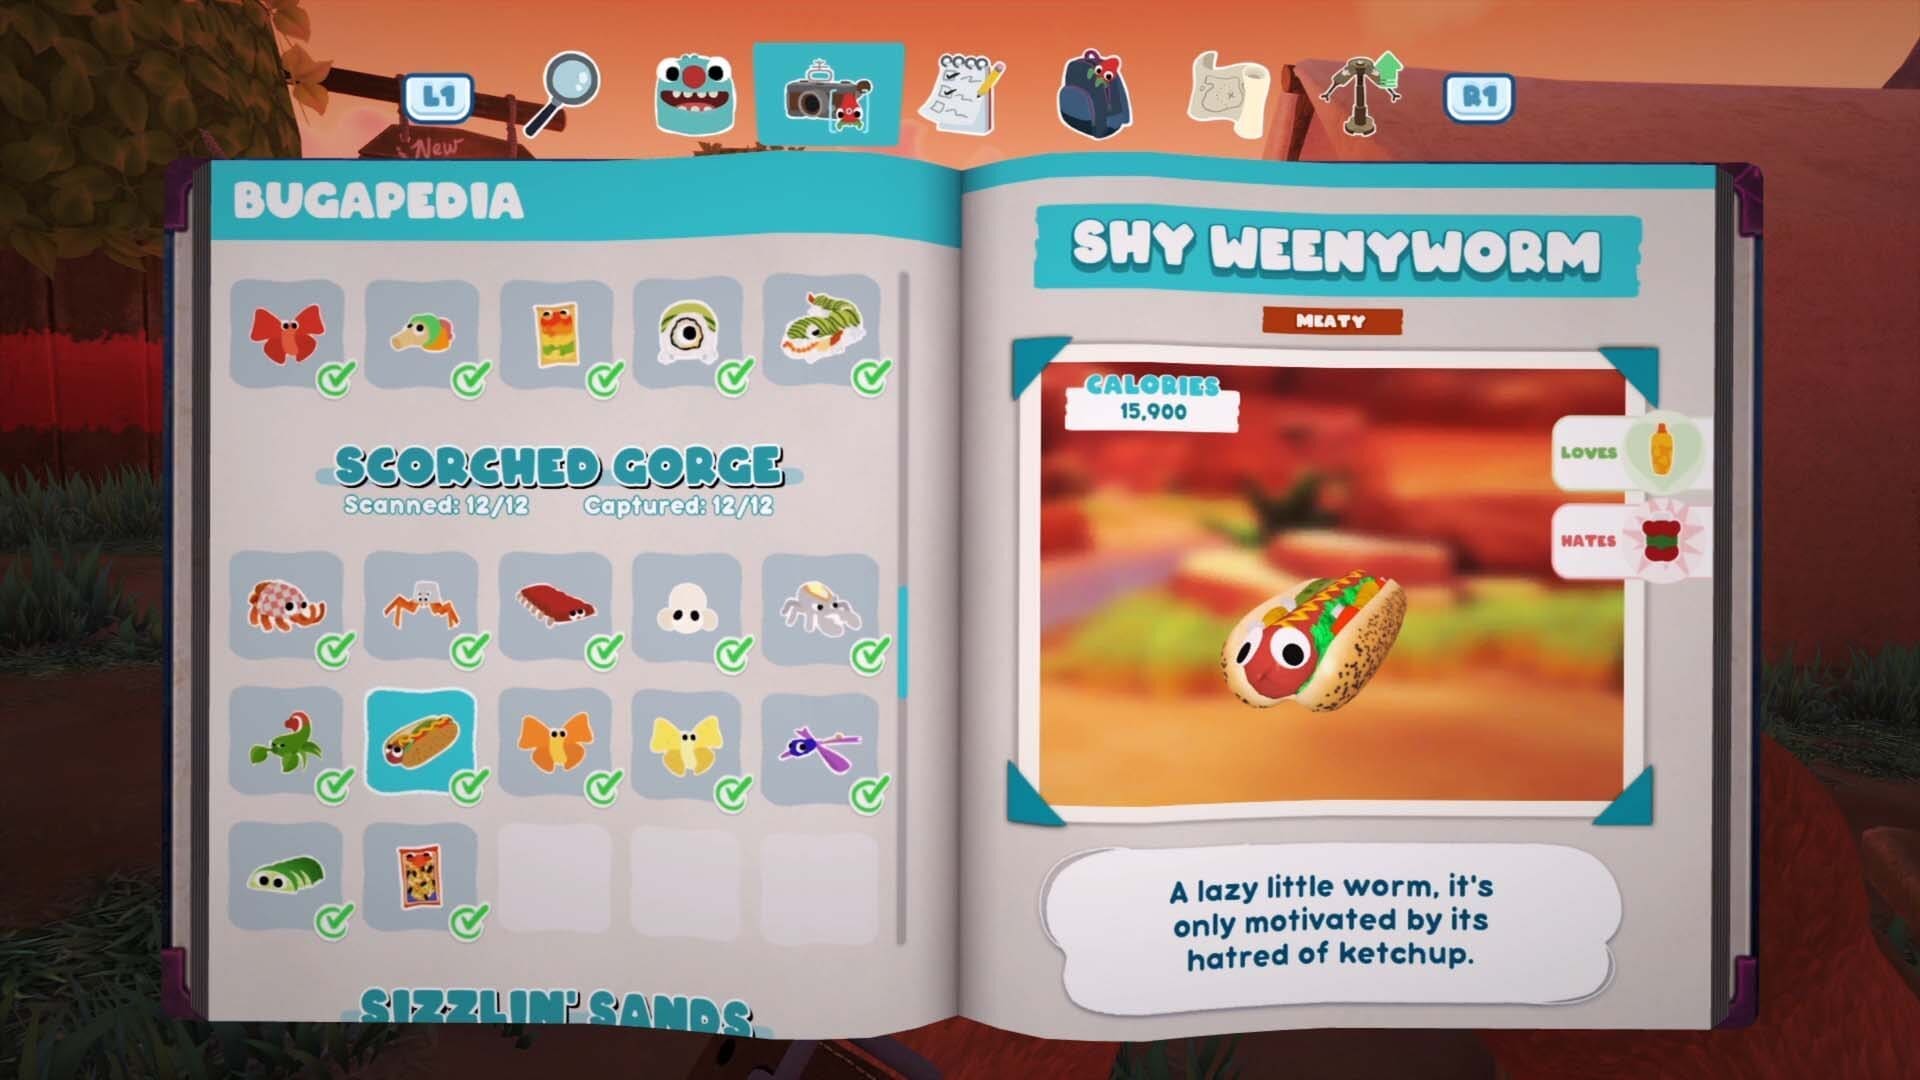
Shy Weenyworm
You’ll catch one of these as part of the main campaign.

Cheepoof
You’ll catch one of these as part of the main campaign when you’re taught how to use the launcher to fling your trap at Bugsnax.

White Cheepoof
Same as the other Cheepoof but only between 4 PM and 4 AM.
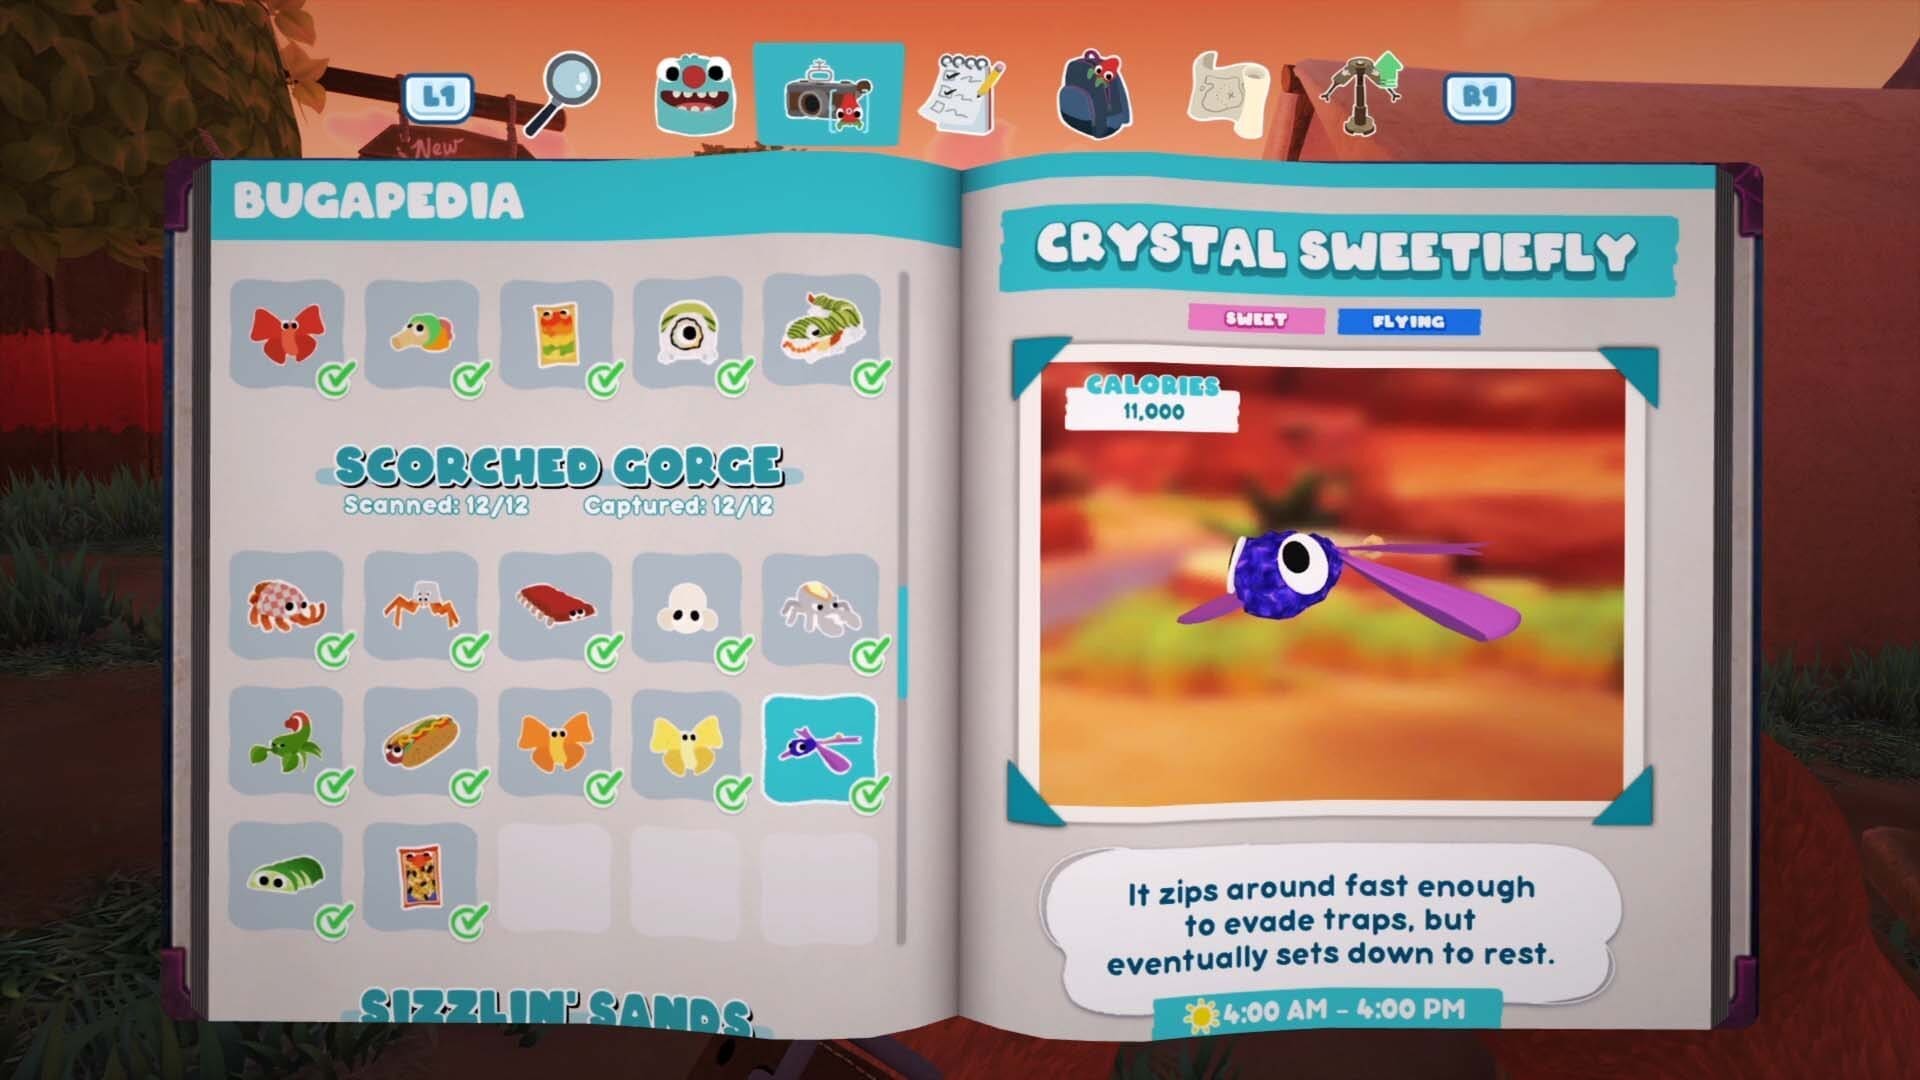
Crystal Sweetiefly
Can only be found between 4 AM and 4 PM. When it settles down to rest you can use the launcher to fling your trap at it and capture the Crystal Sweetiefly.
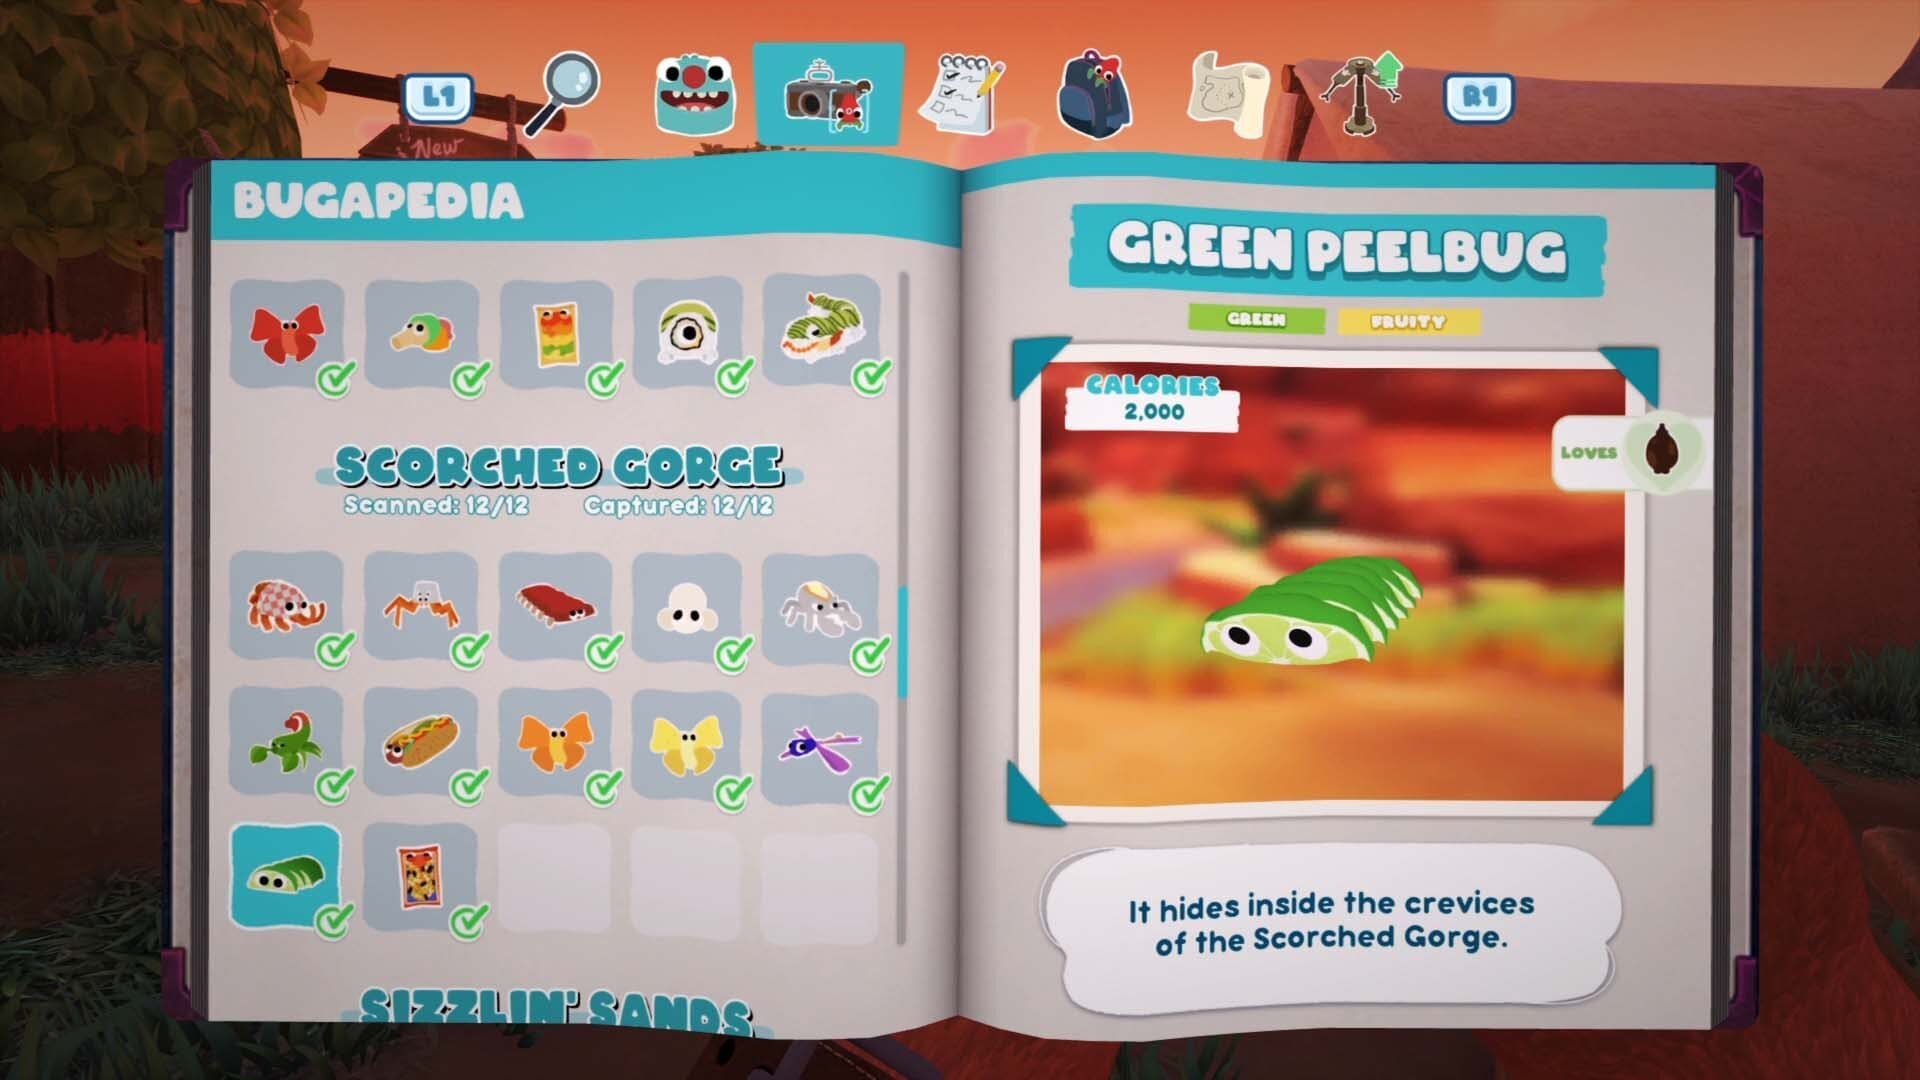
Green Peelbug
As you enter Scorched Gorge, head down the left side and you’ll eventually see a cracked wall on your left. If you lead a Spuddy towards it, it’ll charge and break down the wall. Inside there’s a hole to your right. Lead the ball gadget through it and it’ll force the Green Peelbug out.
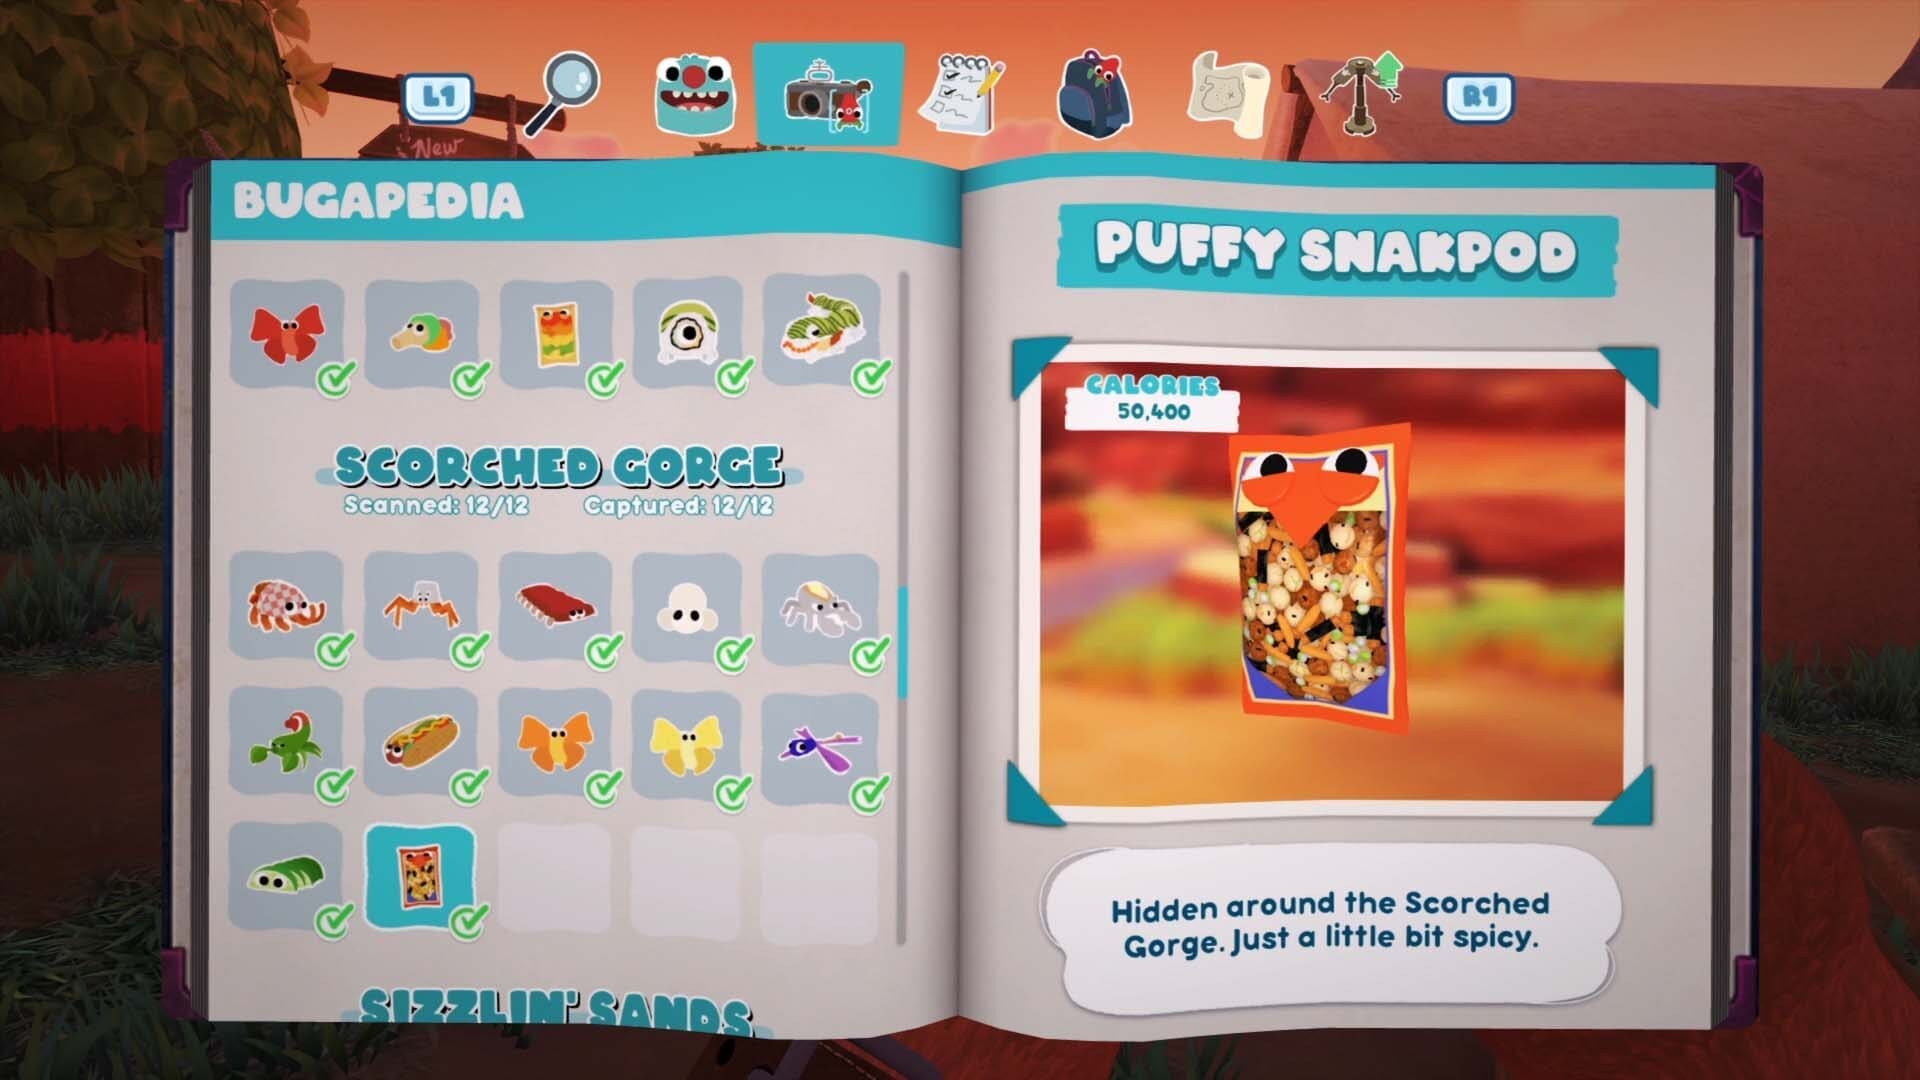
Puffy Snakpod
There’s one of these sitting on top one of the poles you can jump to from the highest area of the map.
BOILING BAY
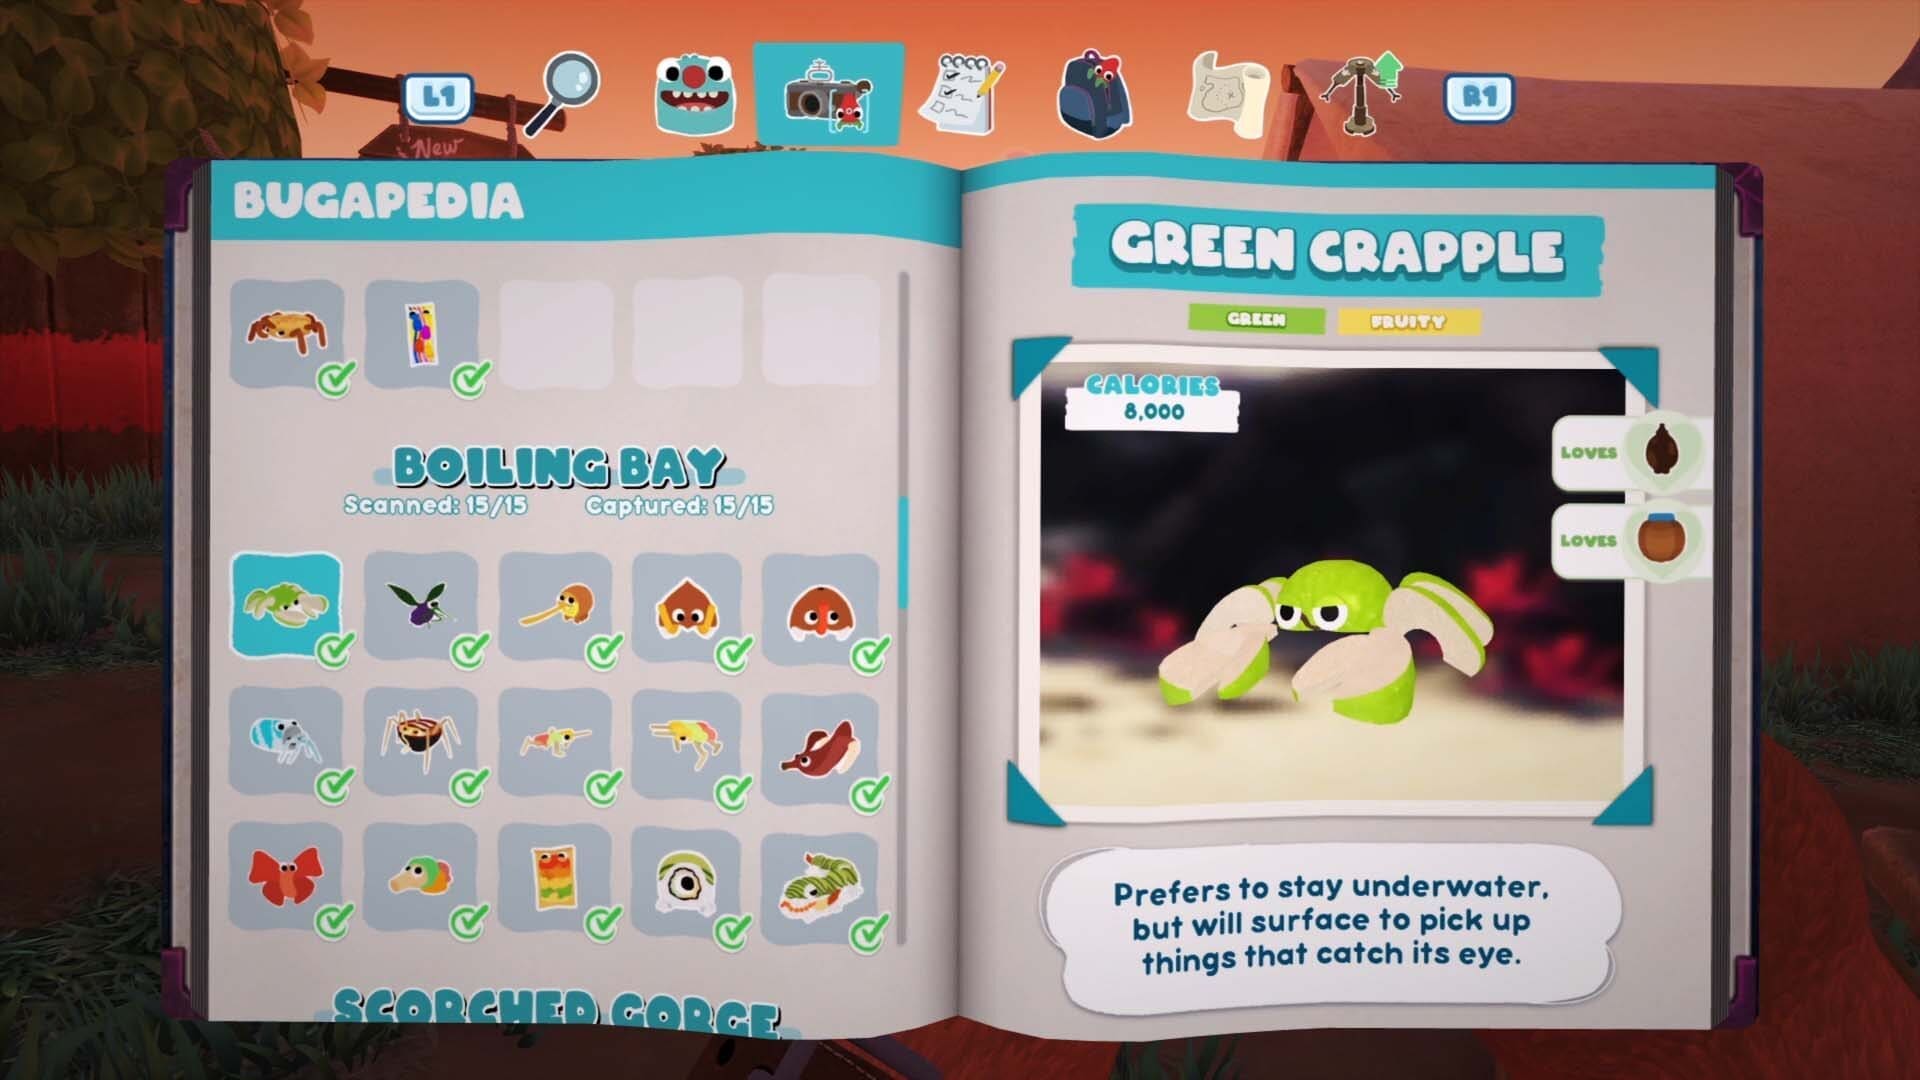
Green Crapple
These are walking around under the water, you can simply place your trap in its way and catch one.
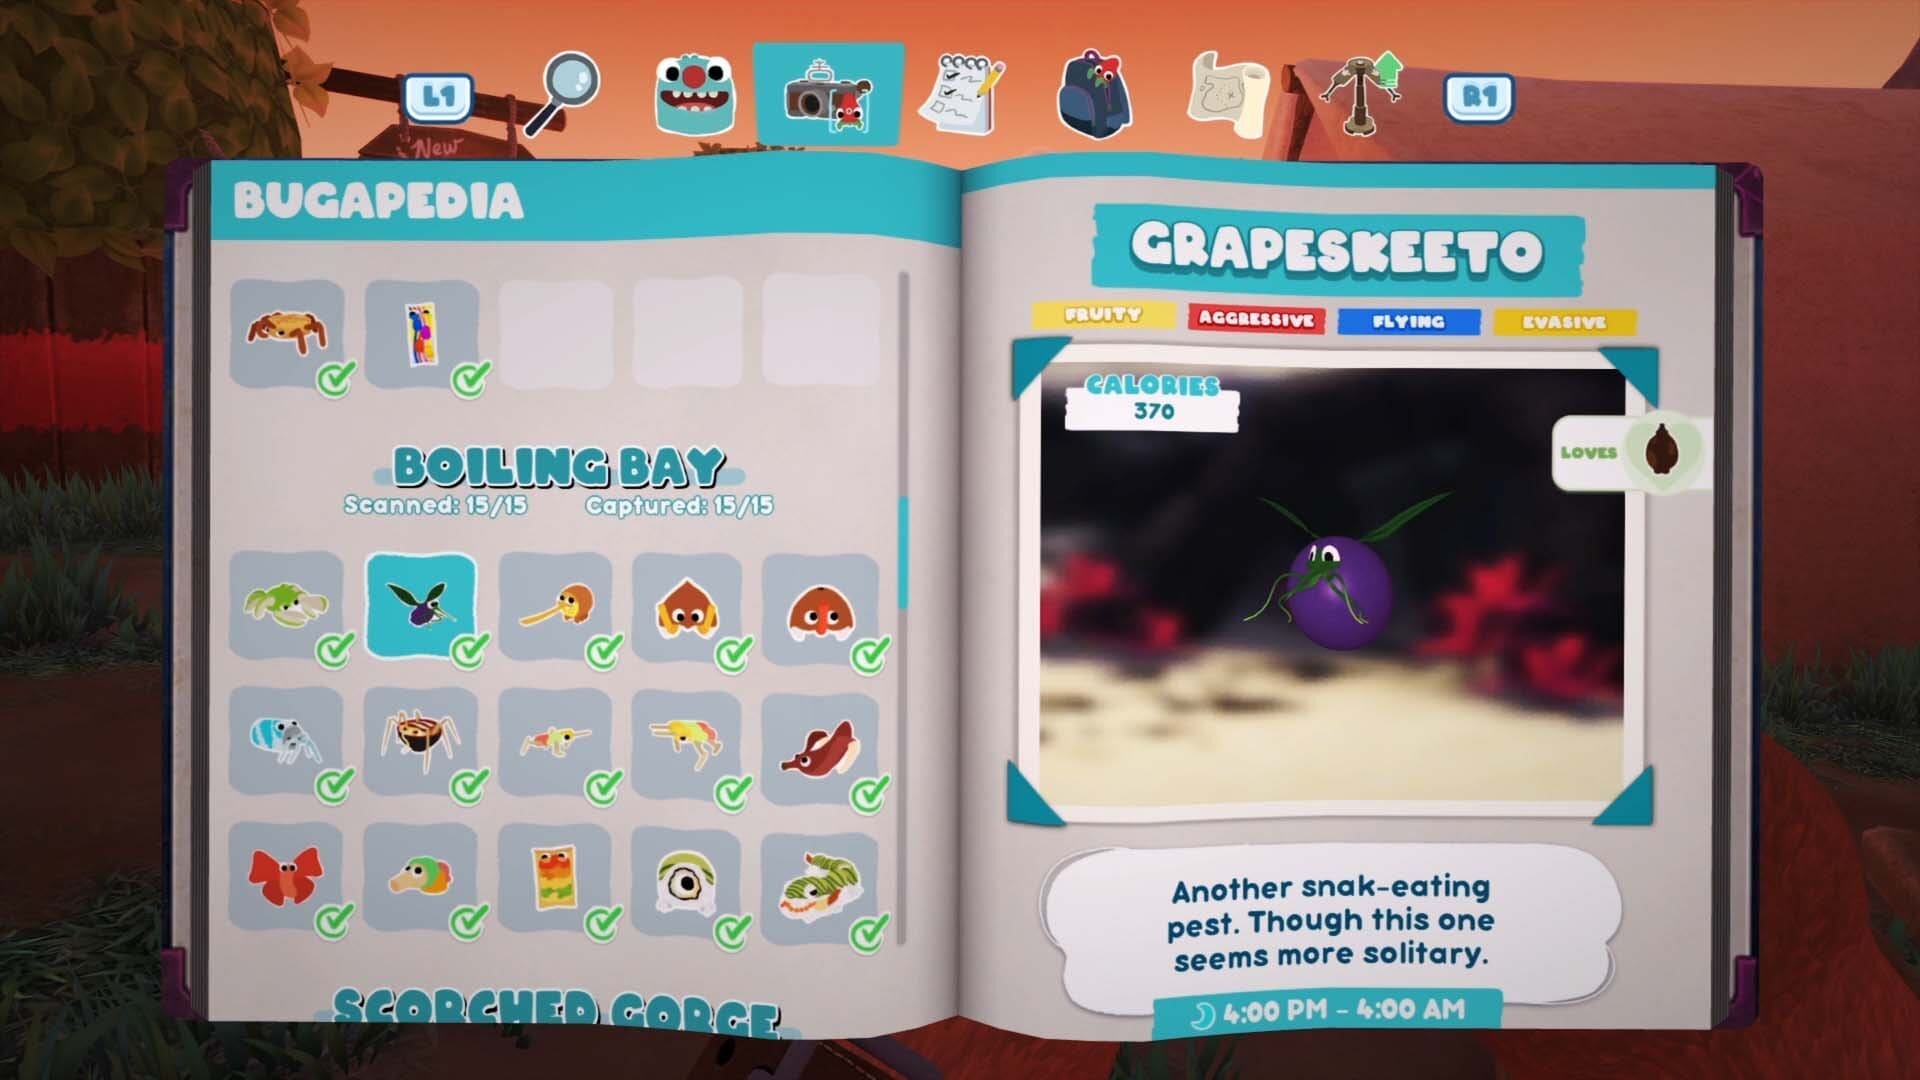
Grapeskeeto
Like the Green Grapeskeepto, you can throw some chocolate on another bug to get this one to come down and feed.

Golden Kweeble
The same as the other Kweeble.
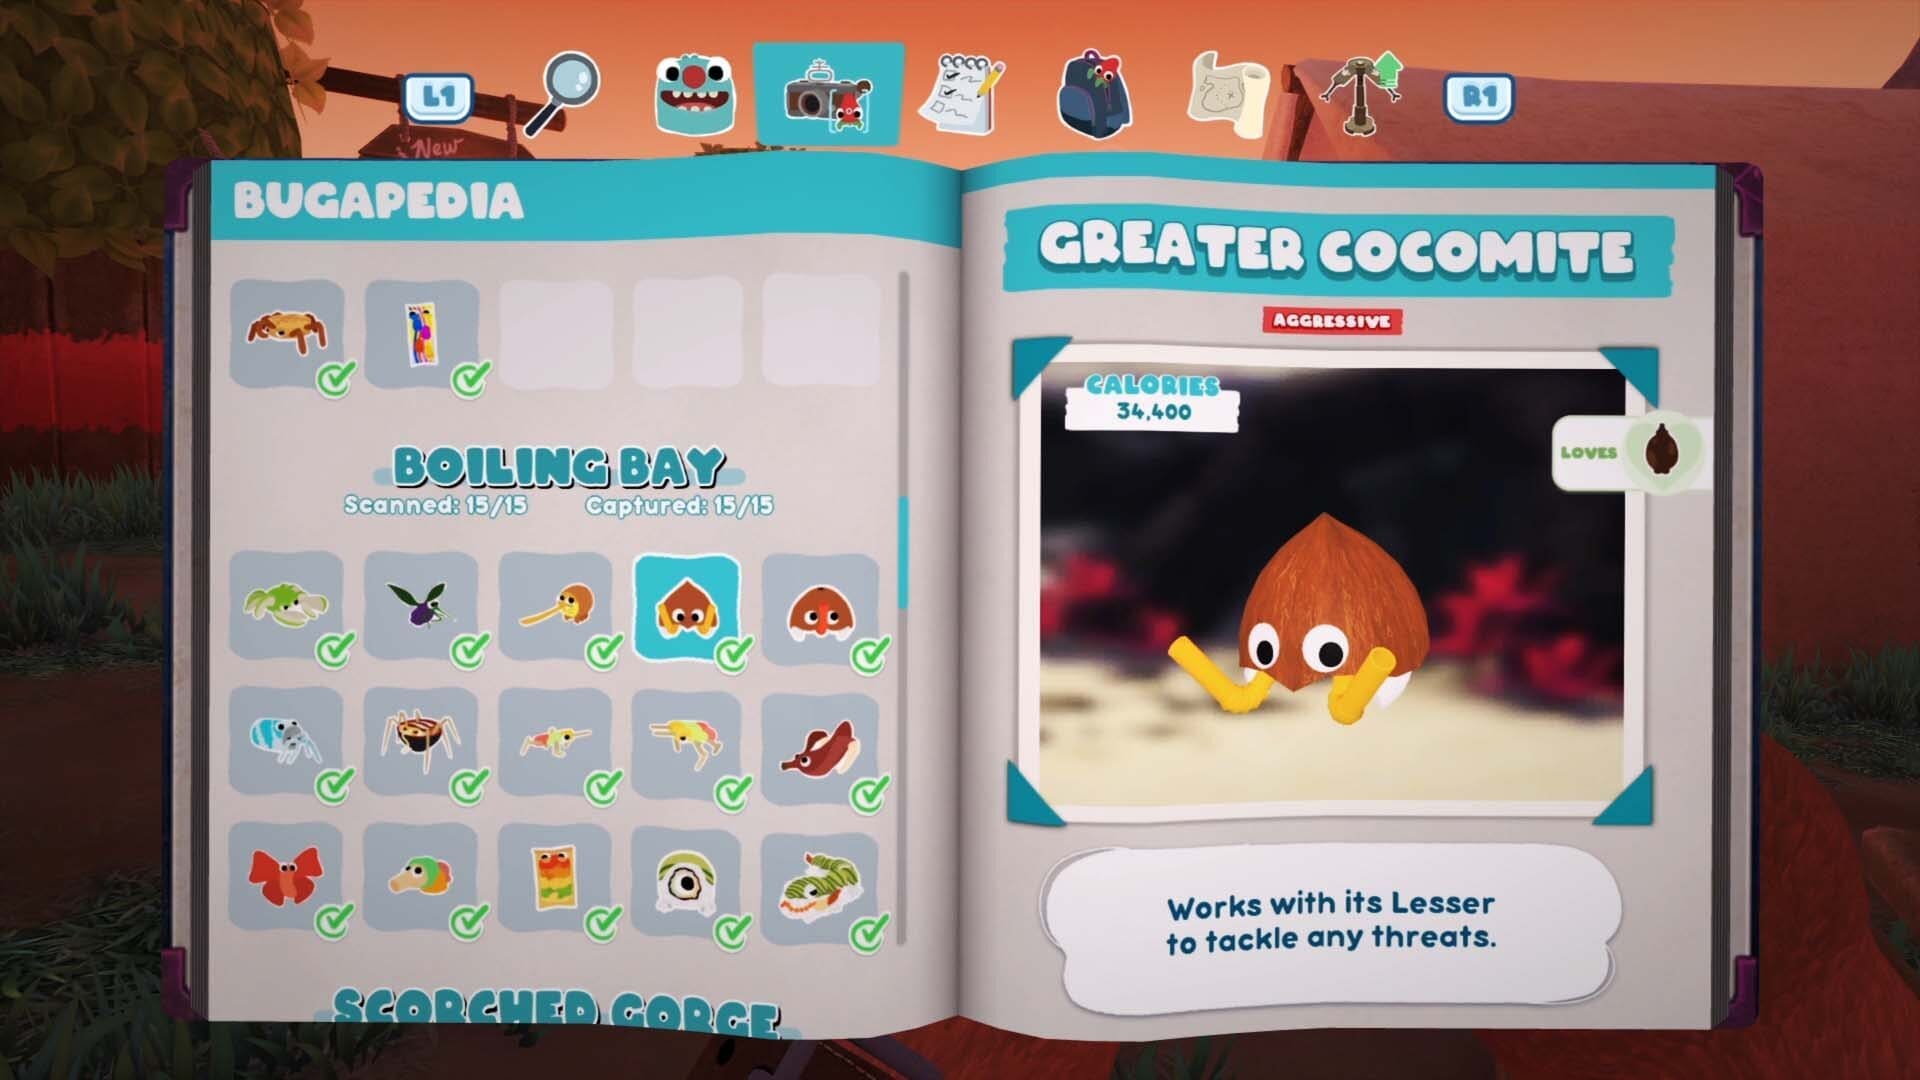
Greater Cocomite
Trip this up in some fashion to be able to capture it.

Lesser Cocomite
Two will form if you set a Greater Cocomite on fire.
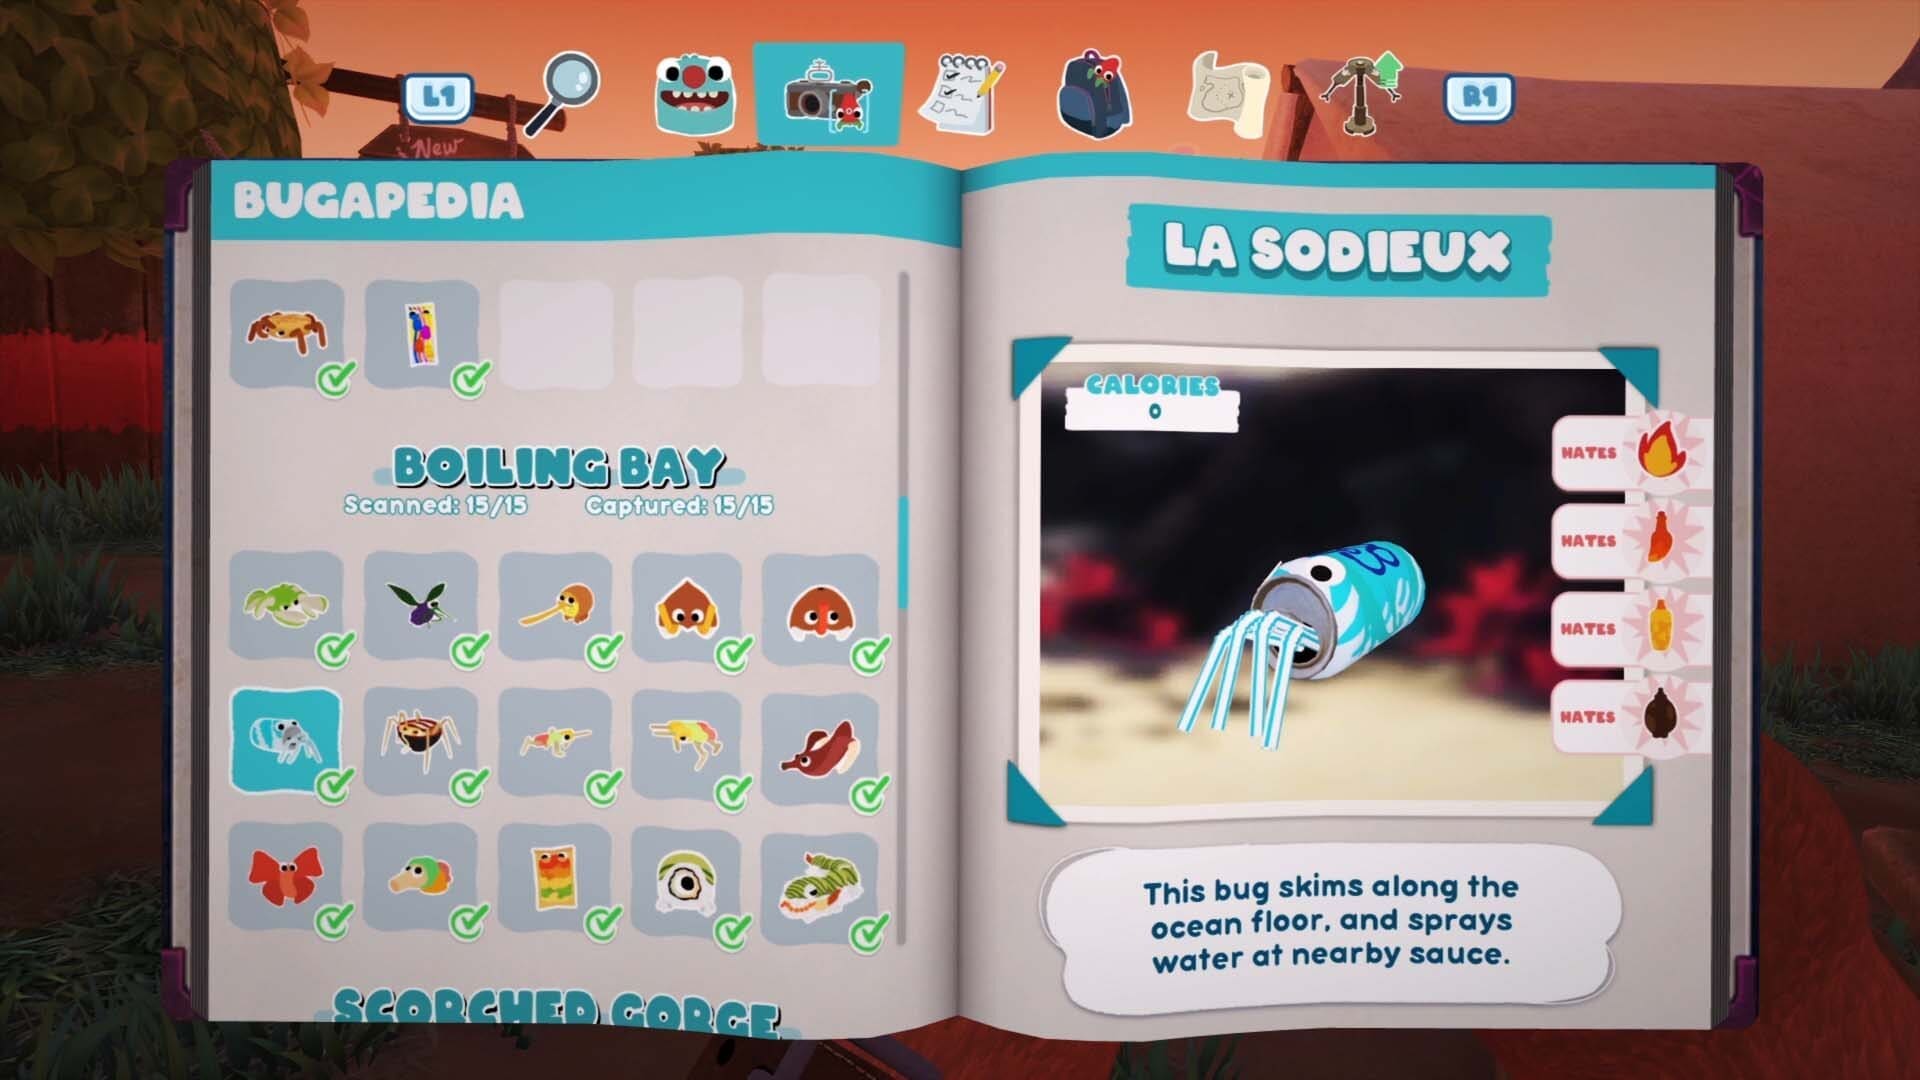
La Sodieux
Can trap easily from the ocean floor.
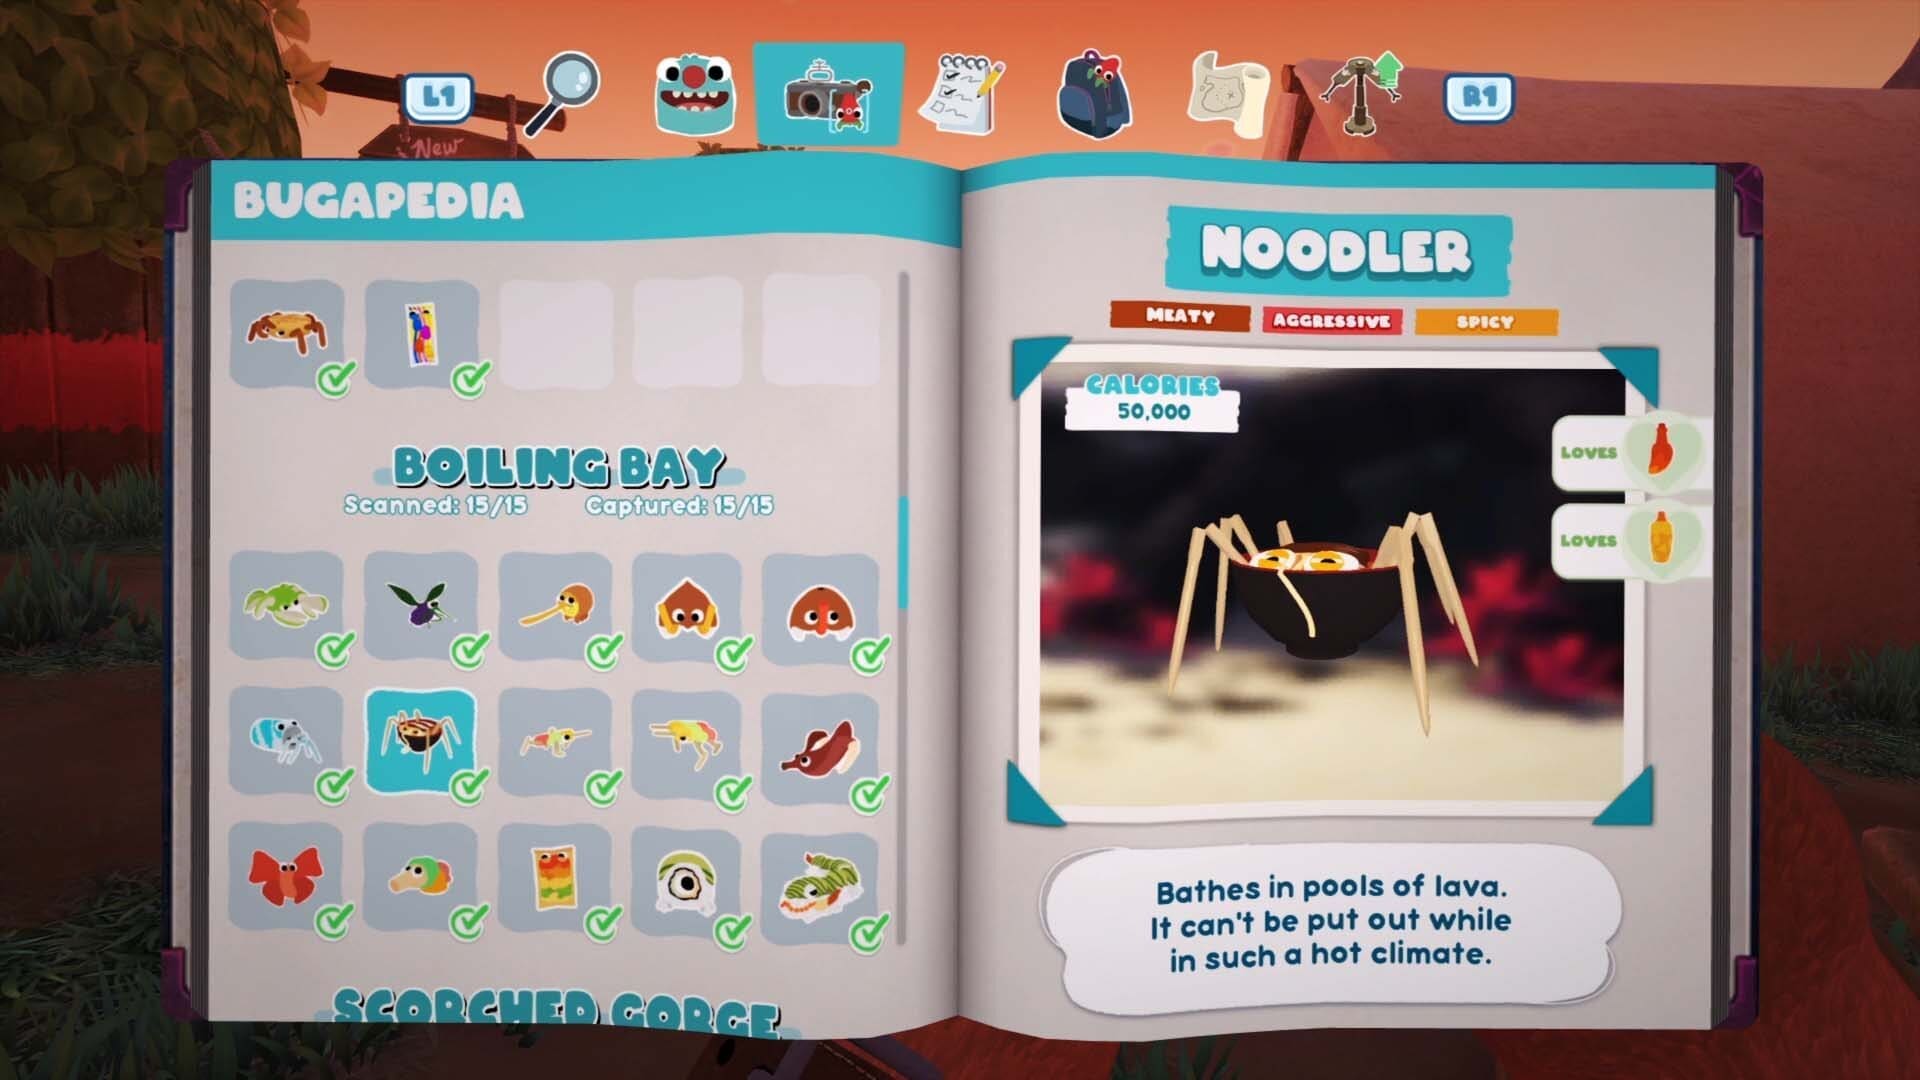
Noodler
Lead a Paletoss down into the cave and then throw some hot sauce on it to get the Noodler to come out and freeze itself. You’ll then be able to pick it up.
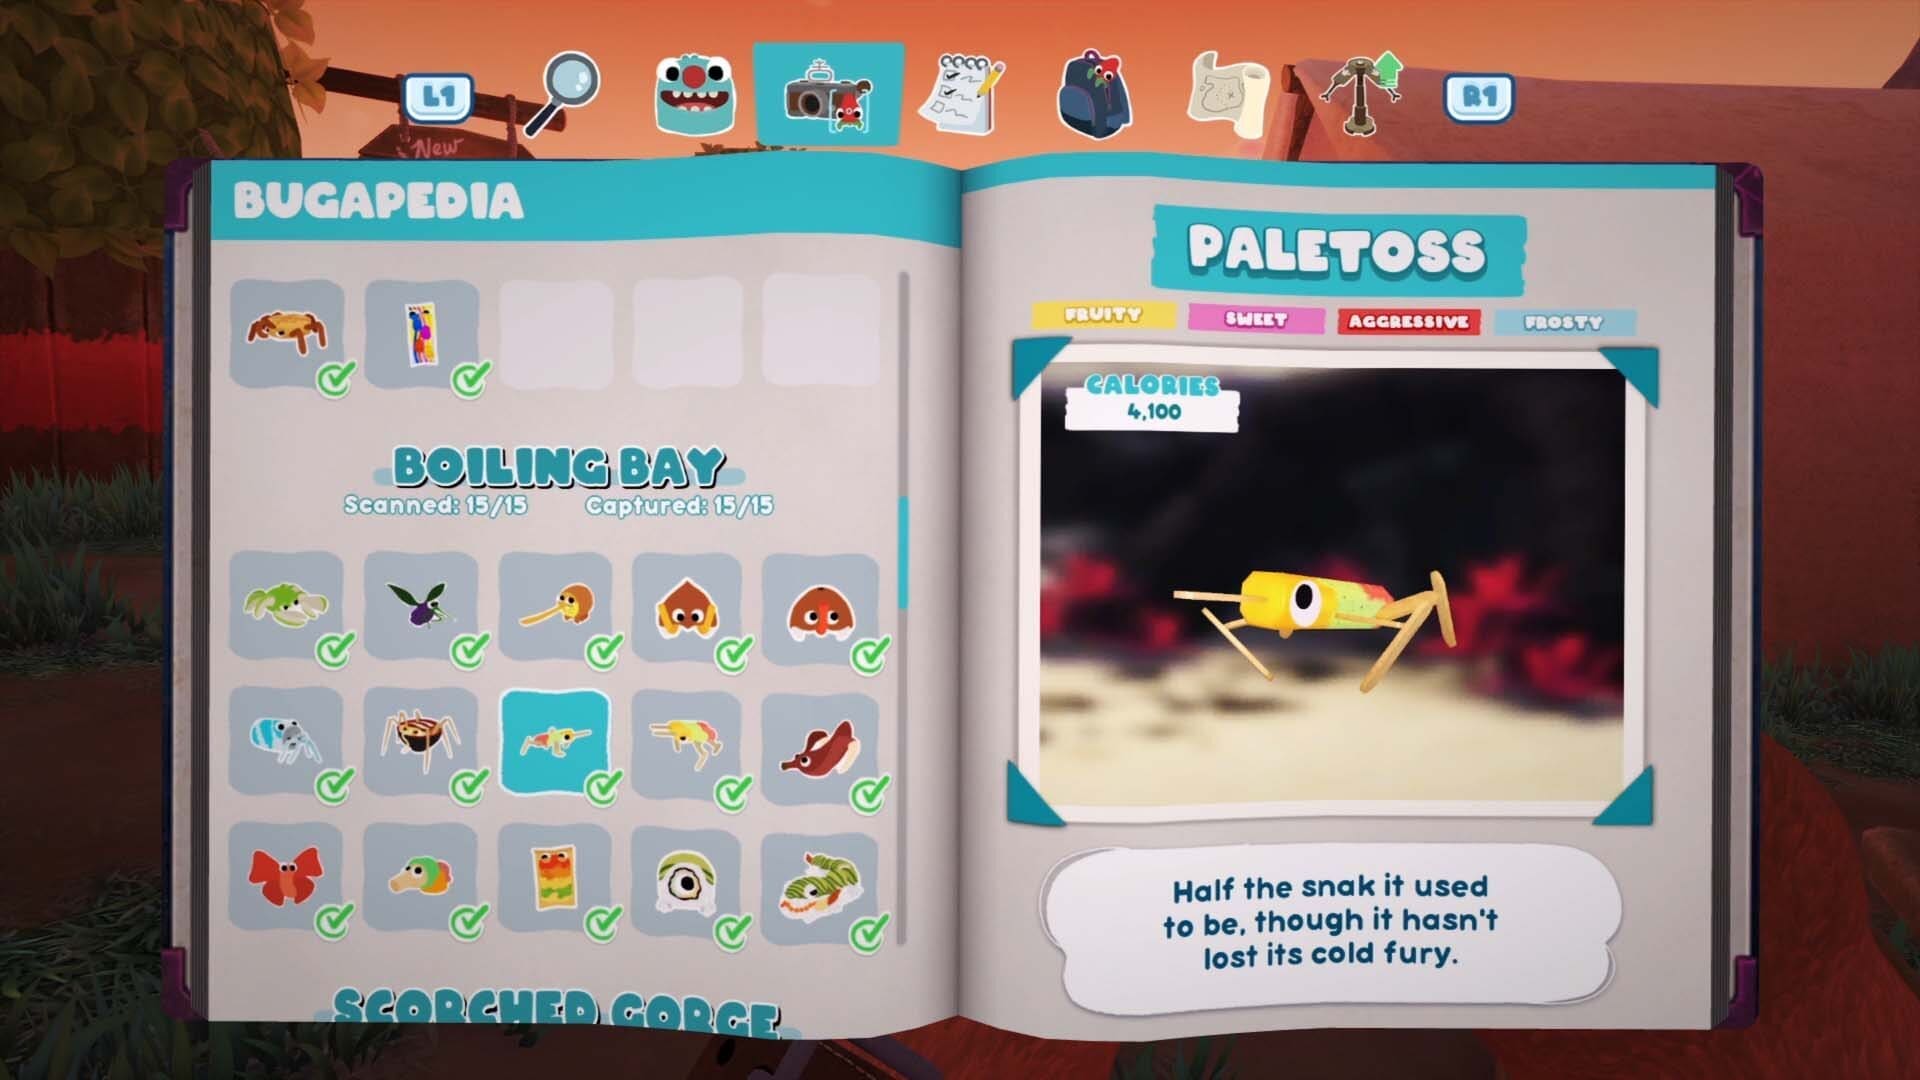
Paletoss
Two of these will break out Paletoss Grande if you lead iit into lava in some way.
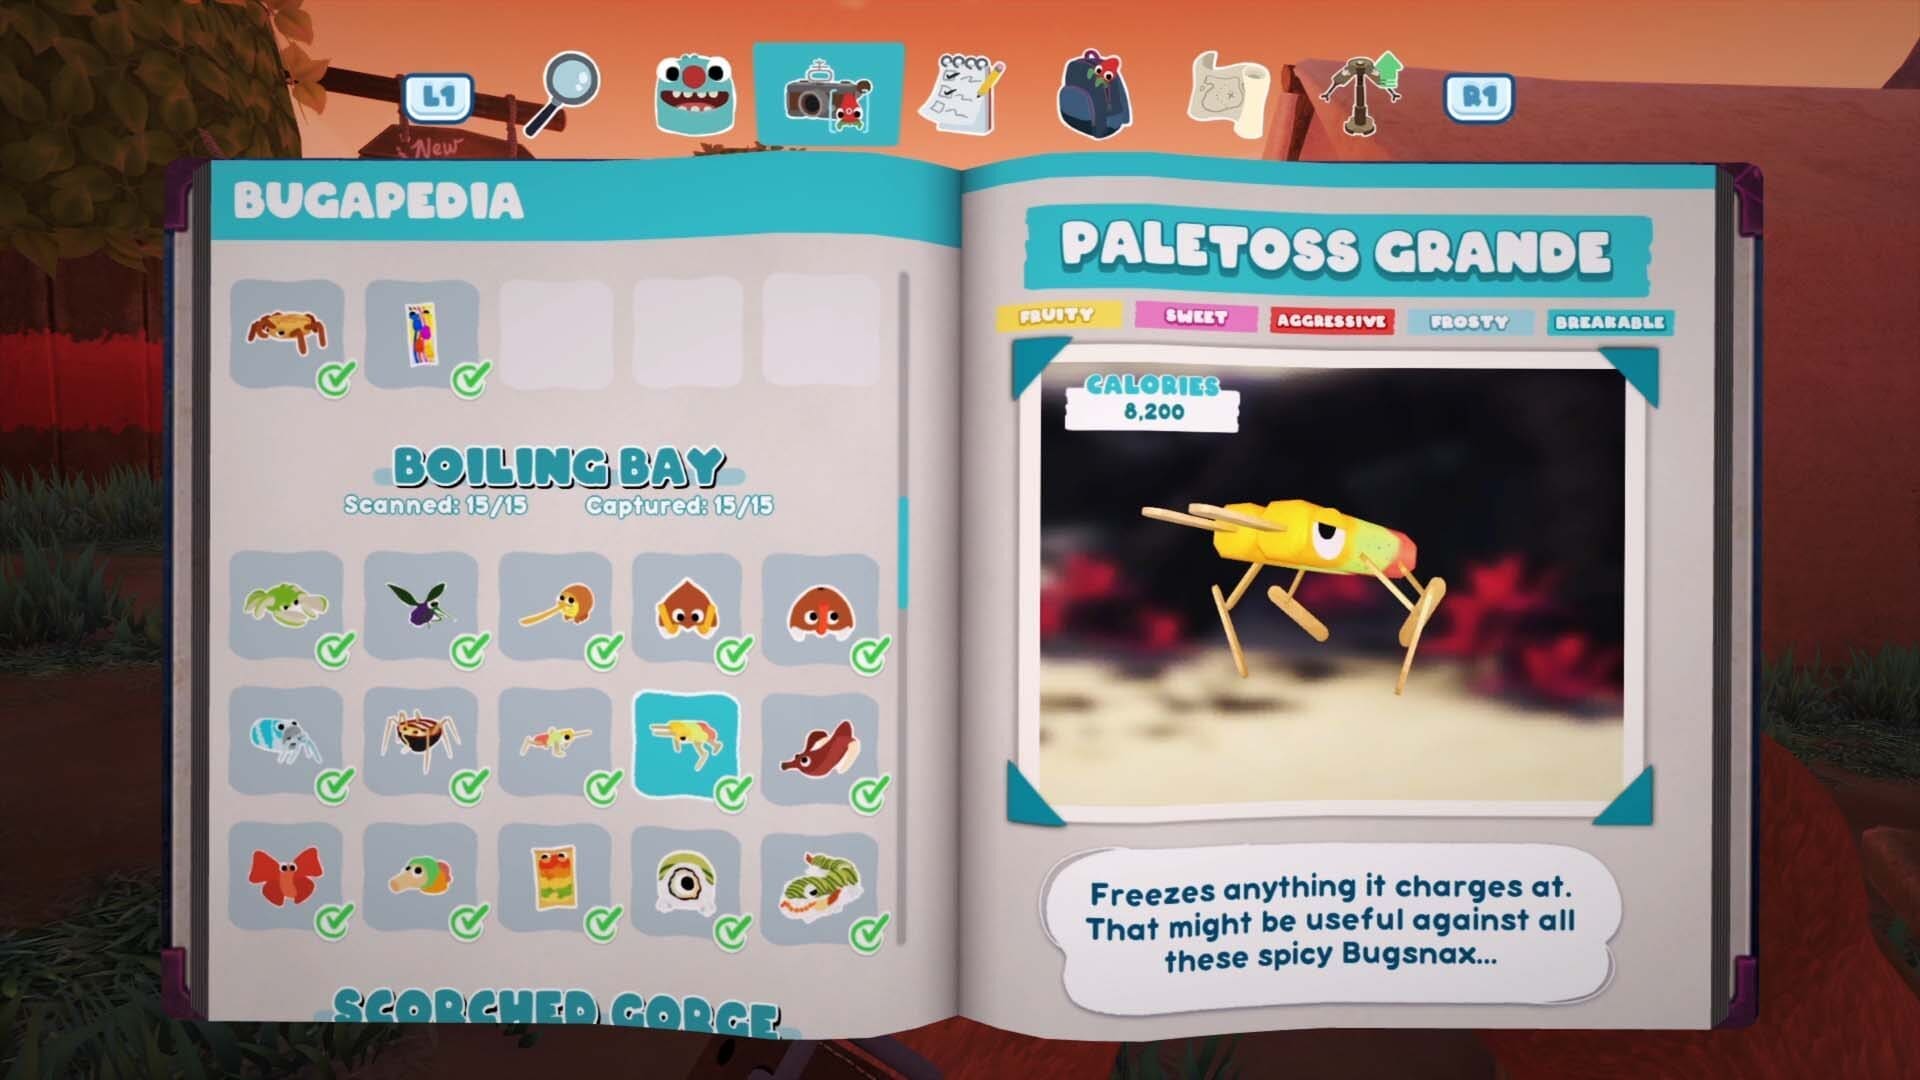
Paletoss Grande
Placing the Trip Line in some lava you can set the Paletoss Grande on fire and then quickly use it again to trip it up and stun it to be able to capture it. Alternatively, you can set up a Trip Line ready, and then use your ball or another Bugsnax to set the Paletoss Grande on fire and then lead it into the Trip Line you’ve set-up to stun it. The former is what I did for the majority of the bigger, aggressive Bugsnax in the game.
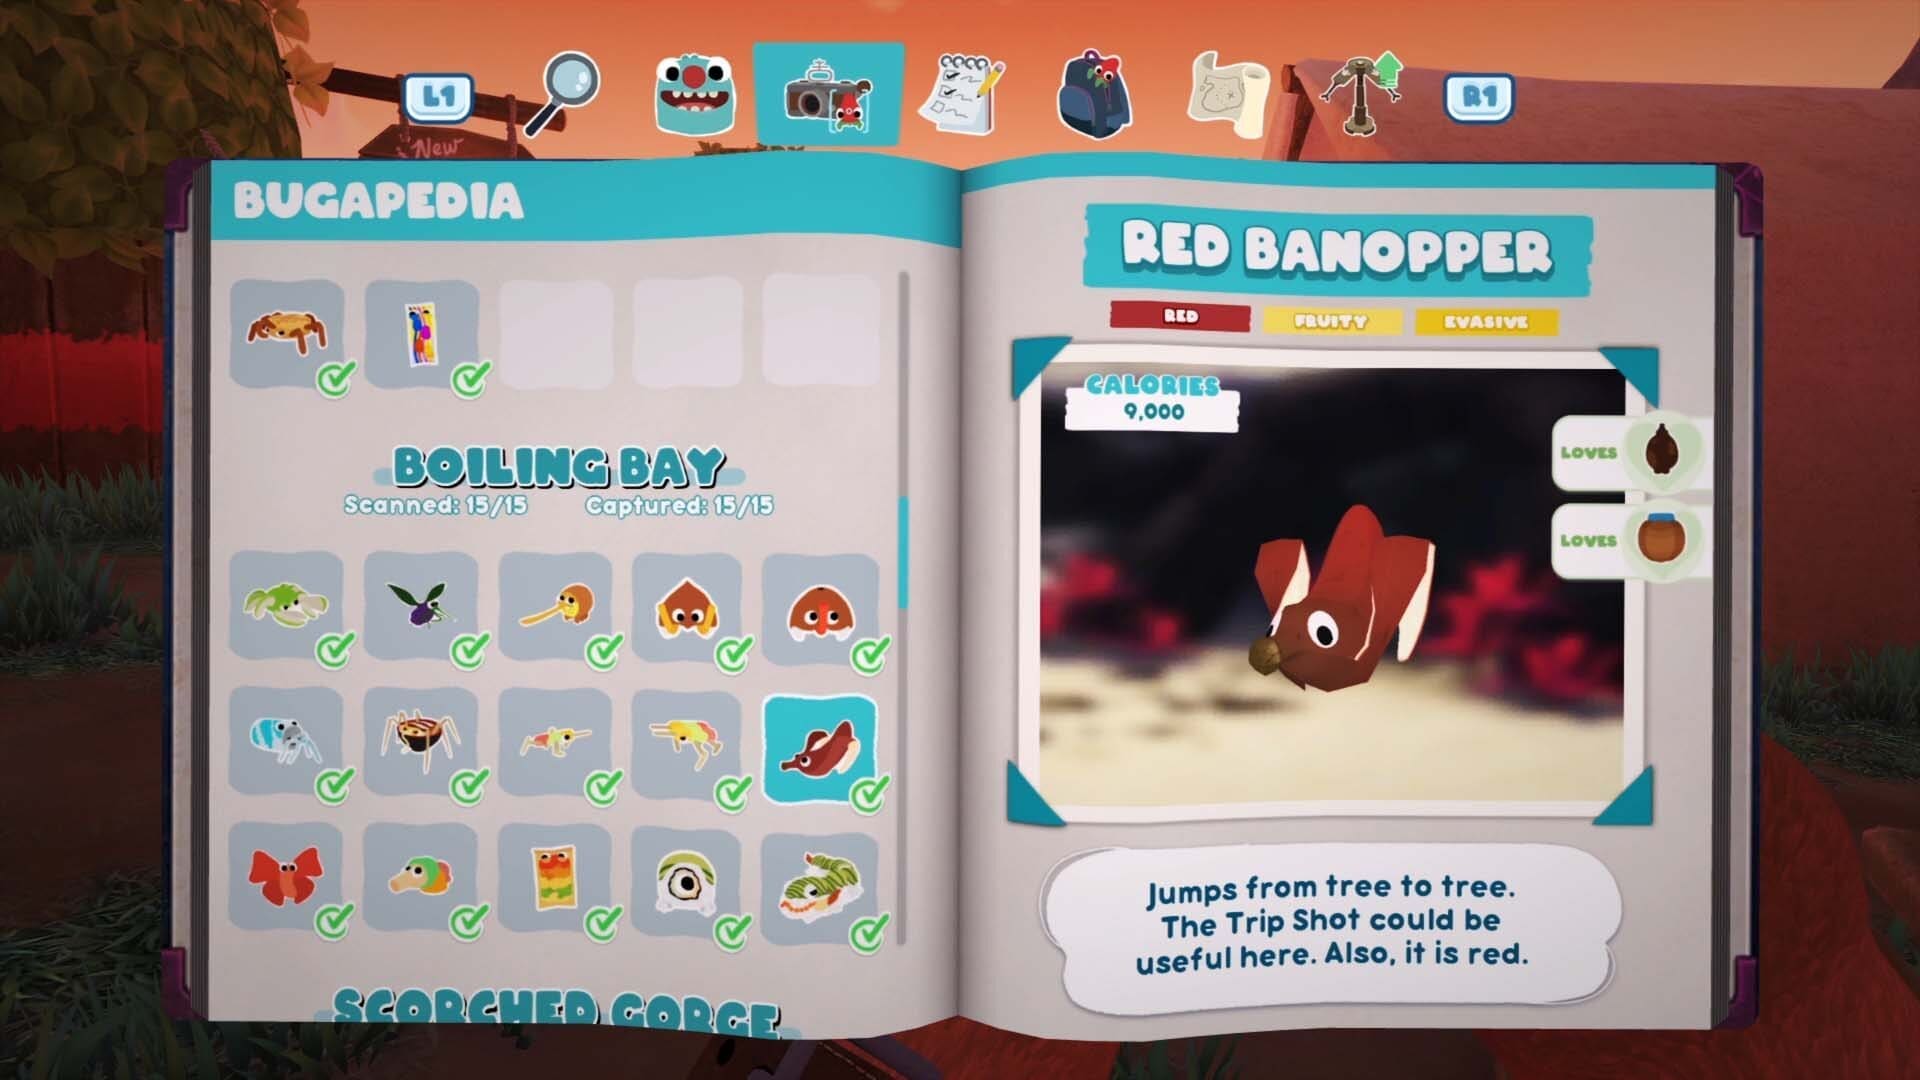
Red Banopper
Jumps from the trees outside the cave. Use the Trip Line to trip it up in its path.

Flamin’ Cheepoof
Inside the cave area. Have to cool them down to catch. Can be done by leading a frozen like a Paletoss Grande into the cave and lining up the launcher with a Flamin’ Cheepoof. See below for an example.
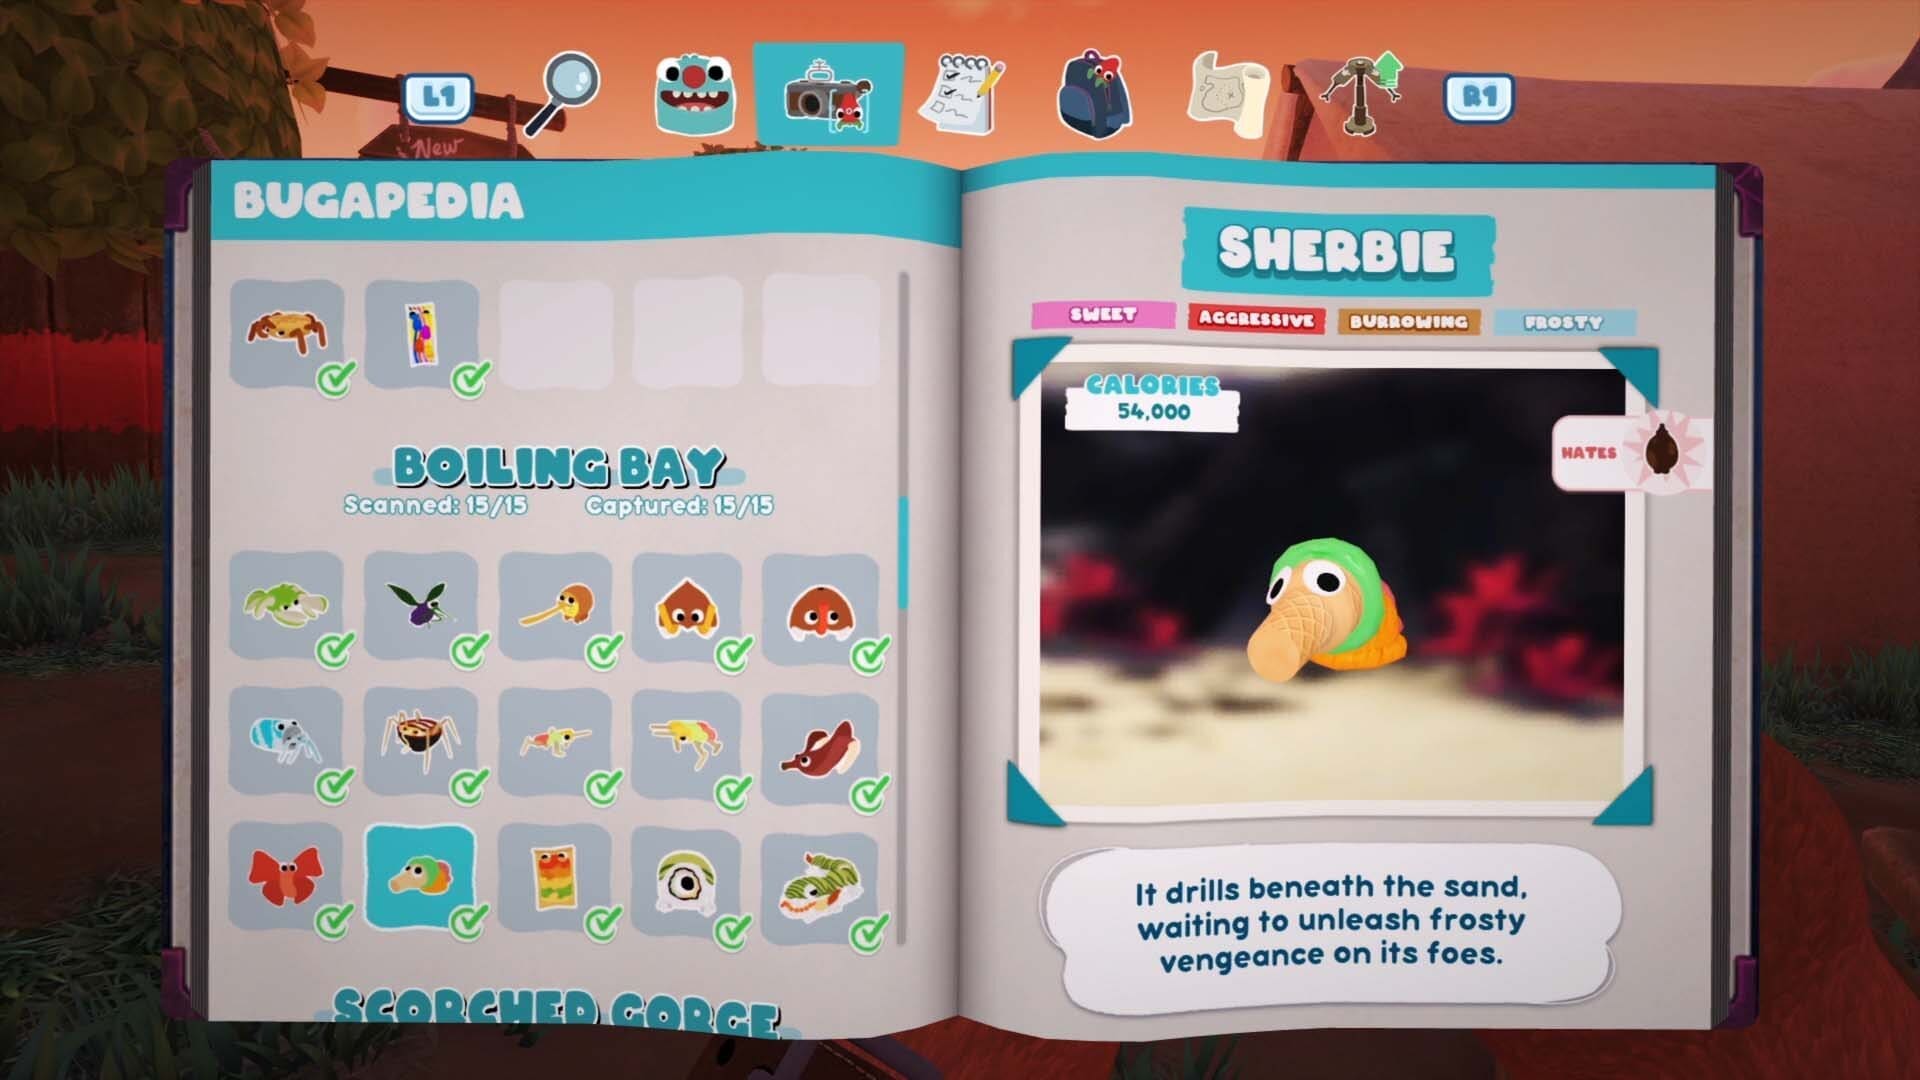
Sherbie
At the far end of the map. Use the Trip Line or the ball on the stream of lava close by to set the Sherbie on fire and stun it.
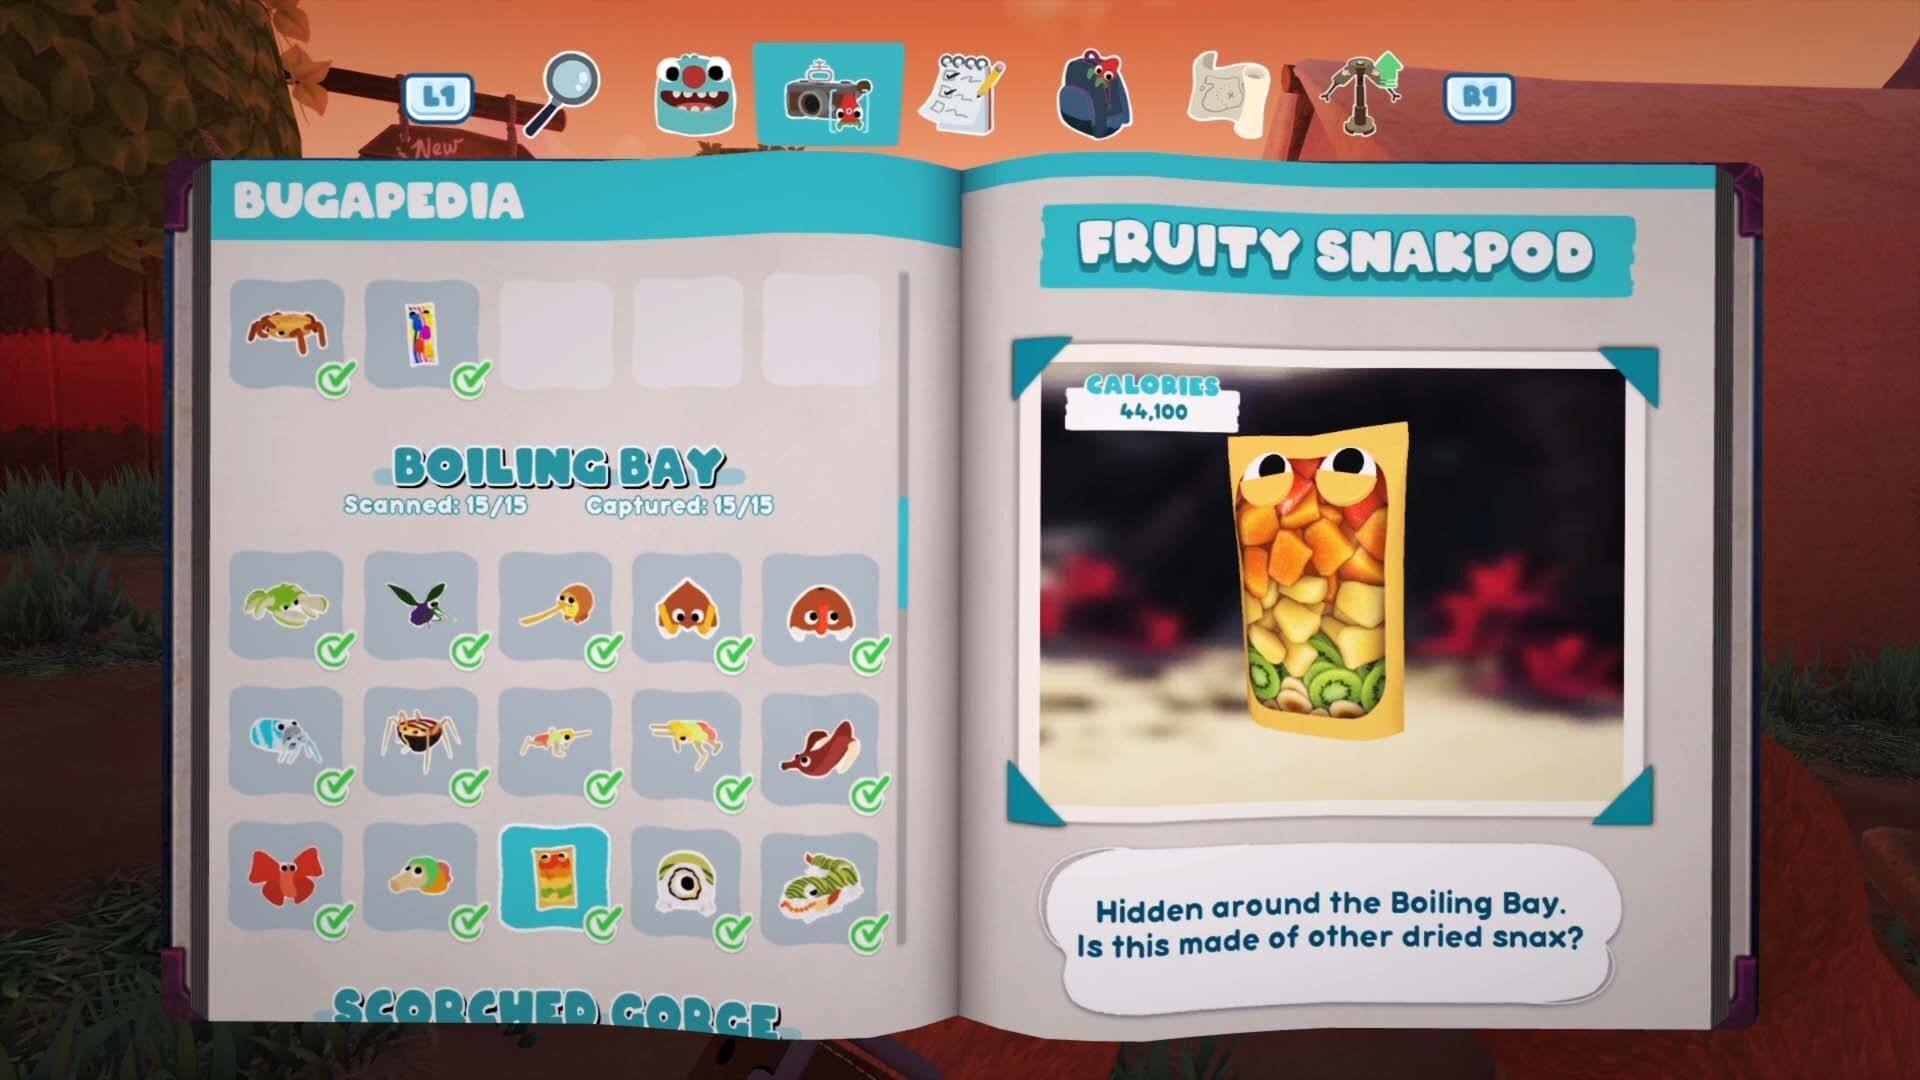
Fruity Snakpod
One can be found behind a tree directly left as you enter Boiling Bay.

Minimaki
The smaller part of the Megamaki, a Legendary Bugsnax that you’ll fight as part of Wiggle Wigglebottom’s side quests.
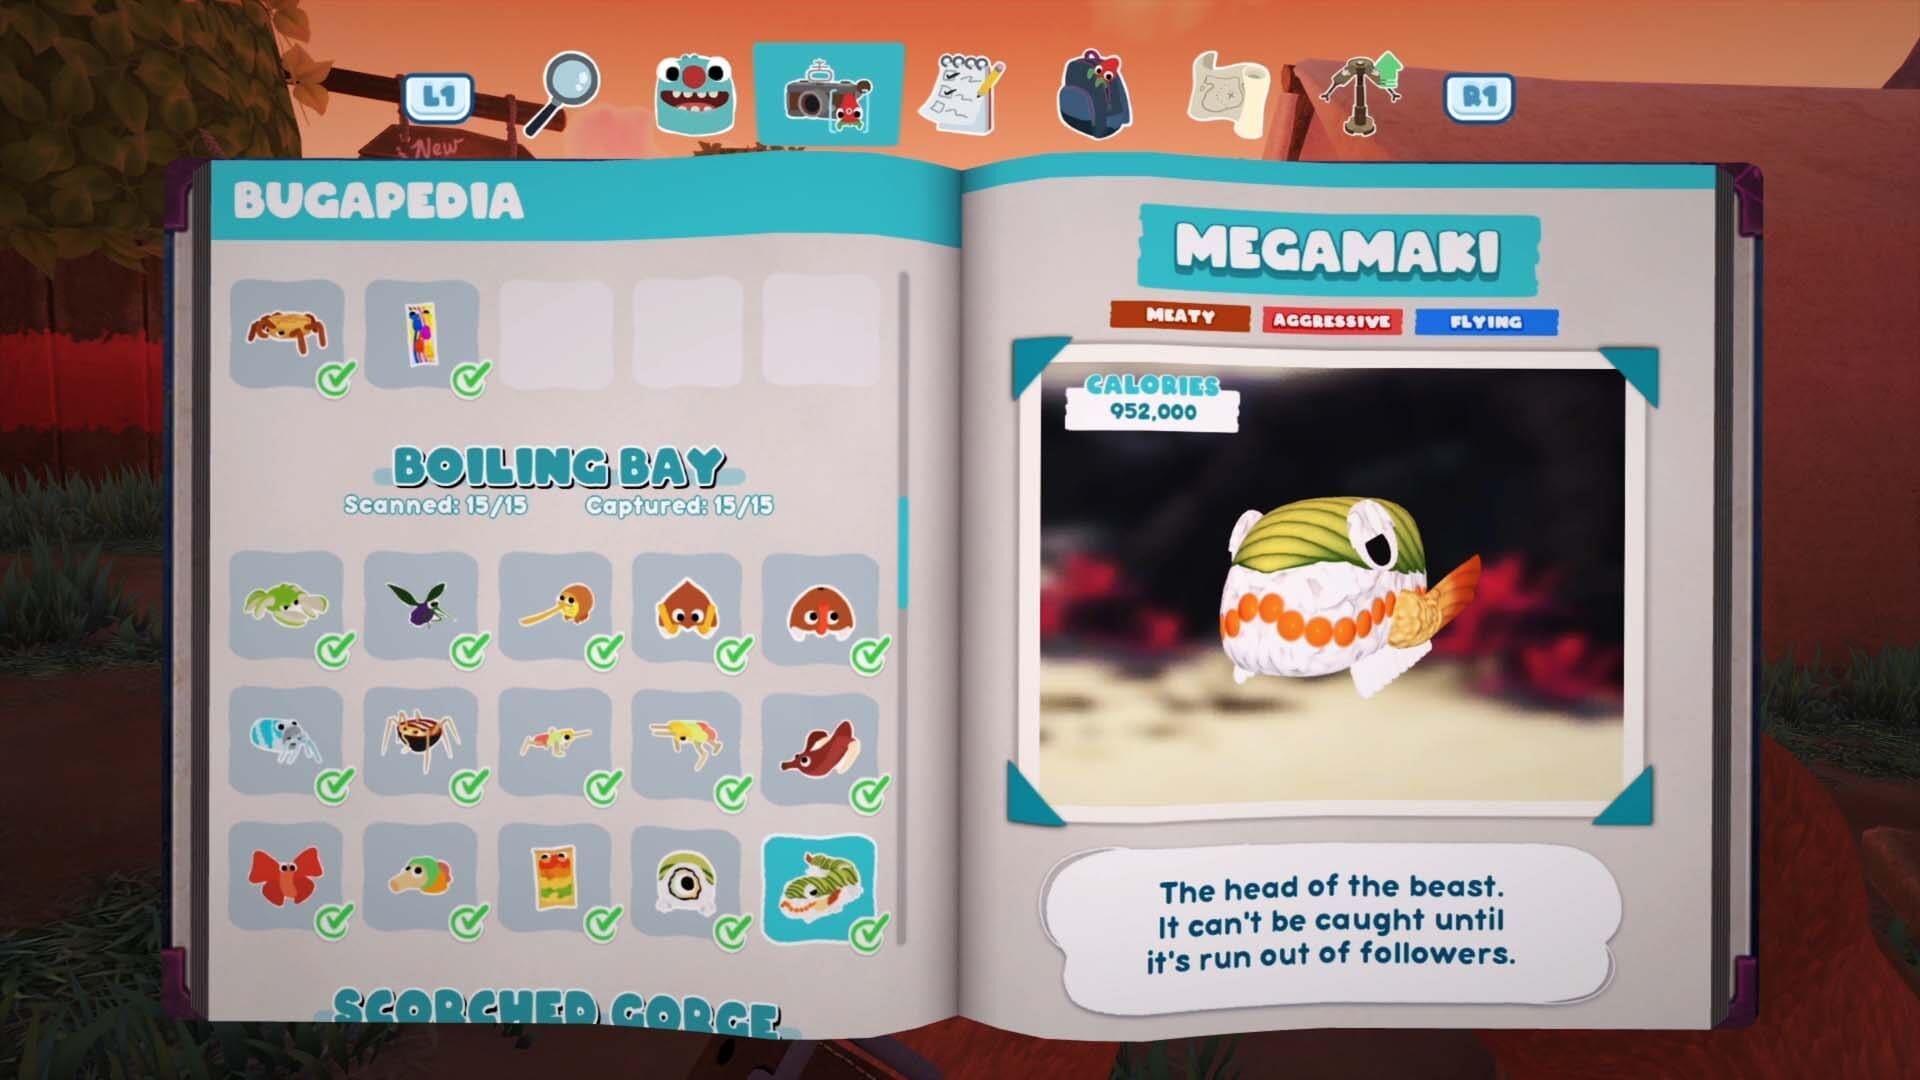
Megamaki
You’ll catch this Legendary Bugsnax as part of Wiggle’ssidwquests.
For more help with the Legendary Bugsnax check out this guide.
SIZZLIN’ SANDS
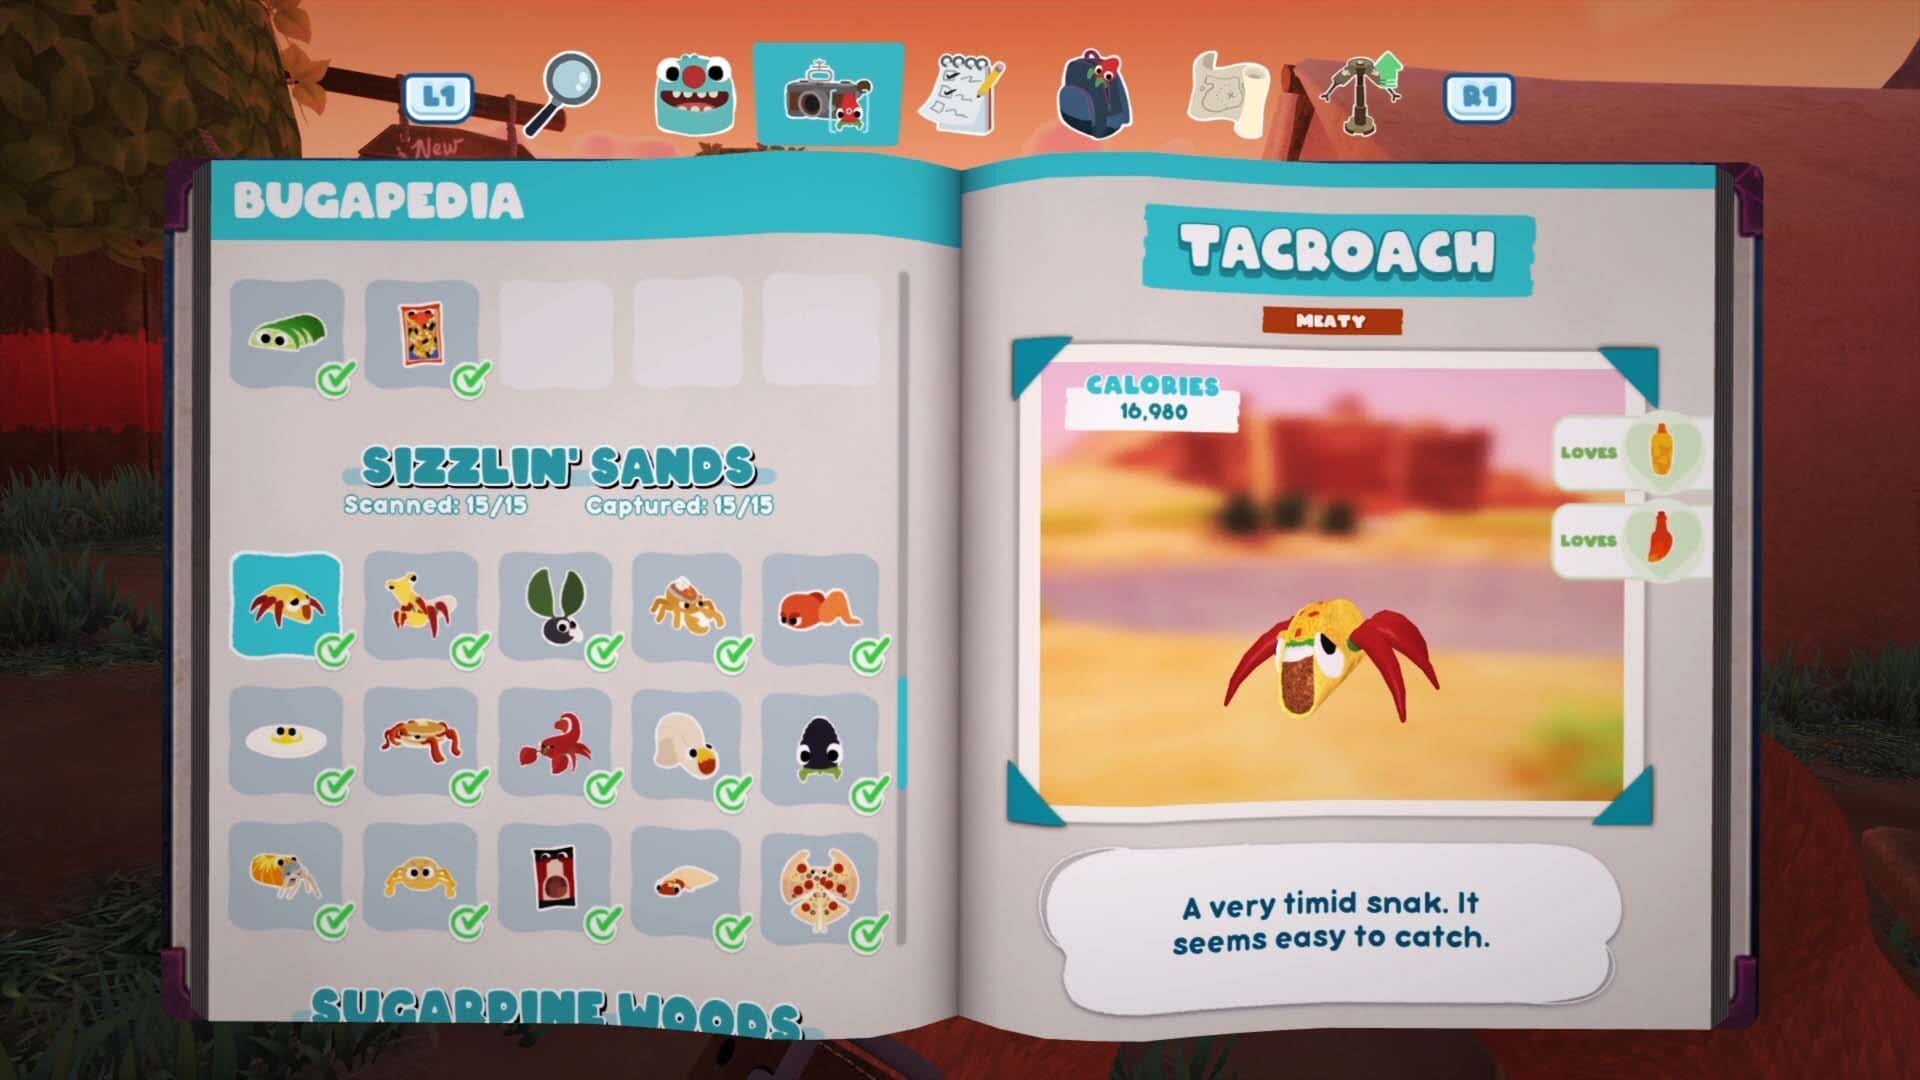
Tacroach
You’ll catch one of these as part of the main campaign.
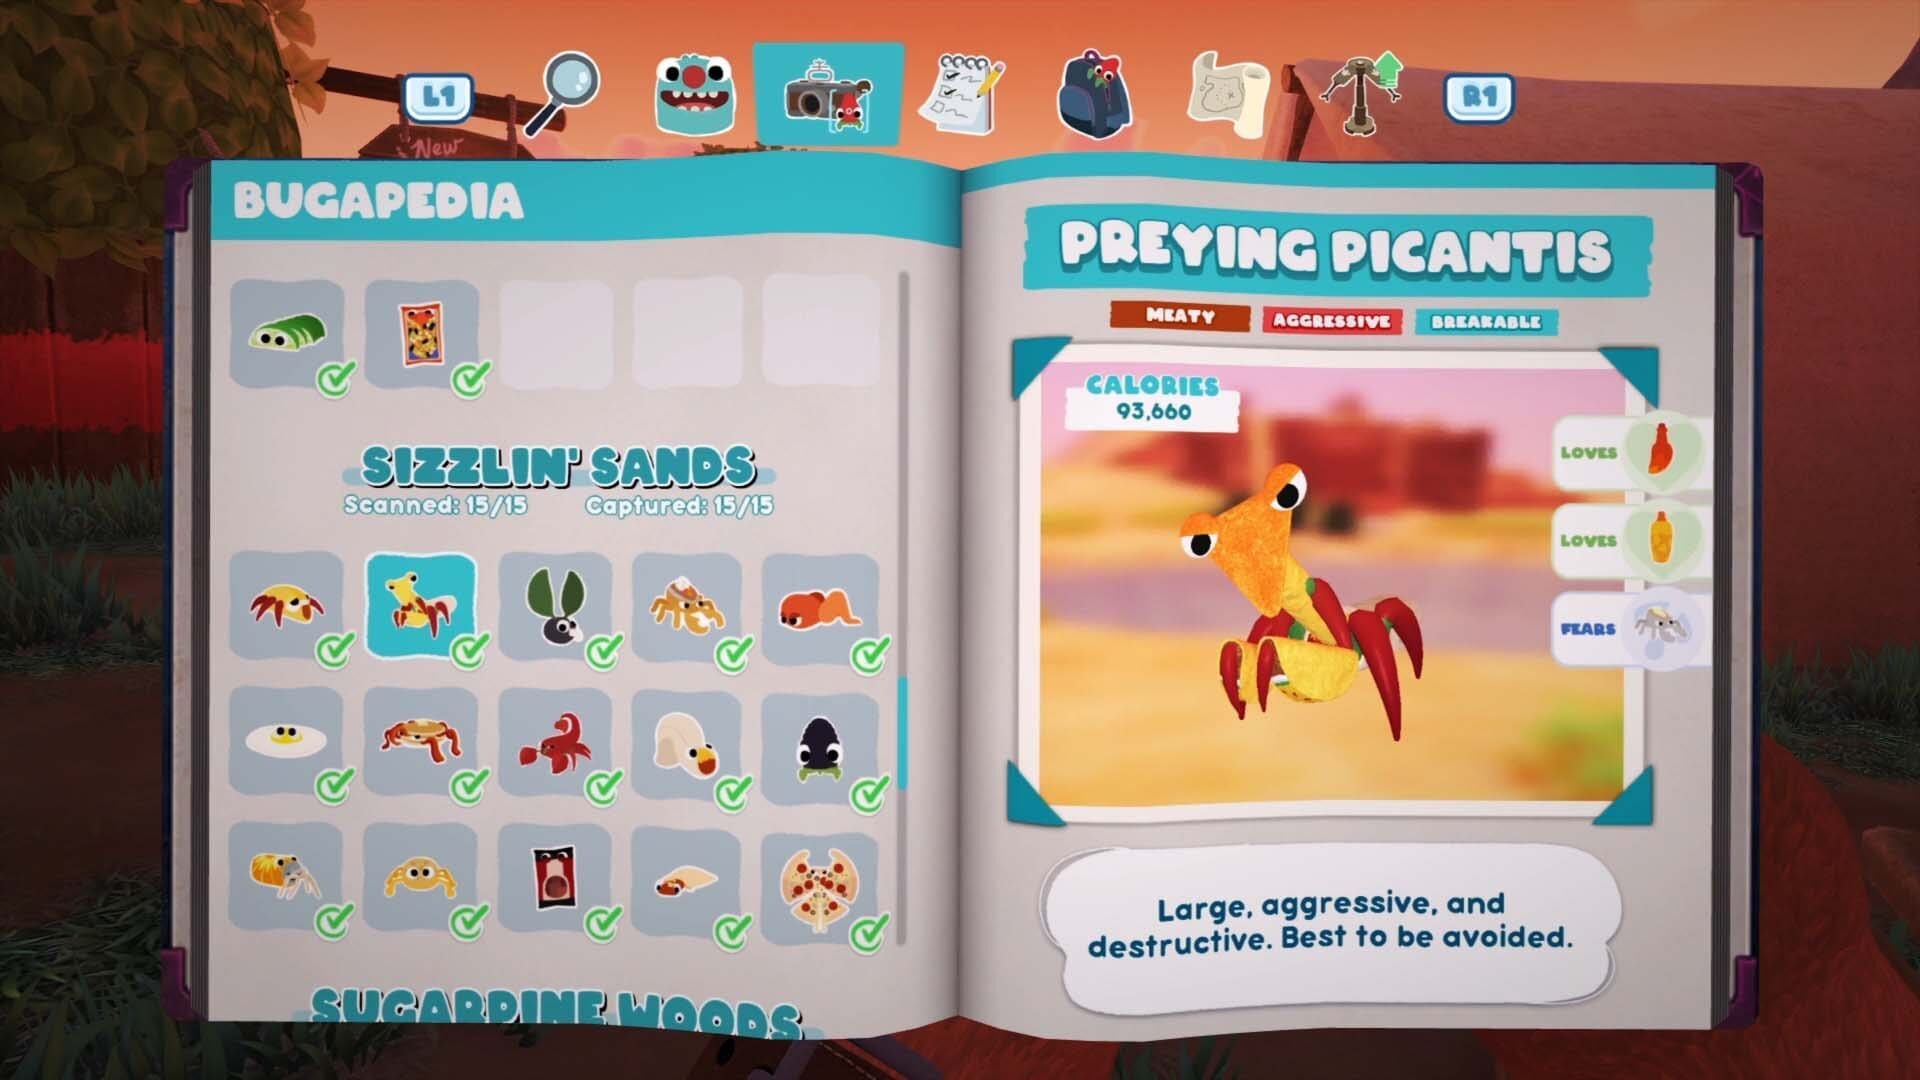
Preying Picantis
There’s one of these near the entrance to Sizzlin’ Sands that’s also close to the small lake. If you aggravate it and lead it towards the water and throw any of the sauces the Sodie D hates on the Preying Picantis, it’ll spray it with water and stun it.
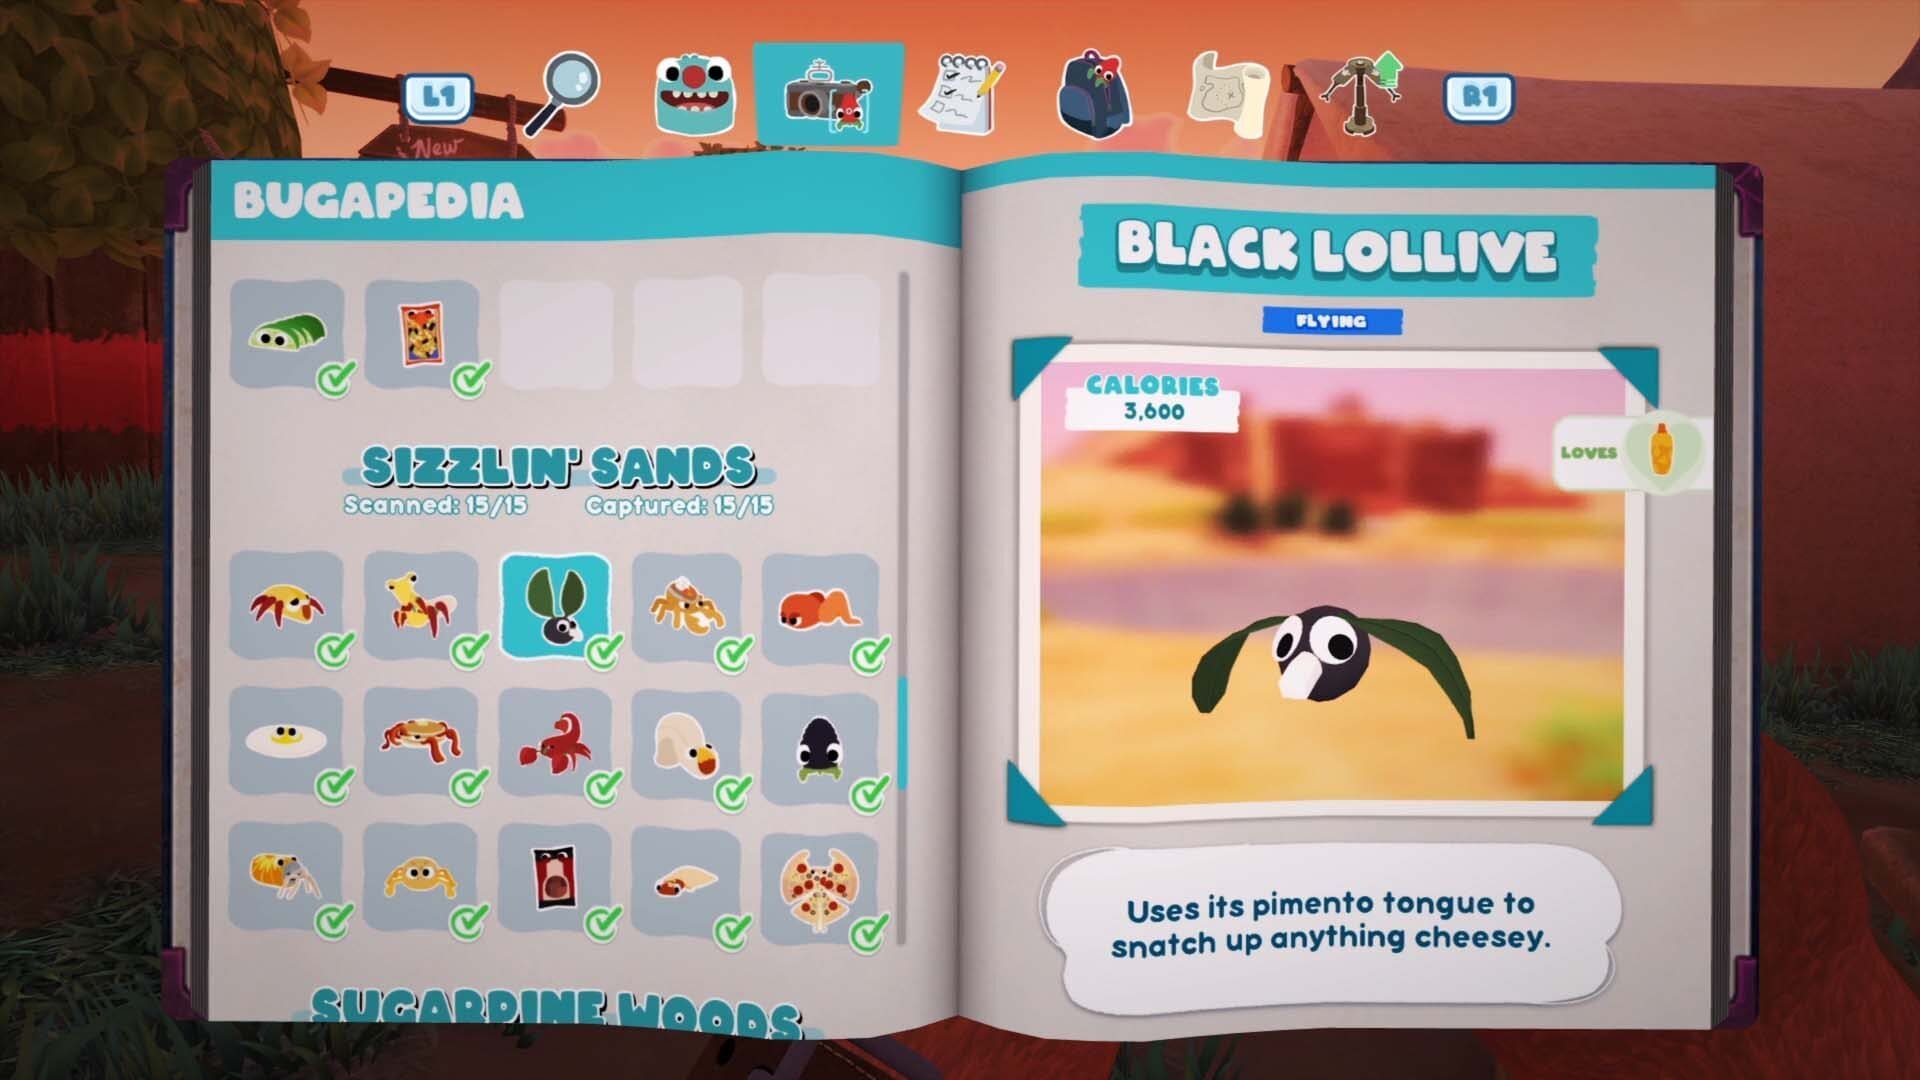
Black Lollive
Launch your trap at it using the launcher.

Loaded Spuddy
Same as other aggressive Bugsnax, trip it up.
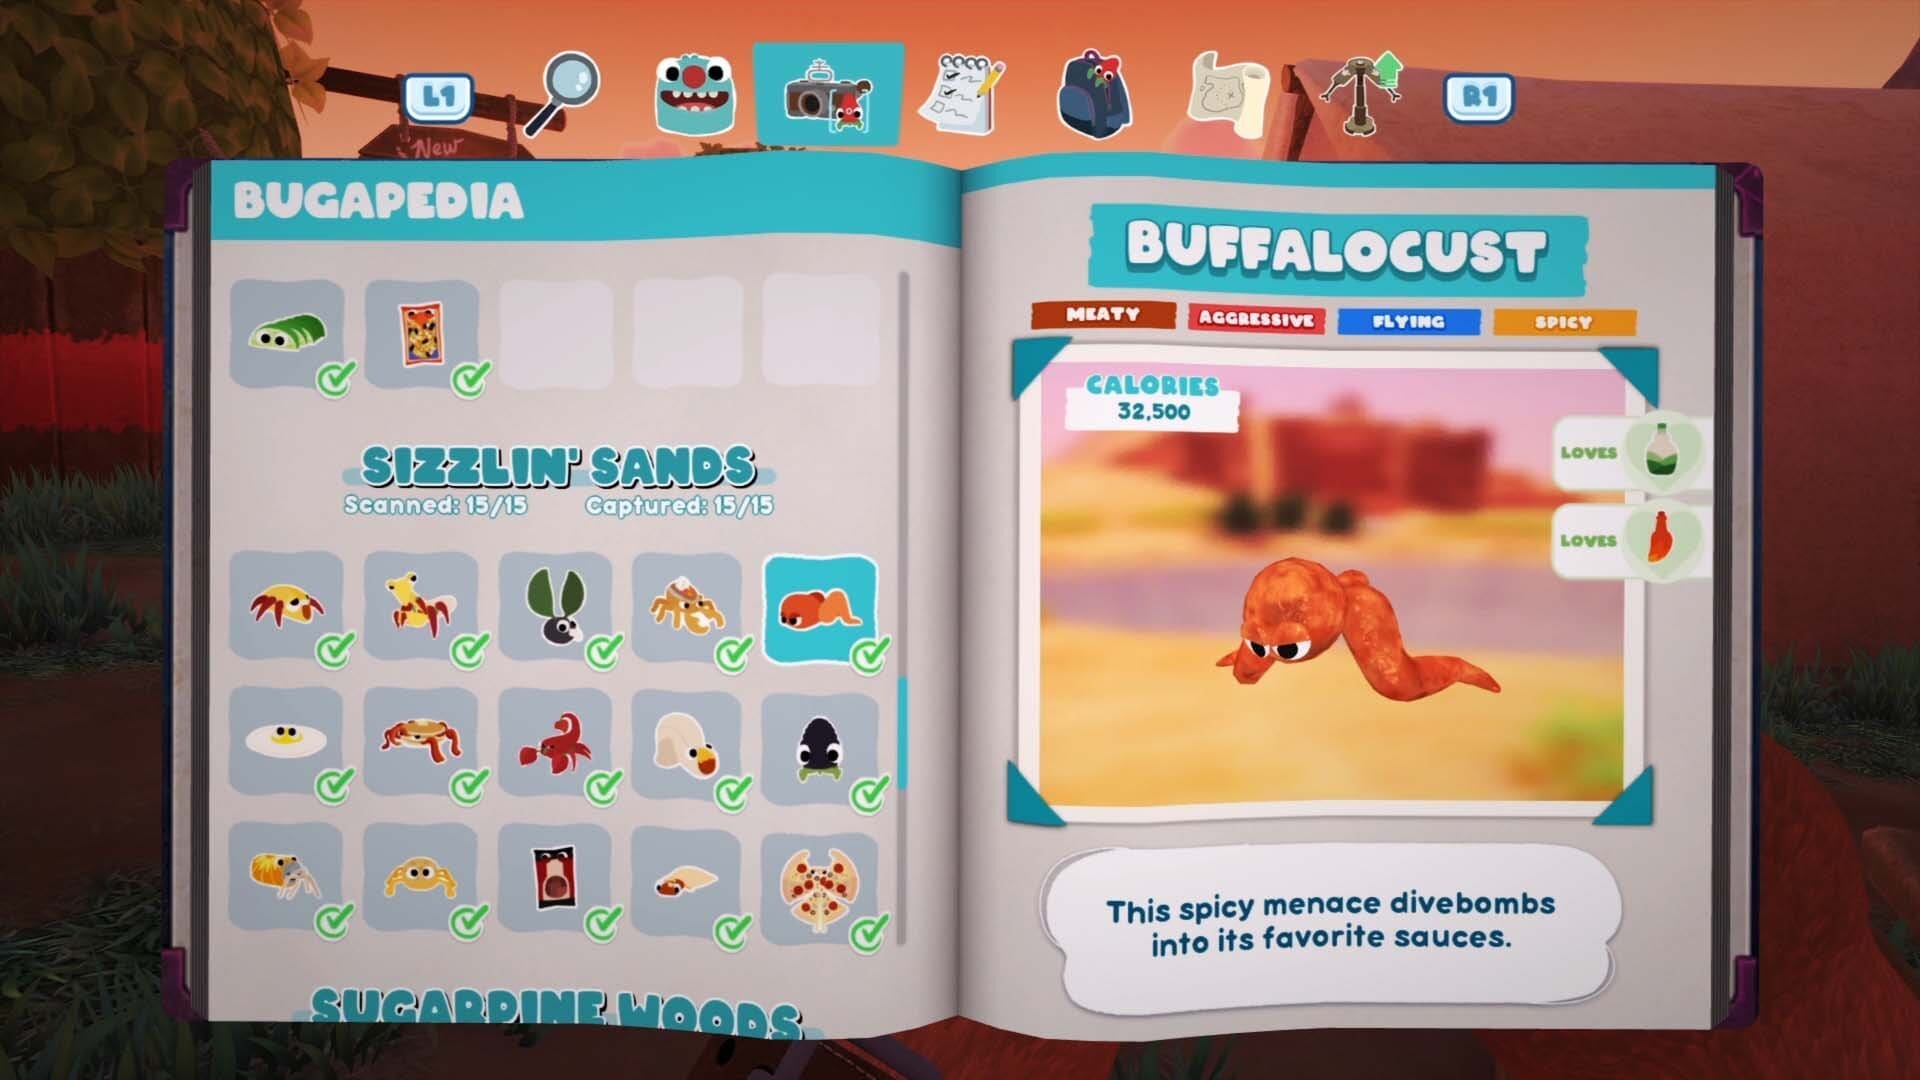
Buffalocust
Spray one of its favourite sauces on one of the other Bugsnax in the area and it’ll dive bomb it and knock itself out.
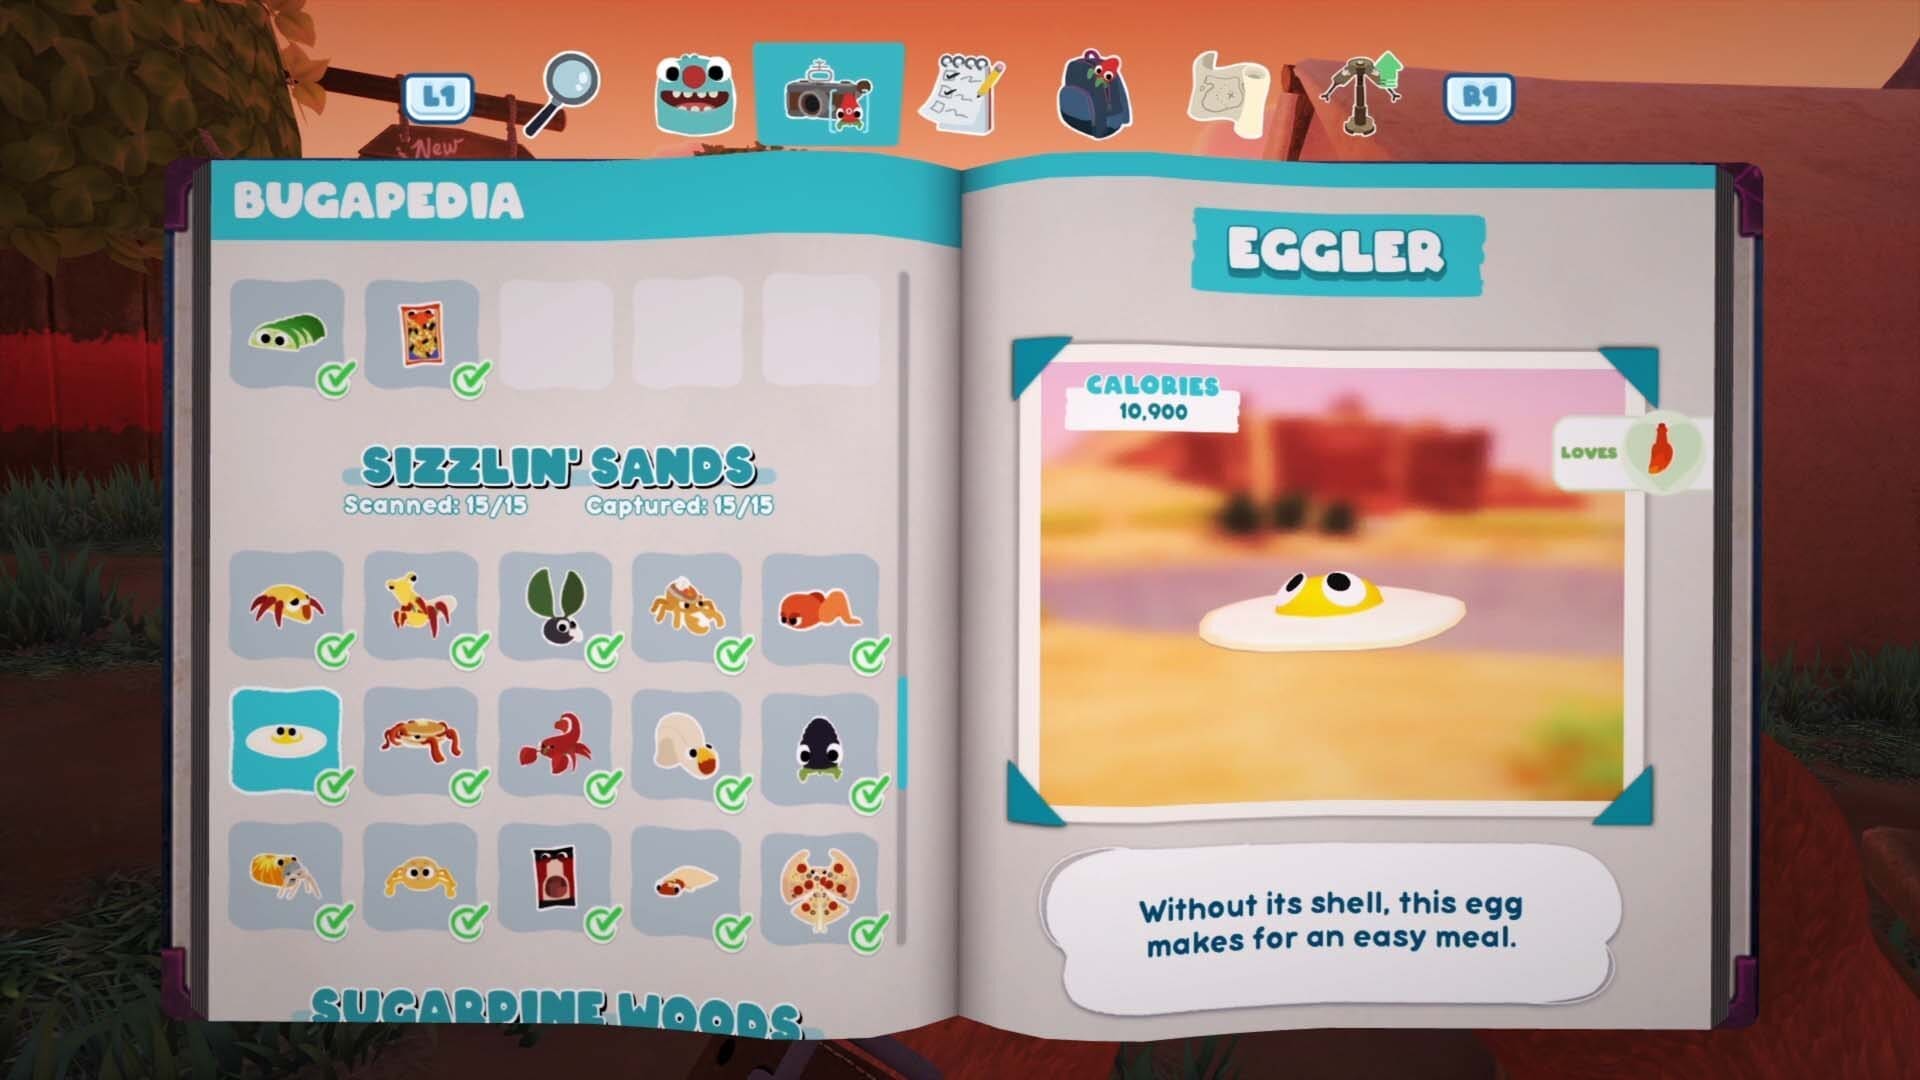
Eggler
You’ll catch one of these as part of the main campaign.
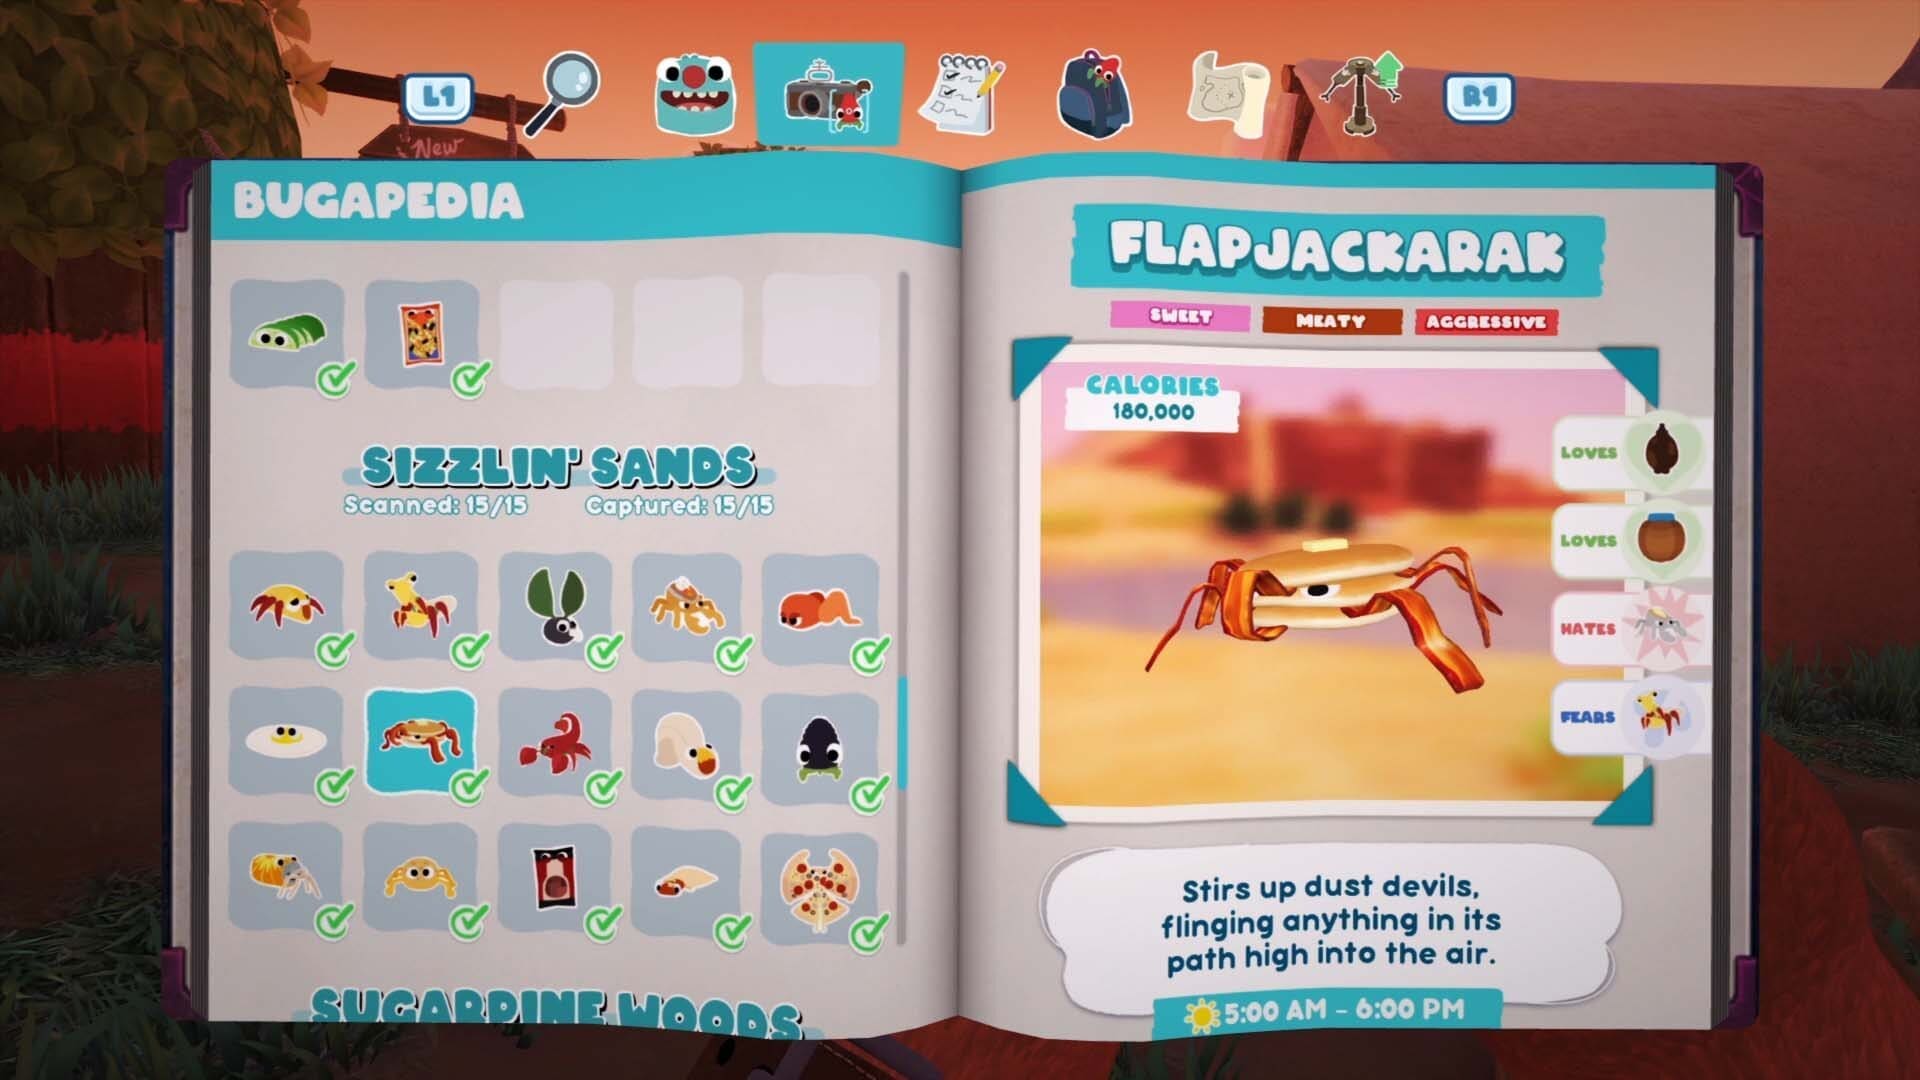
Flapjackarak
Only appears between 5 AM and 6 PM. Throw some sauce on it that’ll get one of the other aggressive Bugsnax in the area to attack it.

Scorpepper
Lead it off the wall near the far right area of the map using its favourite sauce towards the lake in the middle and get the Sodie to spray it.
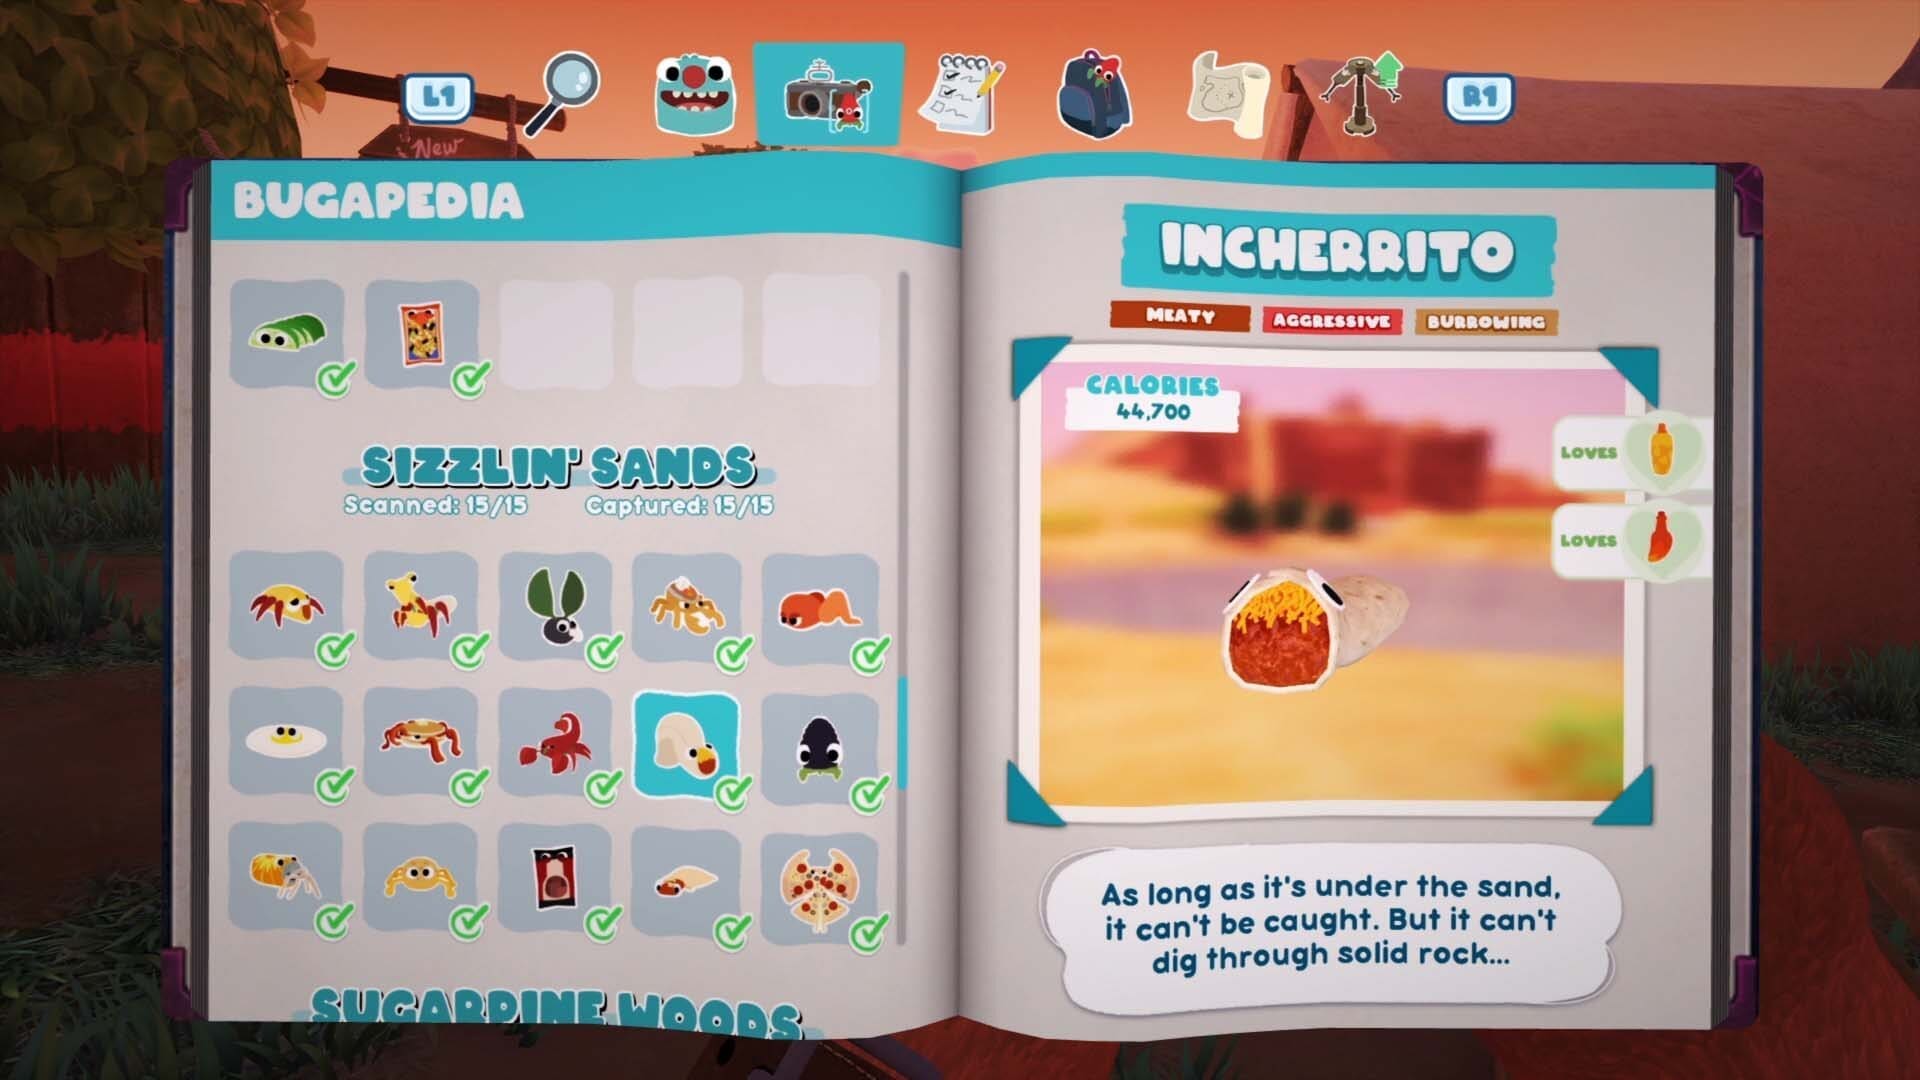
Incherrito
Found in the underground area you have to go to as part of the main campaign. If you place your trap on one of the rocks and then cover it in one of the Incherrito’s favourite sauces you’ll be able to trap it.

Black Razzby
You can find this in the underground area.
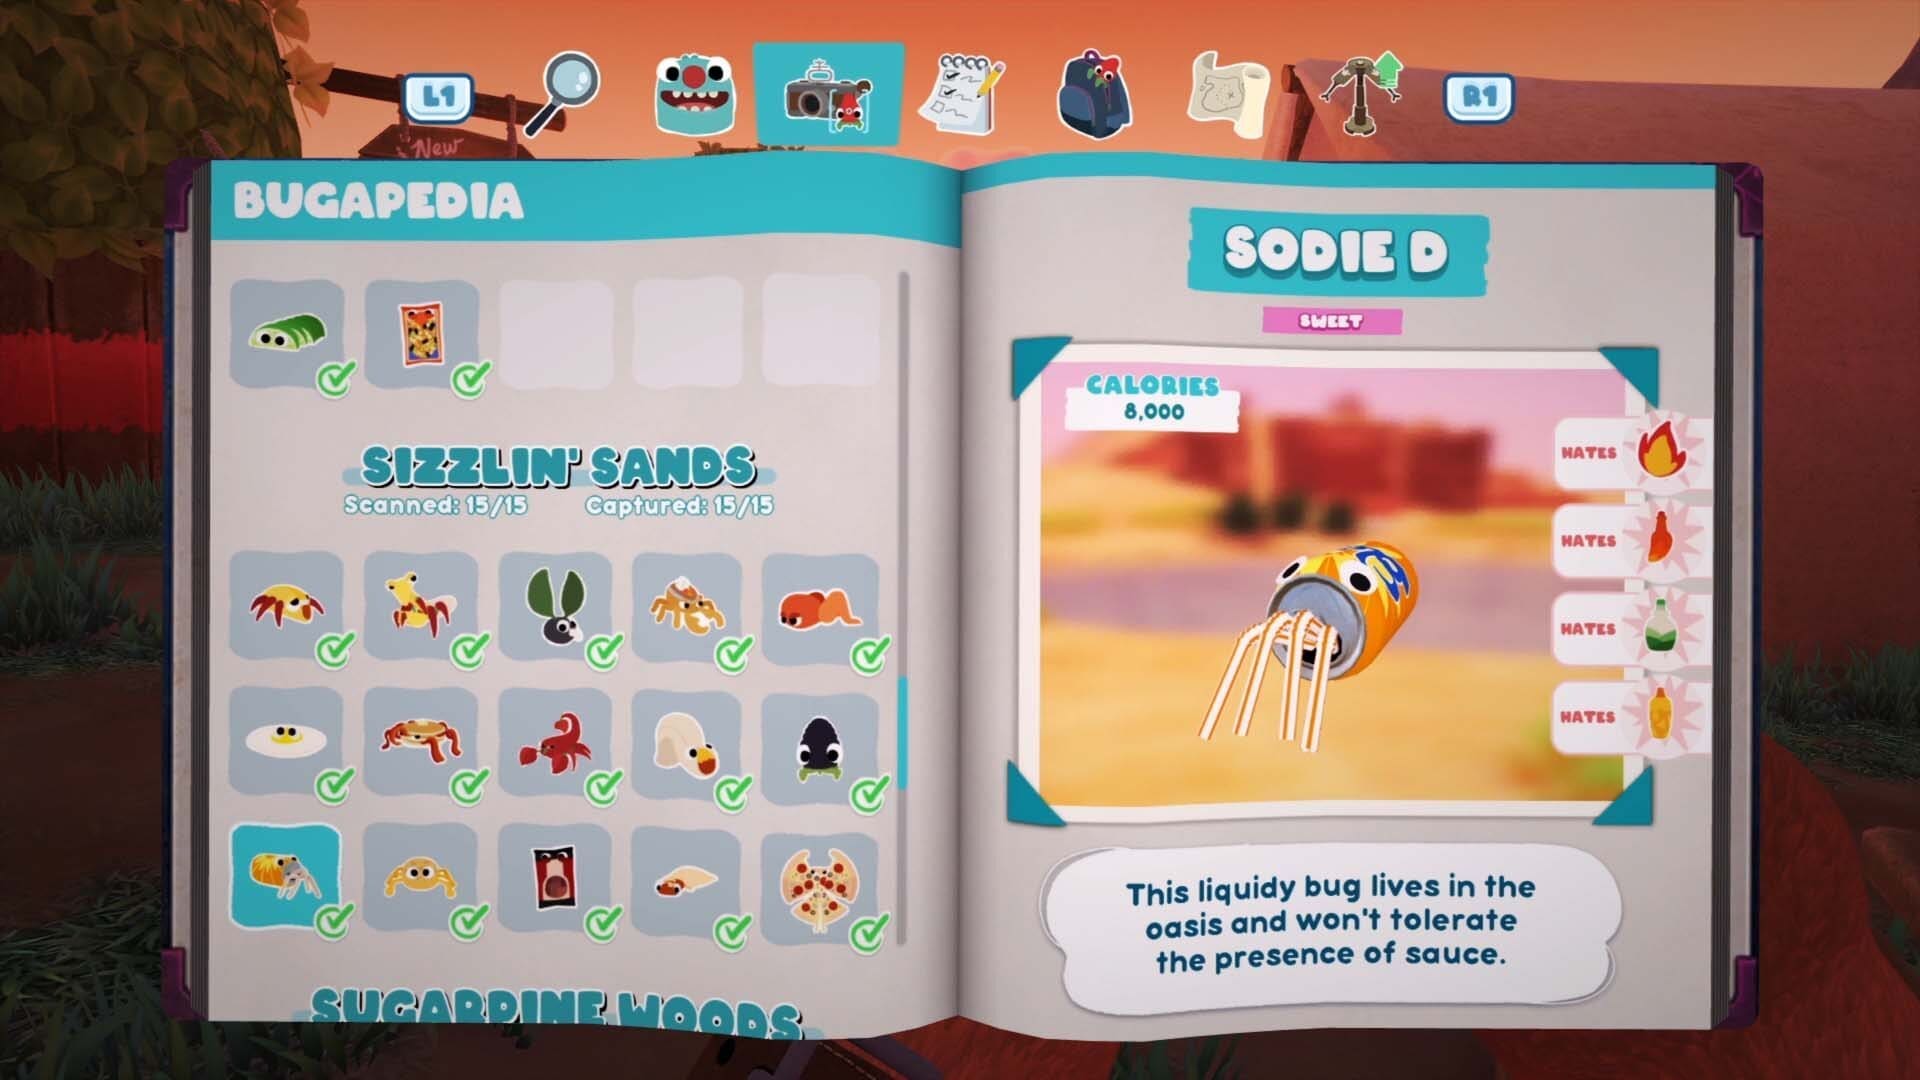
Sodie D
Throw your trap at it.
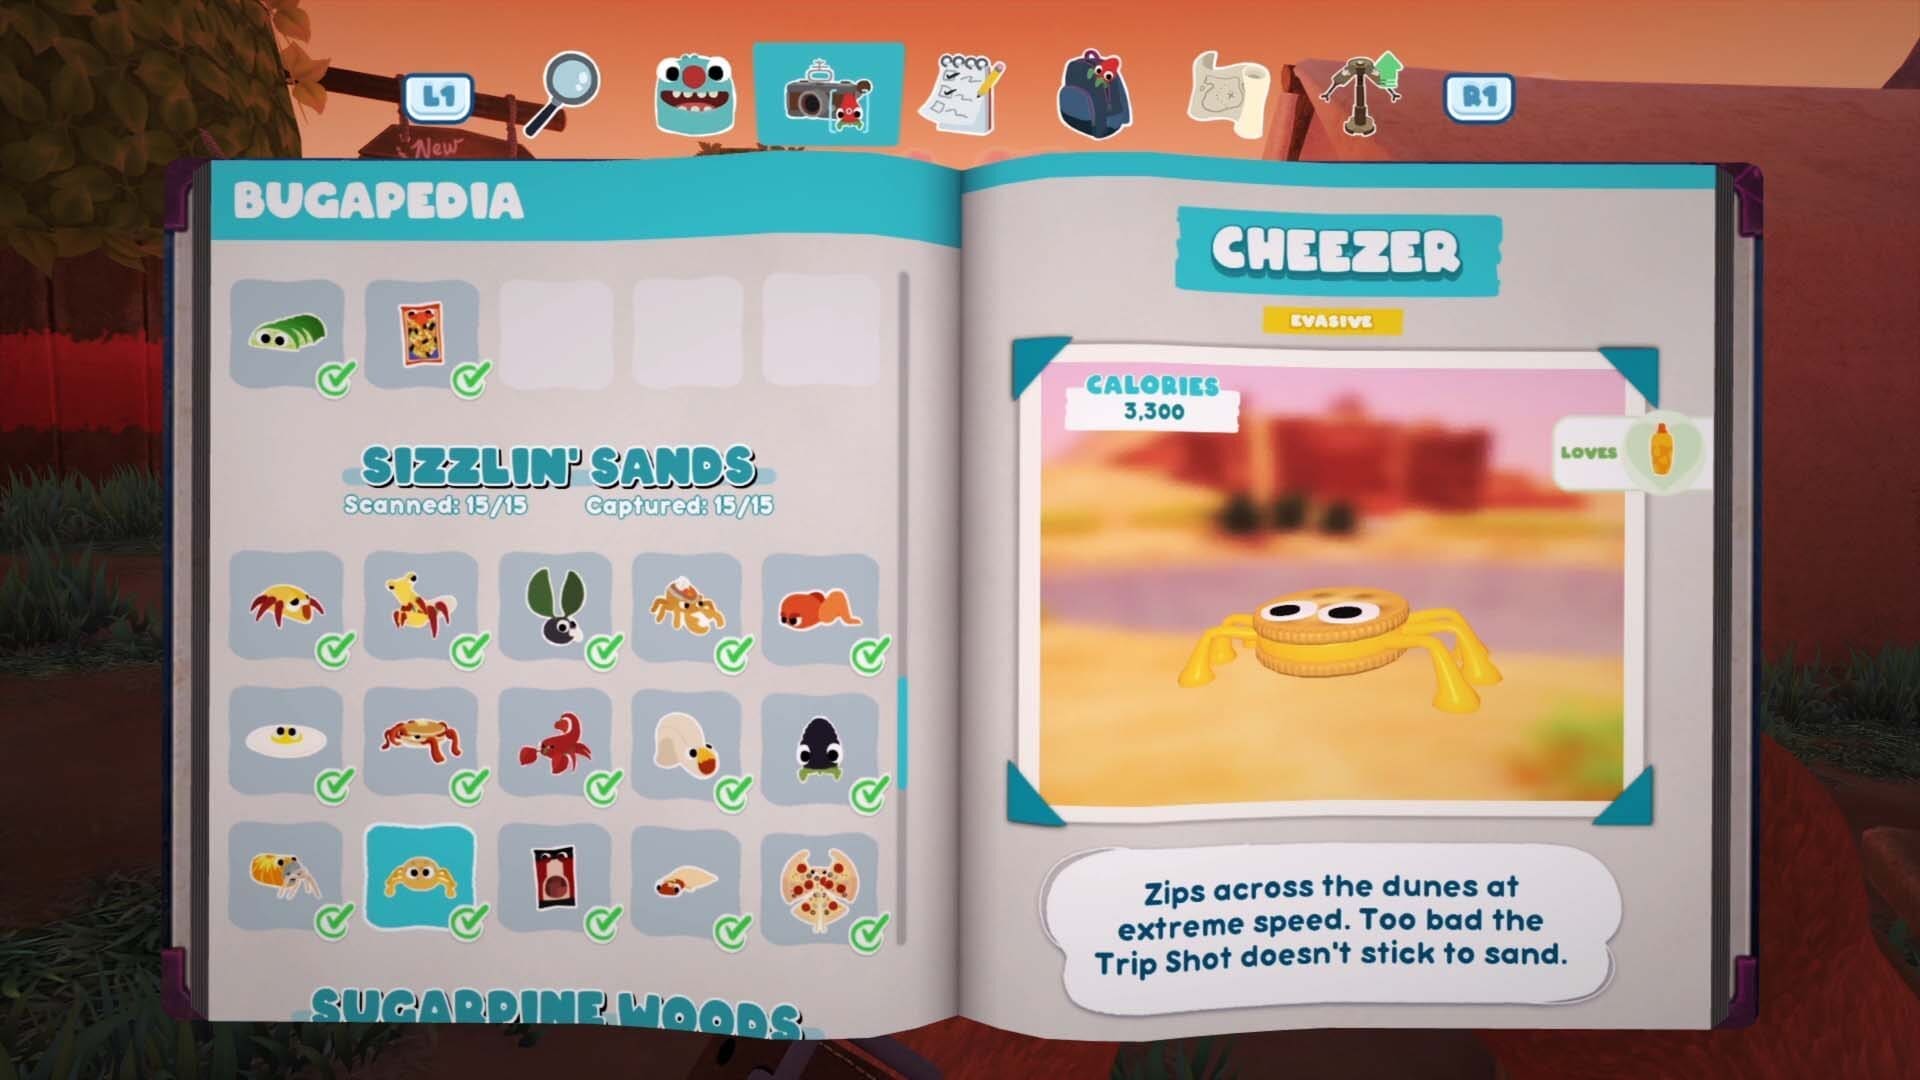
Cheezer
Travels around in a circle and you can find numerous places to use the Trip Shot to stun it.
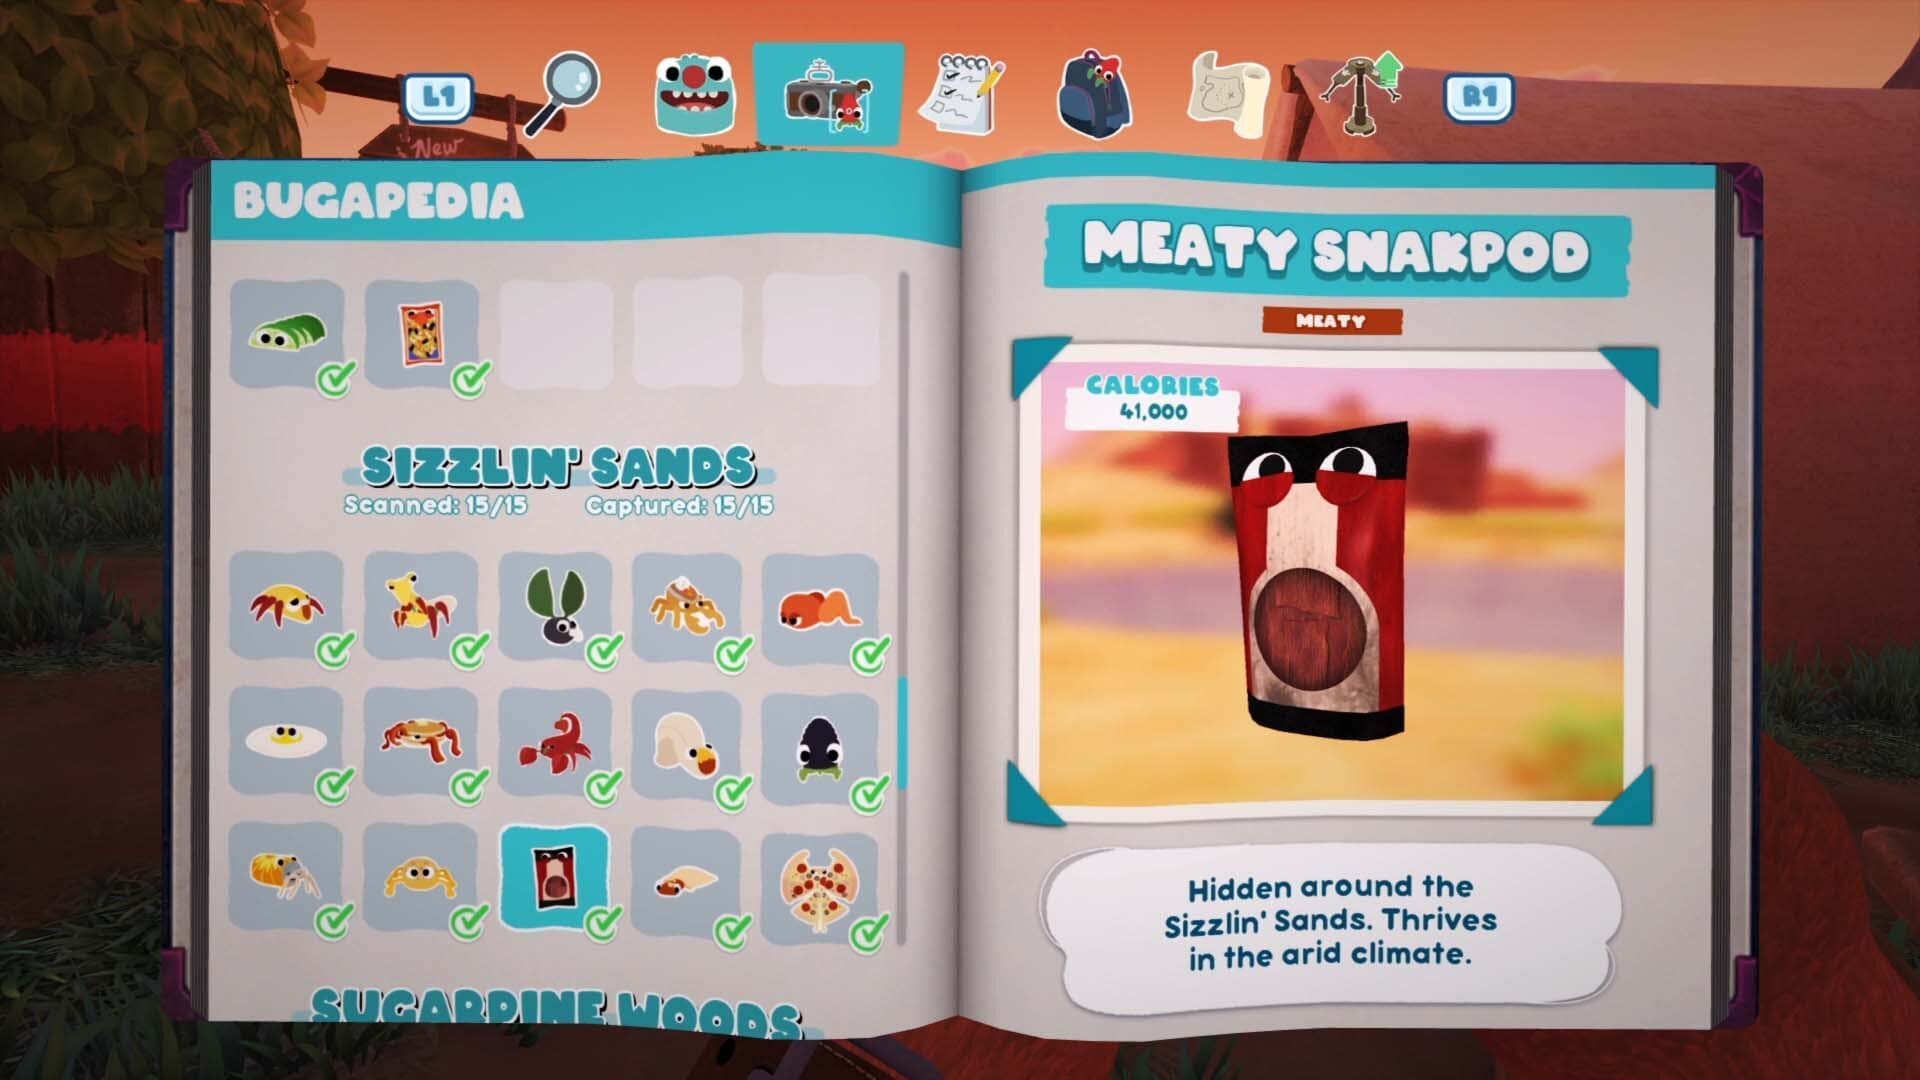
Meaty Snakpod
One’s located next to the cheese plant on top of the far-right area of the map.
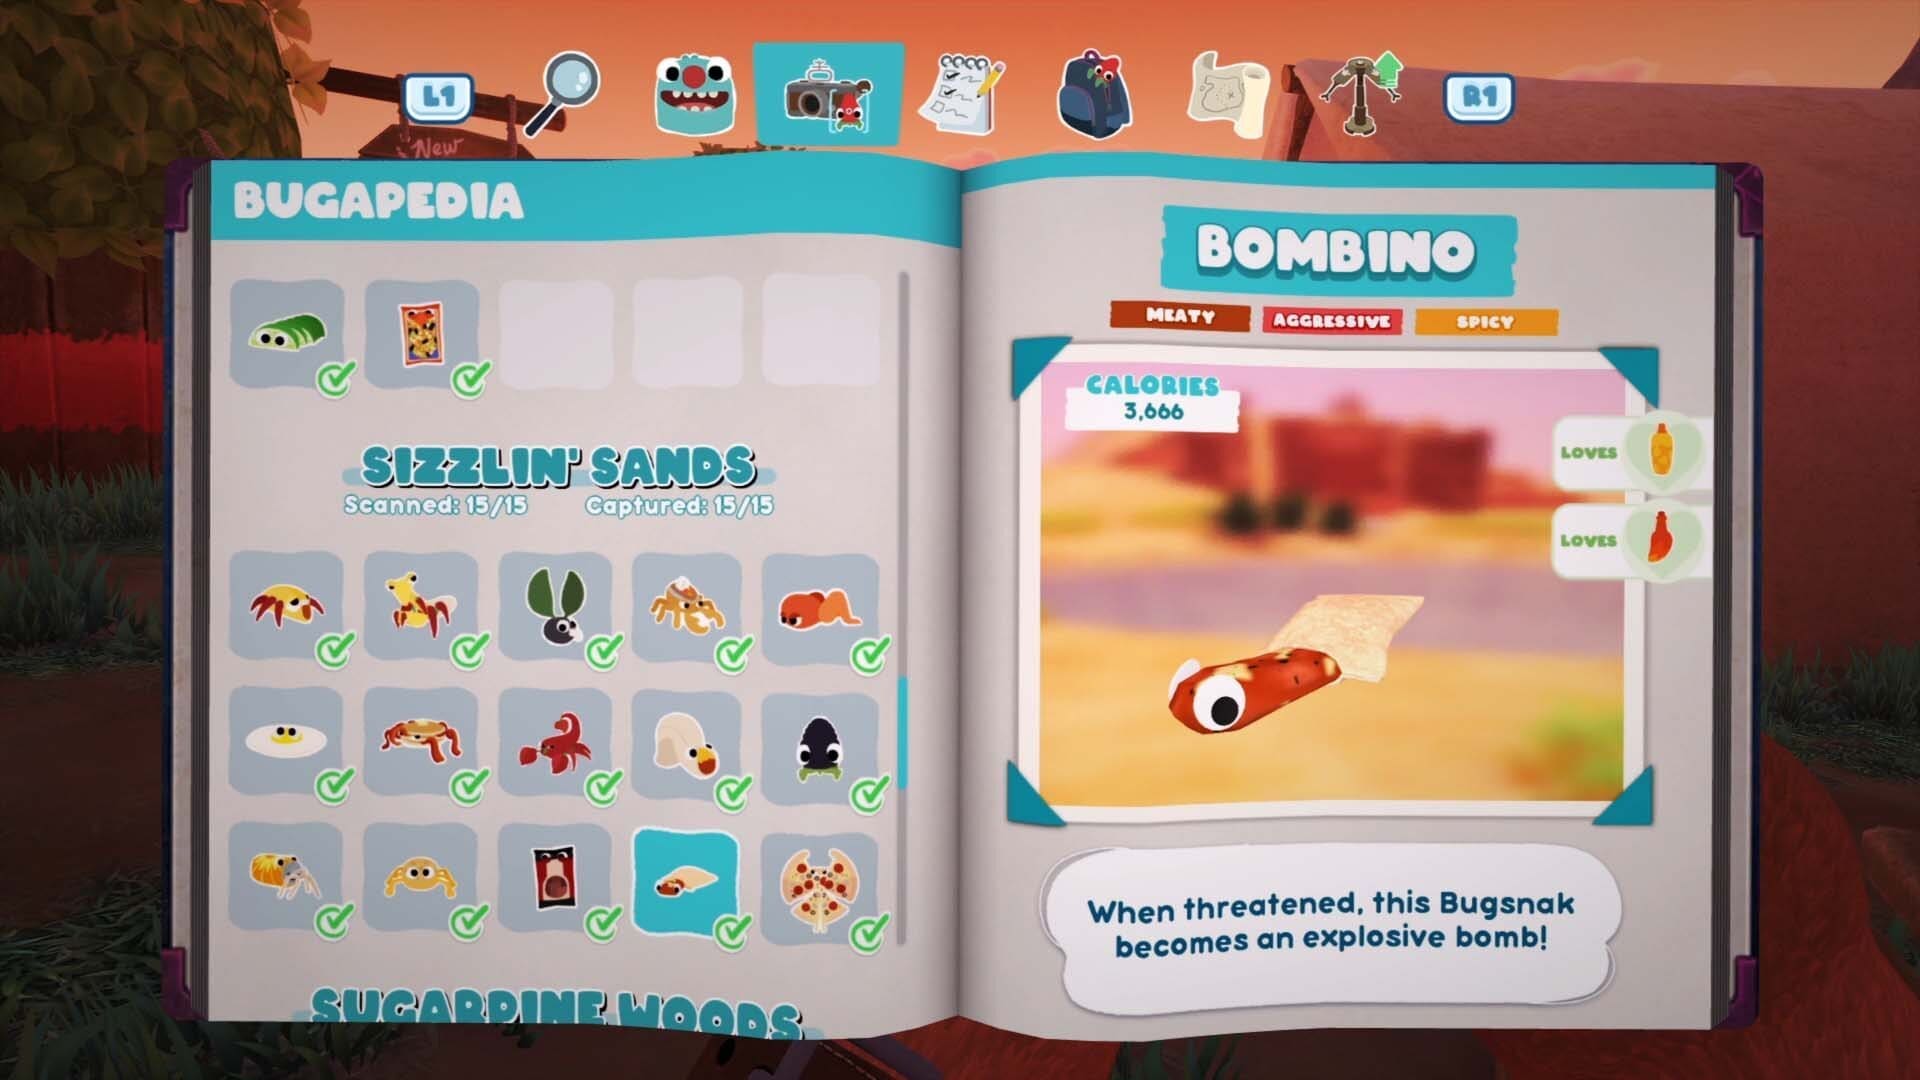
Bombino
You’ll only get access to these as part of the Mothza Supreme questline (see below). Make sure you capture one while you’re doing the quest/fight against the Mothza Supreme.
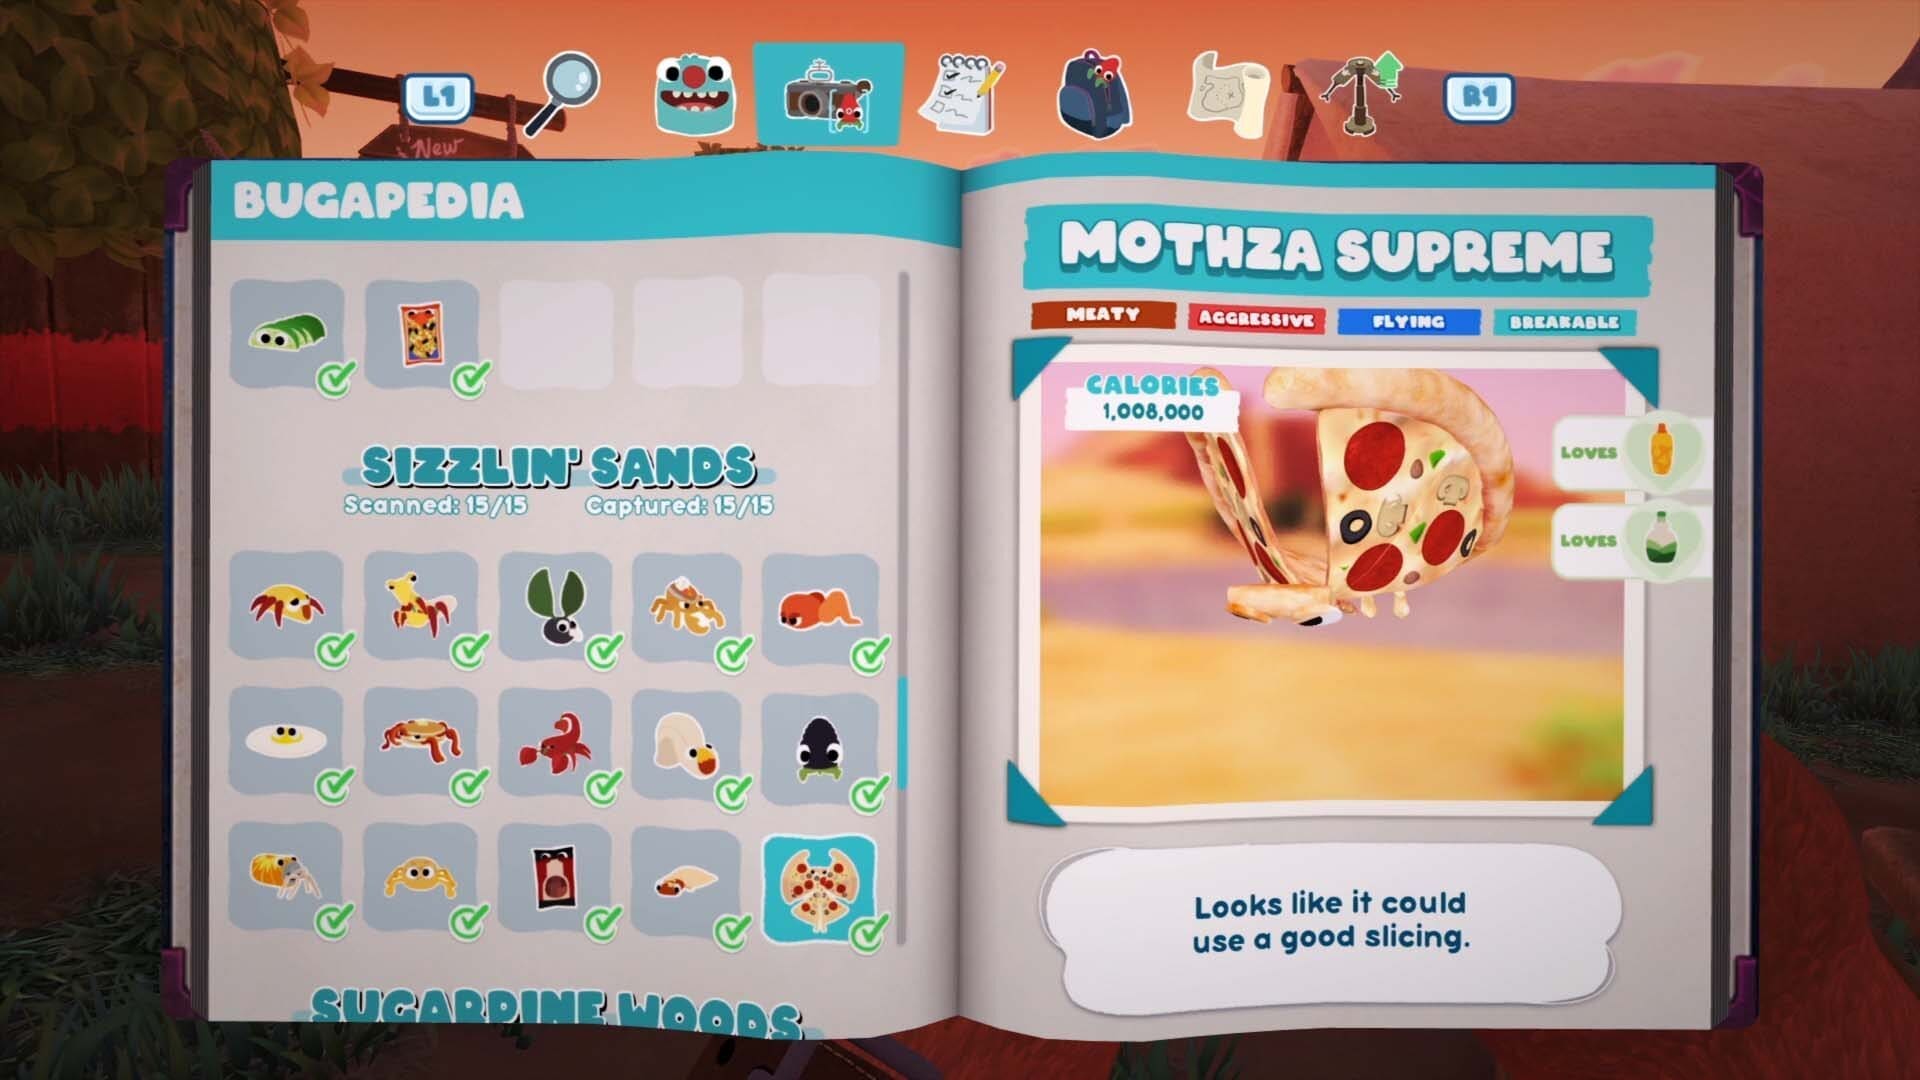
Mothza Supreme
You’ll face-off against the Mothza Supreme while doing the final quest for Cromdo Face. Although you can see it flying in the air at all points while in Sizzlin’ Sands, there’s no way to capture it until that quest begins.
For more help with the Legendary Bugsnax check out this guide.
SUGARPINE WOODS

Kwookie
Zips around several areas and you can stop it with the Trip Line.
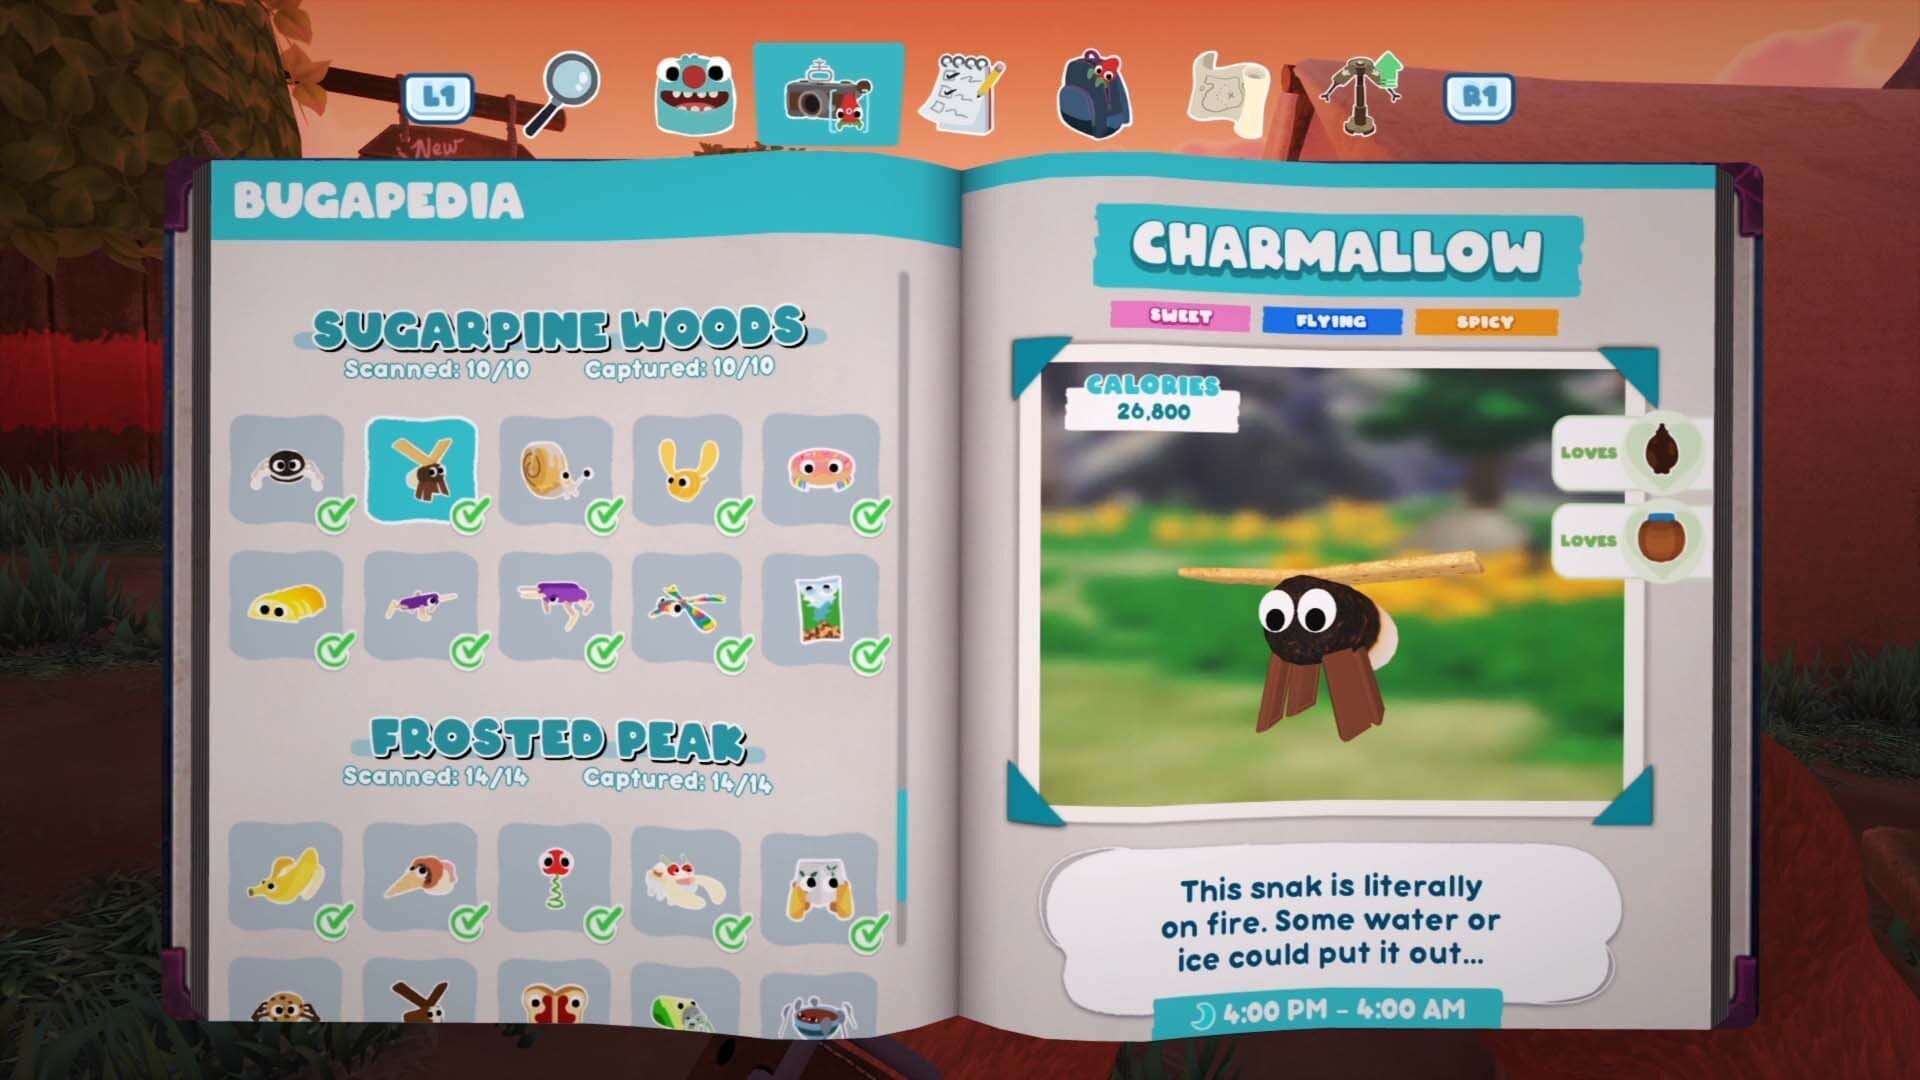
Charmallow
These appear only between 4 PM and 4 AM and always near the Big Bopsicles. If you throw one of its favourite sauces on the Bopsicle it’ll be stunned and you’ll be able to capture it.

Cinnasnail
You’ll catch one of these as part of the main campaign.

Hunnabee
You’ll catch one of these as part of the main campaign.
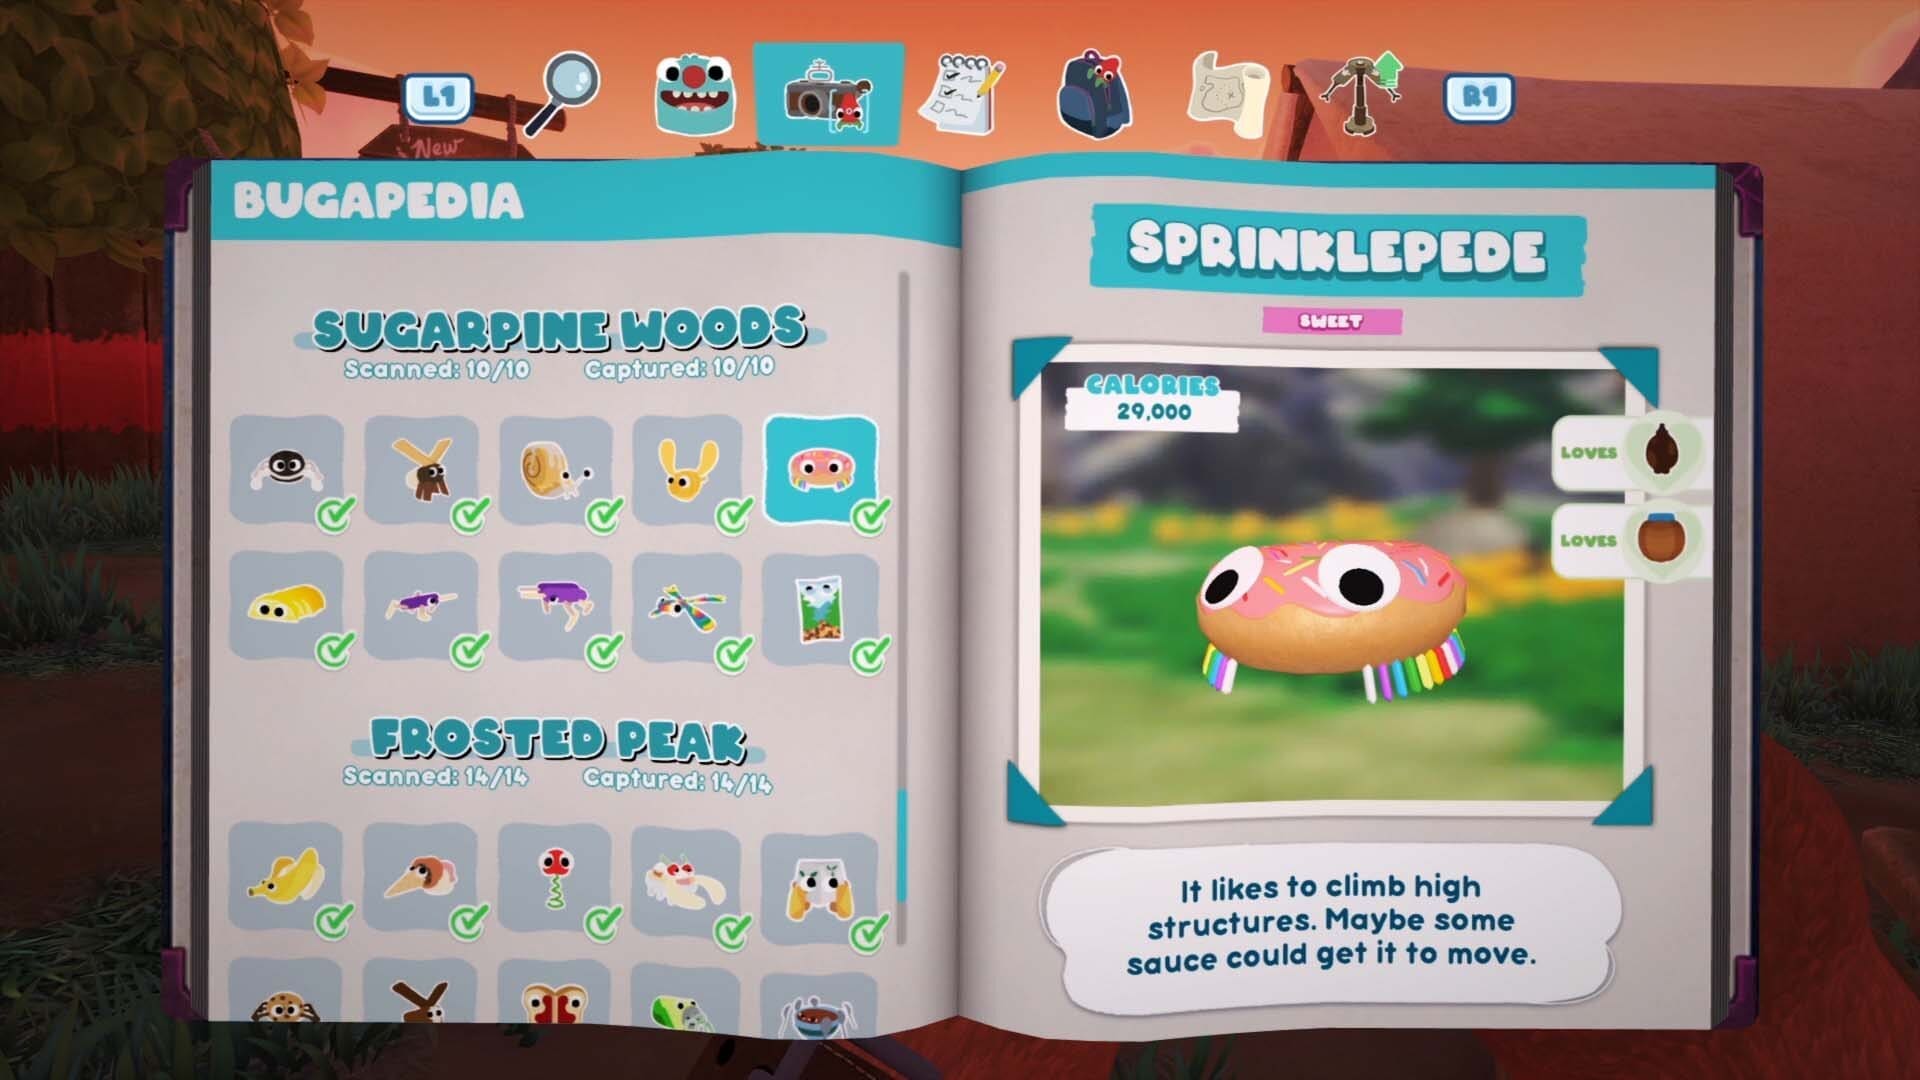
Sprinklepede
It hangs off the side of the tower where you get the Trip Line from. If you launch your trap at it you can capture it on the side of the tower.
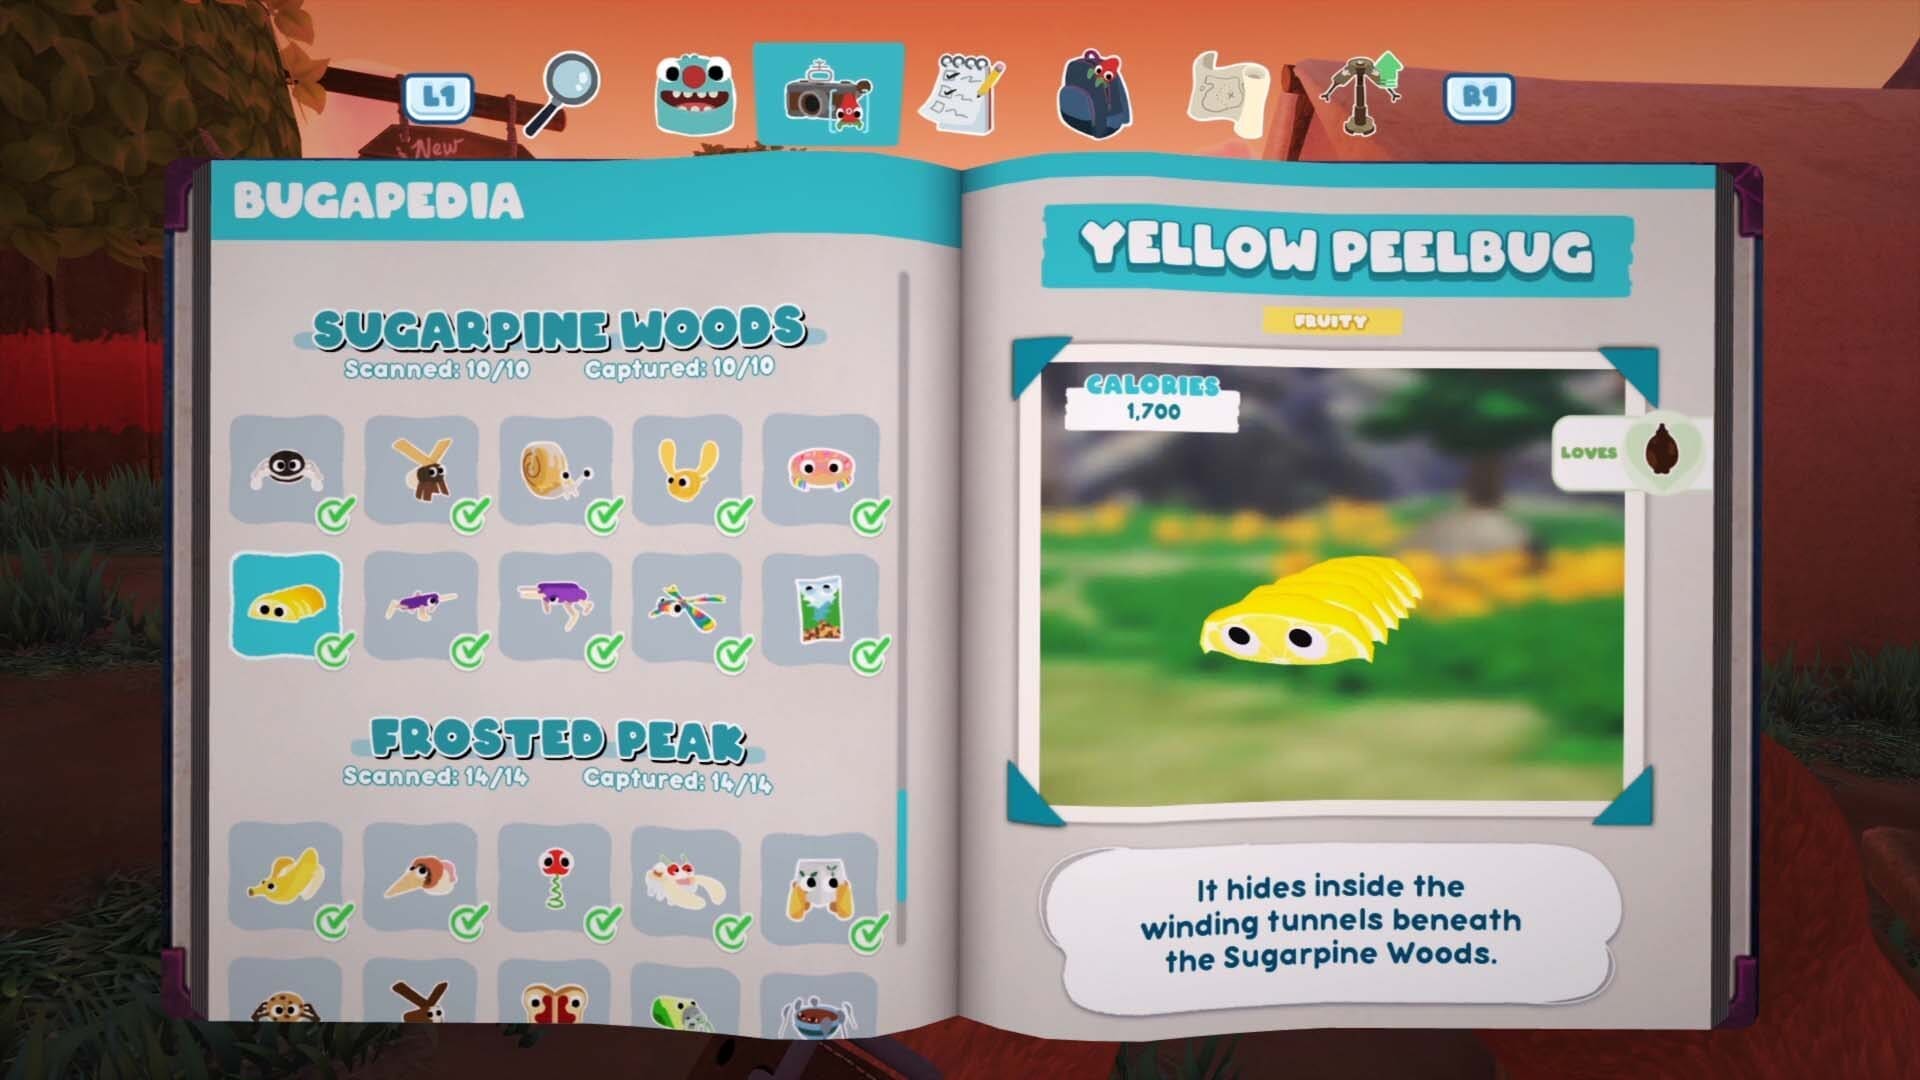
Yellow Peelbug
There’s a hole outside of Cromdo’s house in the middle of the map. You can force it out with the ball like the others in the game.

Bopsicle
If you send a Charmallow at a Big Bopsicle it’ll catch on fire and eventually explode into two Bopsicles. You can then capture them simply using your trap.

Big Bopsicle
To capture the Big Bopsicle lure a Charmallow into it and then use the Trip Wire to trip it up before it explodes.

Rainbow Sweetiefly
These only appear between 4 AM and 4 PM but like the other Sweetiefly’s you just need to wait for it to settle down and then launch your trap at it.

Nutty Snakpod
One of these Snakpods can be found in a cave at the bottom area of the map.
FROSTED PEAK
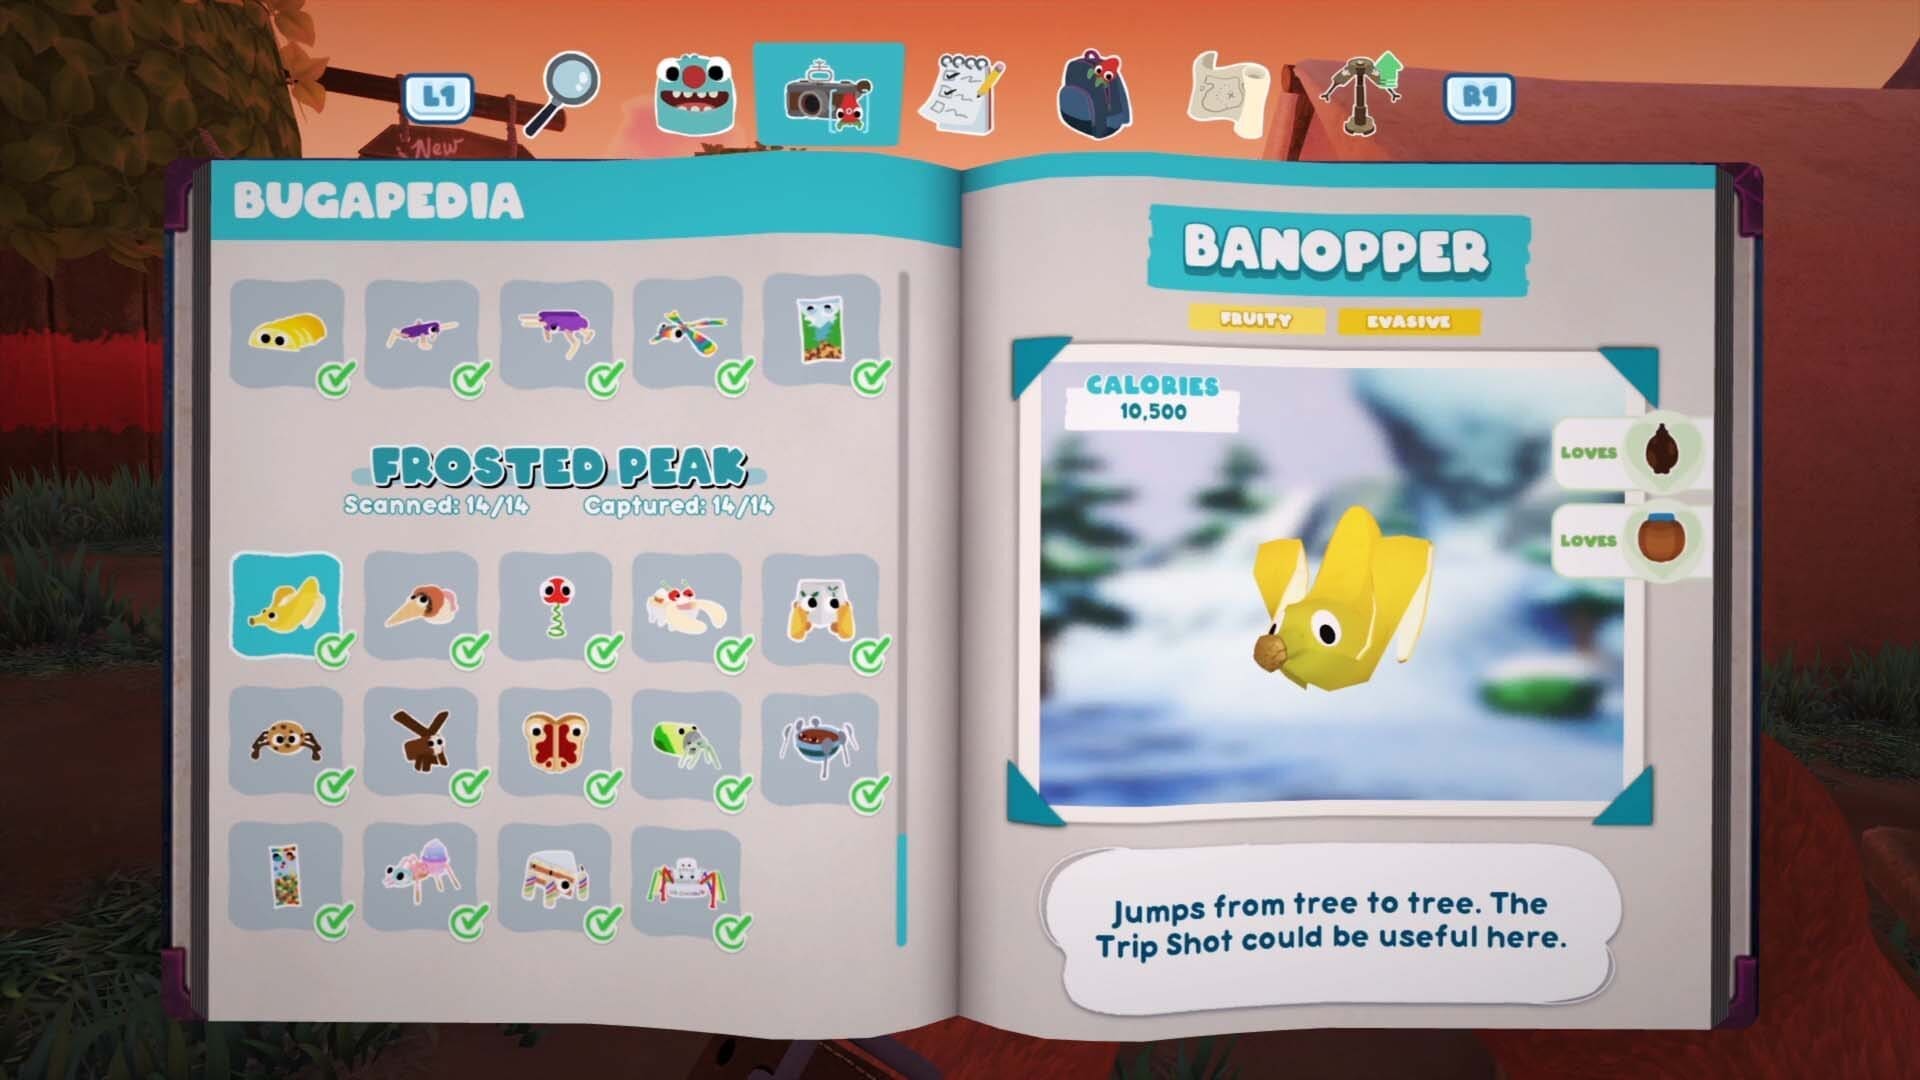
Banopper
If you set a Scoopy Banoopy on fire it’ll break apart into the Banopper and the Scoopy. The Banopper will fly between the tree’s and you can trip it up with the Trip Shot.

Scoopy
Use either the Trip Shot or the ball gadgets to set the Scoopy on fire and stun it.
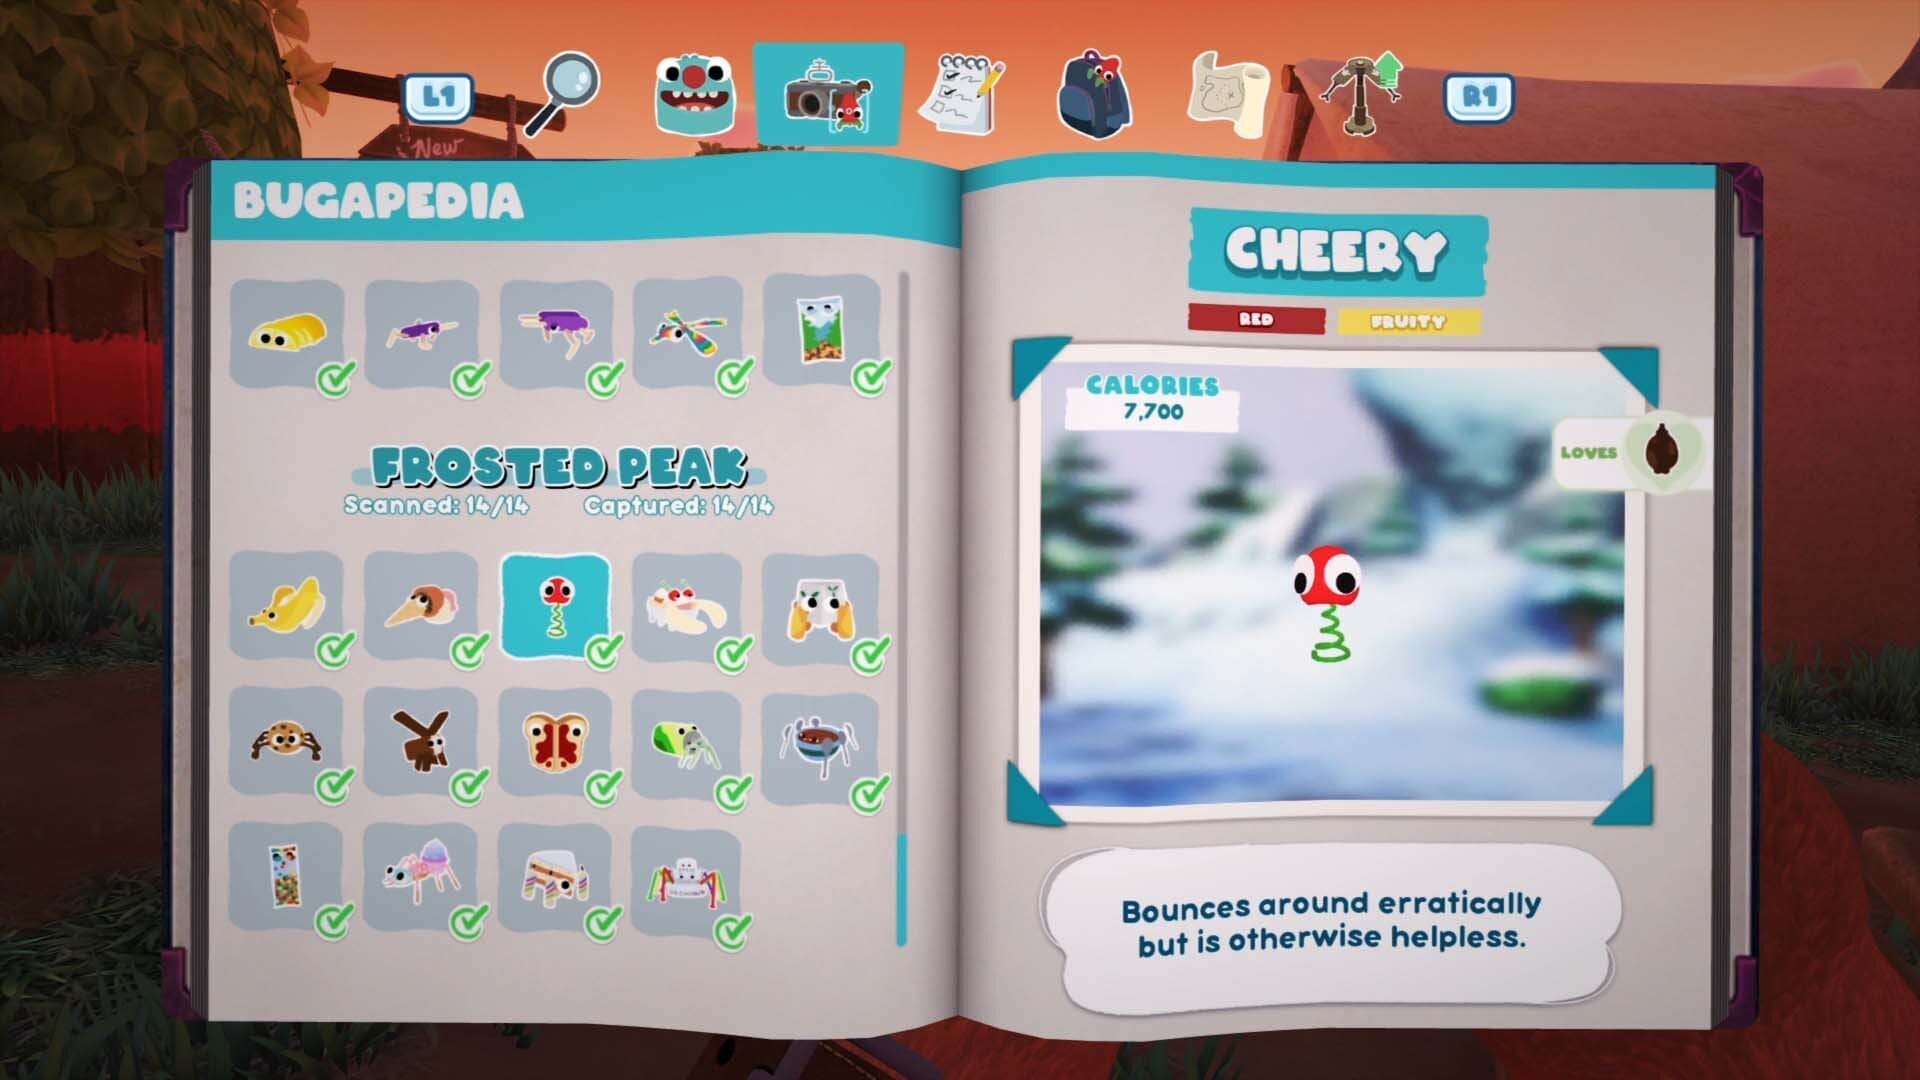
Cheery
Can find one outside the cave entrance on the lower level. Just place a trap and wait for it to walk into it.
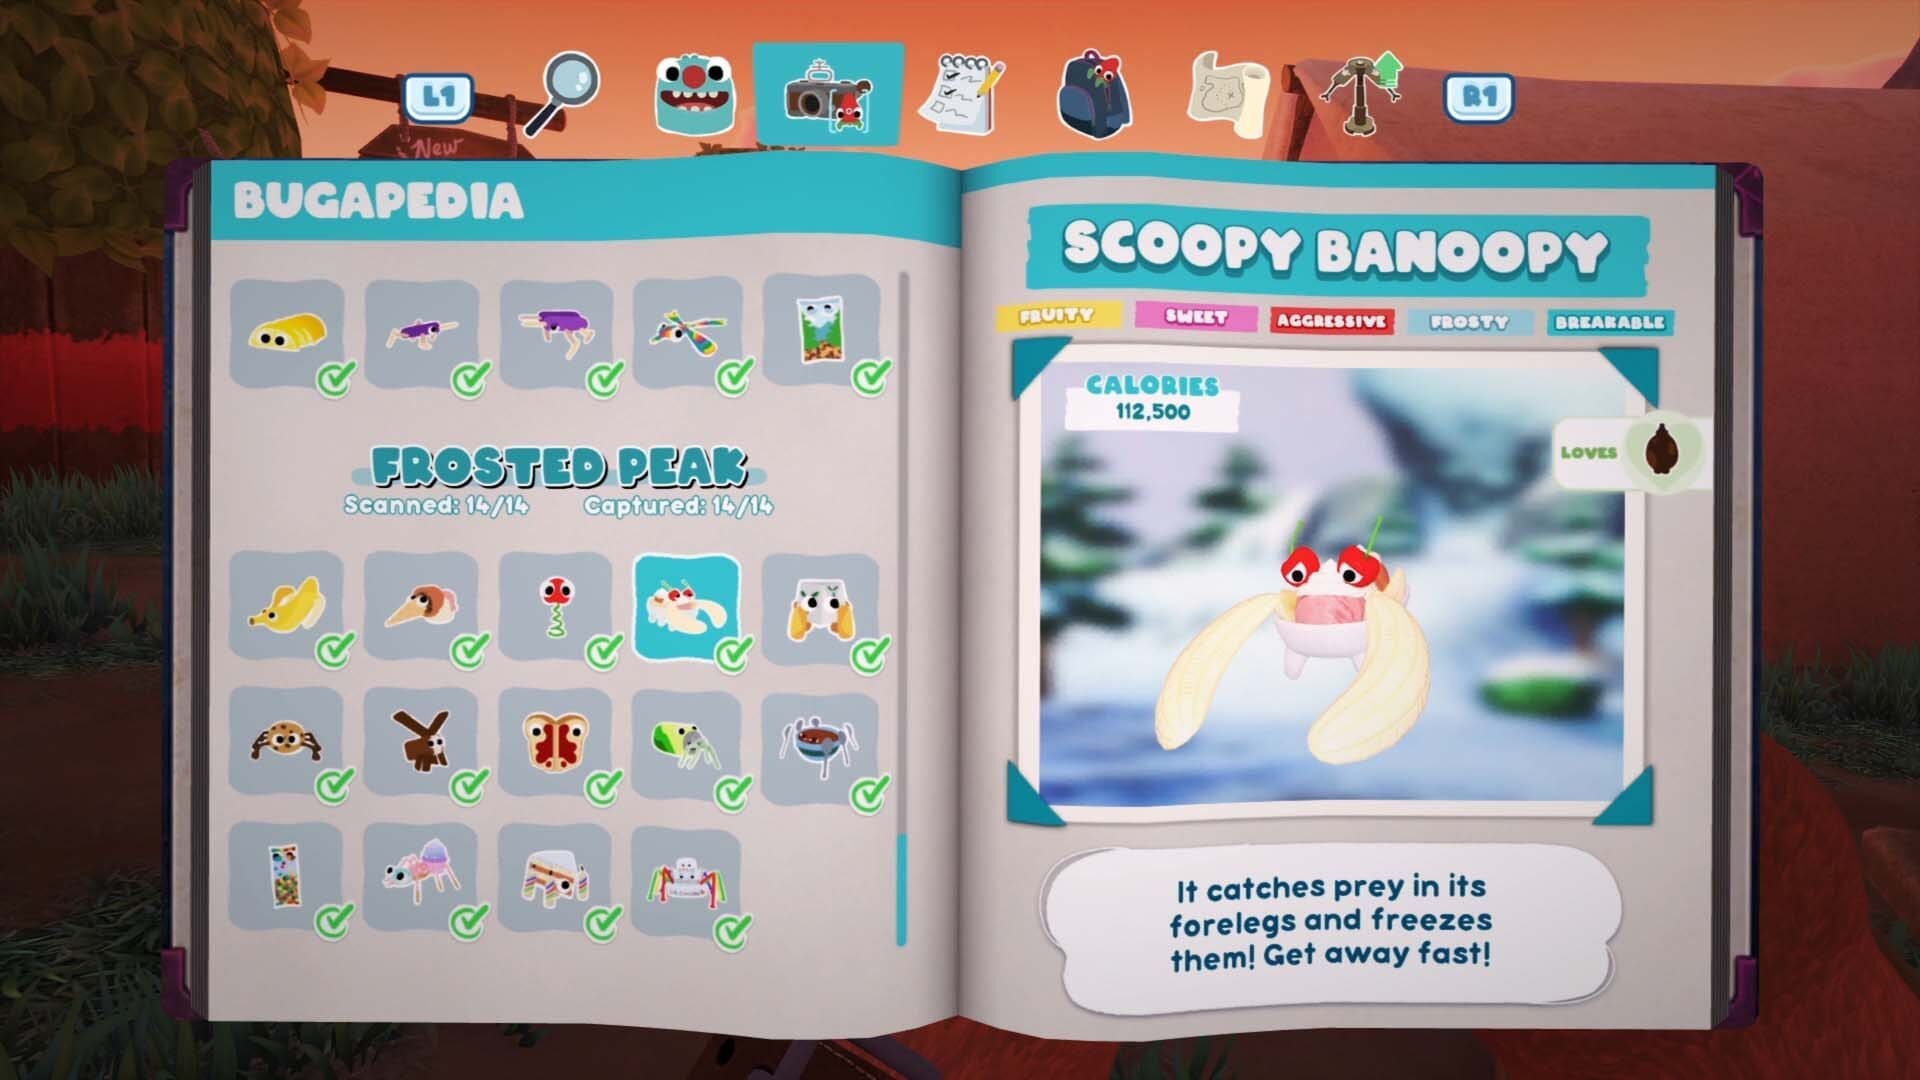
Scoopy Banoopy
To capture a Scoopy Banoopy you have to lead it into the fire (there’s a camp fire at the entrance to Frosted Peak) and then use the Trip Line to trip it up and capture it.
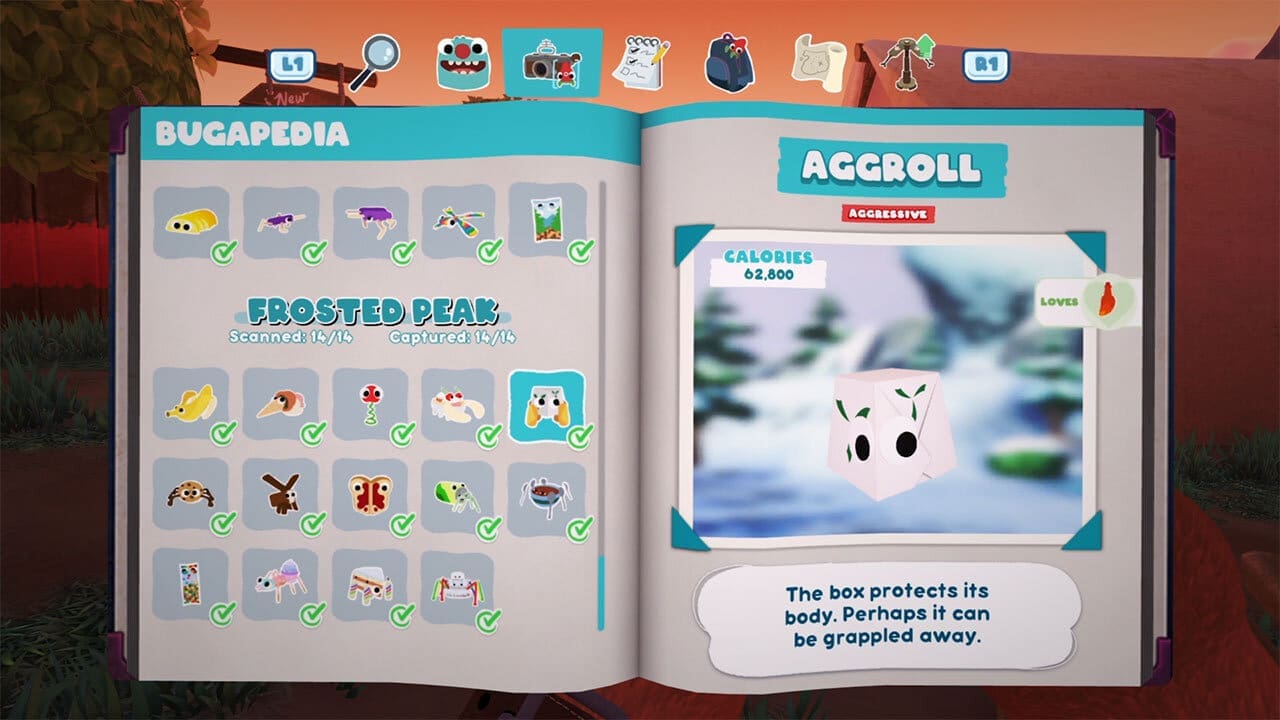
Aggroll
There are a few frozen icicles in the cave on the lower floor. If you set them all alight and un-freeze them you’ll find an Aggroll in one.

Chippie
Climbs around the walls and cave in the upperside of the mountain. If you set up the Trip Shot inside the cave you can trip it up as it comes through.

Chillynilly
The Chillynilly only appears between 4 PM and 4 AM. If you lead it towards fire you can place one end of the Trip Shot in the fire and then launch the other at the Chillynilly to knock it out.

Flutterjam
Circles around the top of the mountain between 4 AM and 4 PM. If you throw some honey on it you’ll drop it to the ground and you can then scoop it up in a net.
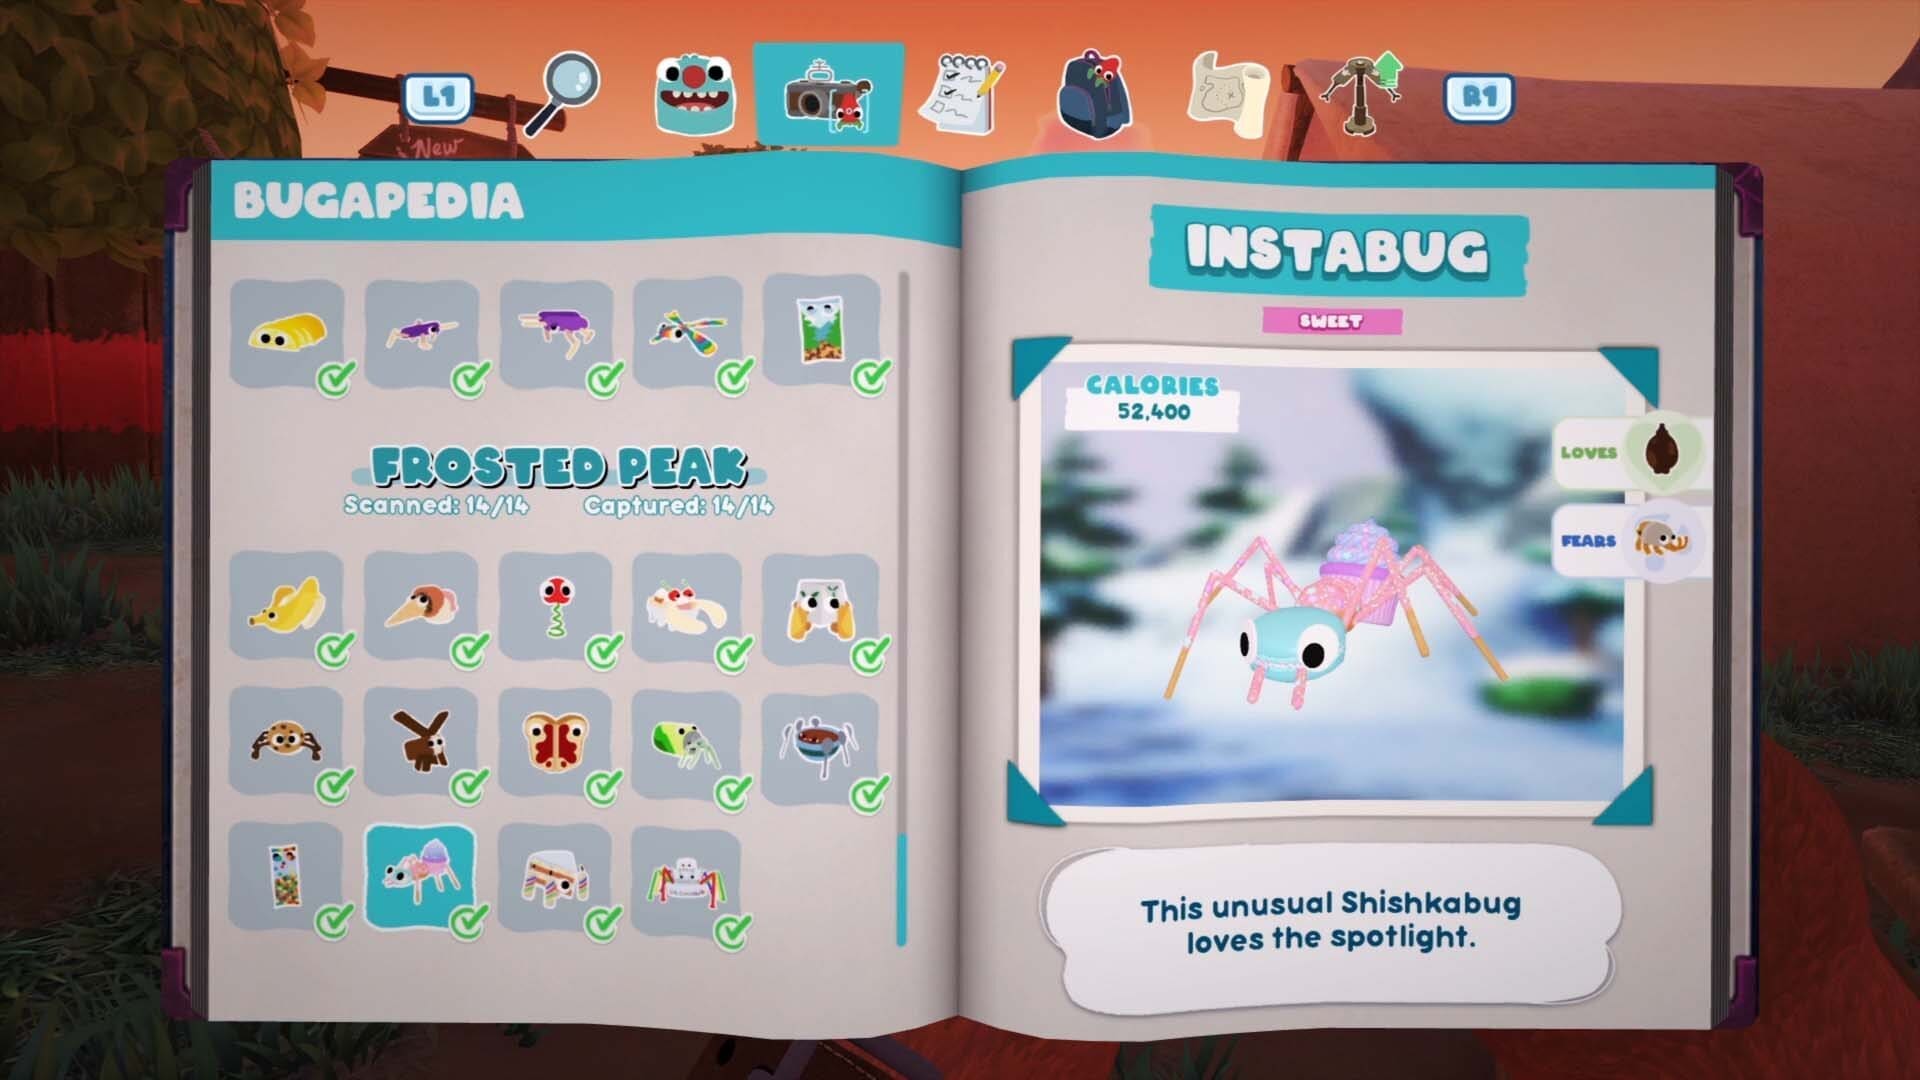
Instabug
From the entrance to Frosted Peak head right just past the small pond. There’s an Insabug in the bush here and you’ll probably hear it. Place your trap near the bush and then bring up your camera to cause the Instabug to jump out into the spotlight. Quickly spring your trap and you’ll capture it.
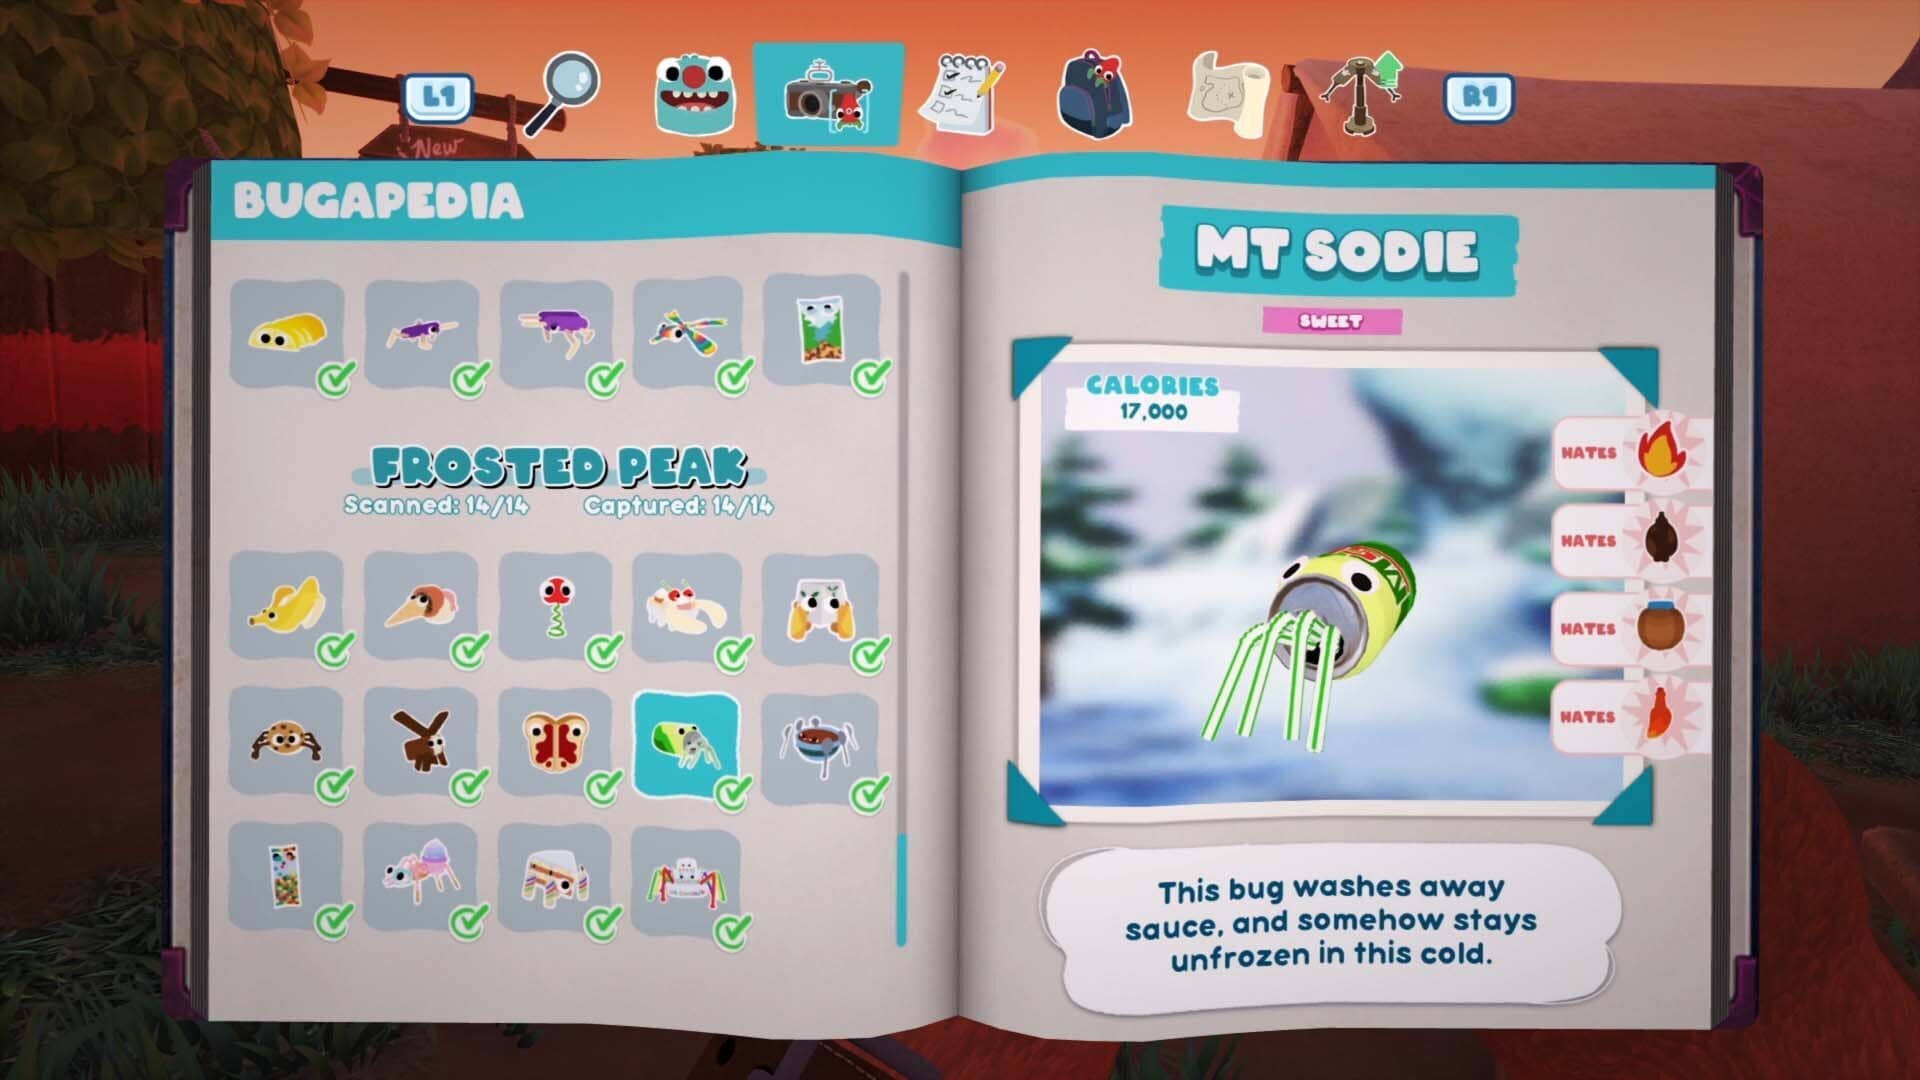
MT Sodie
It floats around the small pond near the entrance to Frosted Peak.

Stewdler
You’ll find one of these in the cave towards the top of the mountain. If there isn’t one when you enter, there will be a Chillynilly that appears later that you can lead onto the Stewdler to knock it out. Alternatively, use its favourite sauce to lead it to the fire on top of the mountain.
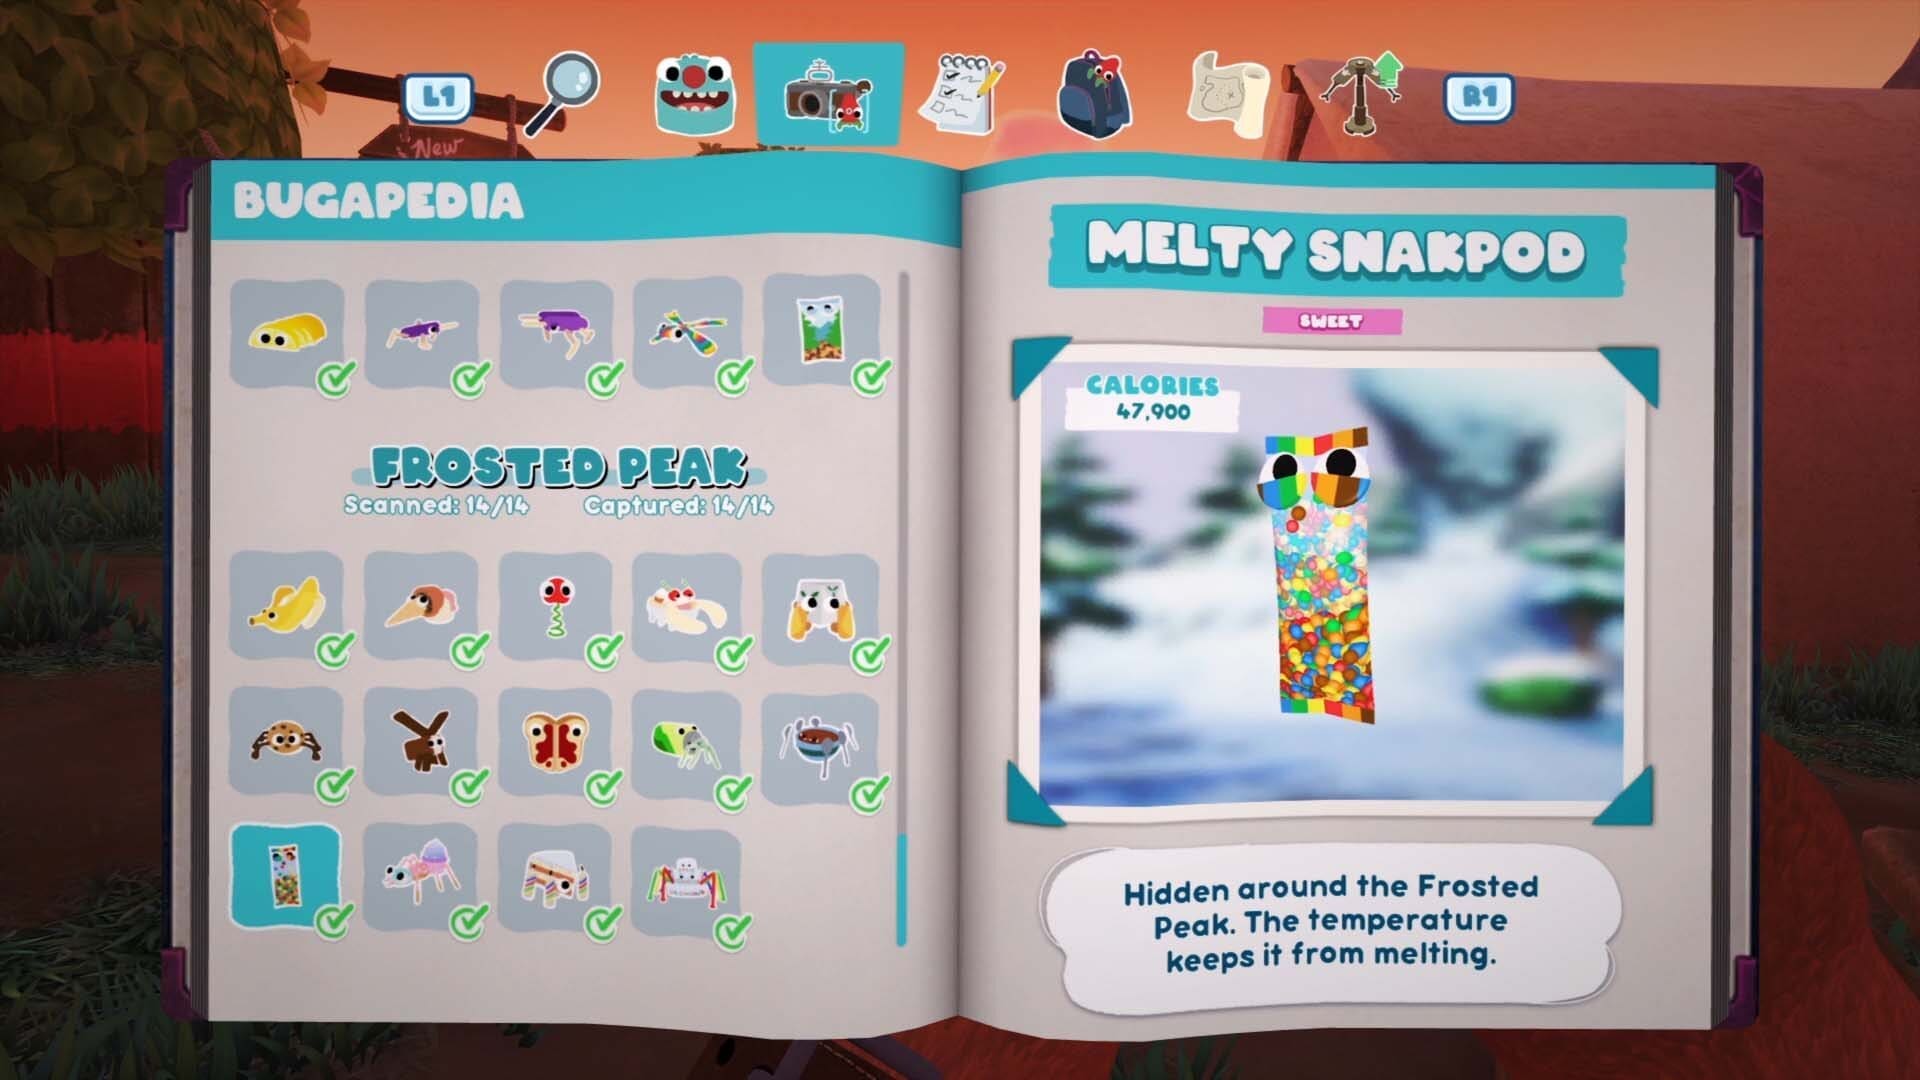
Melty Snakpod
There’s one behind the tent at the very top of the mountain.
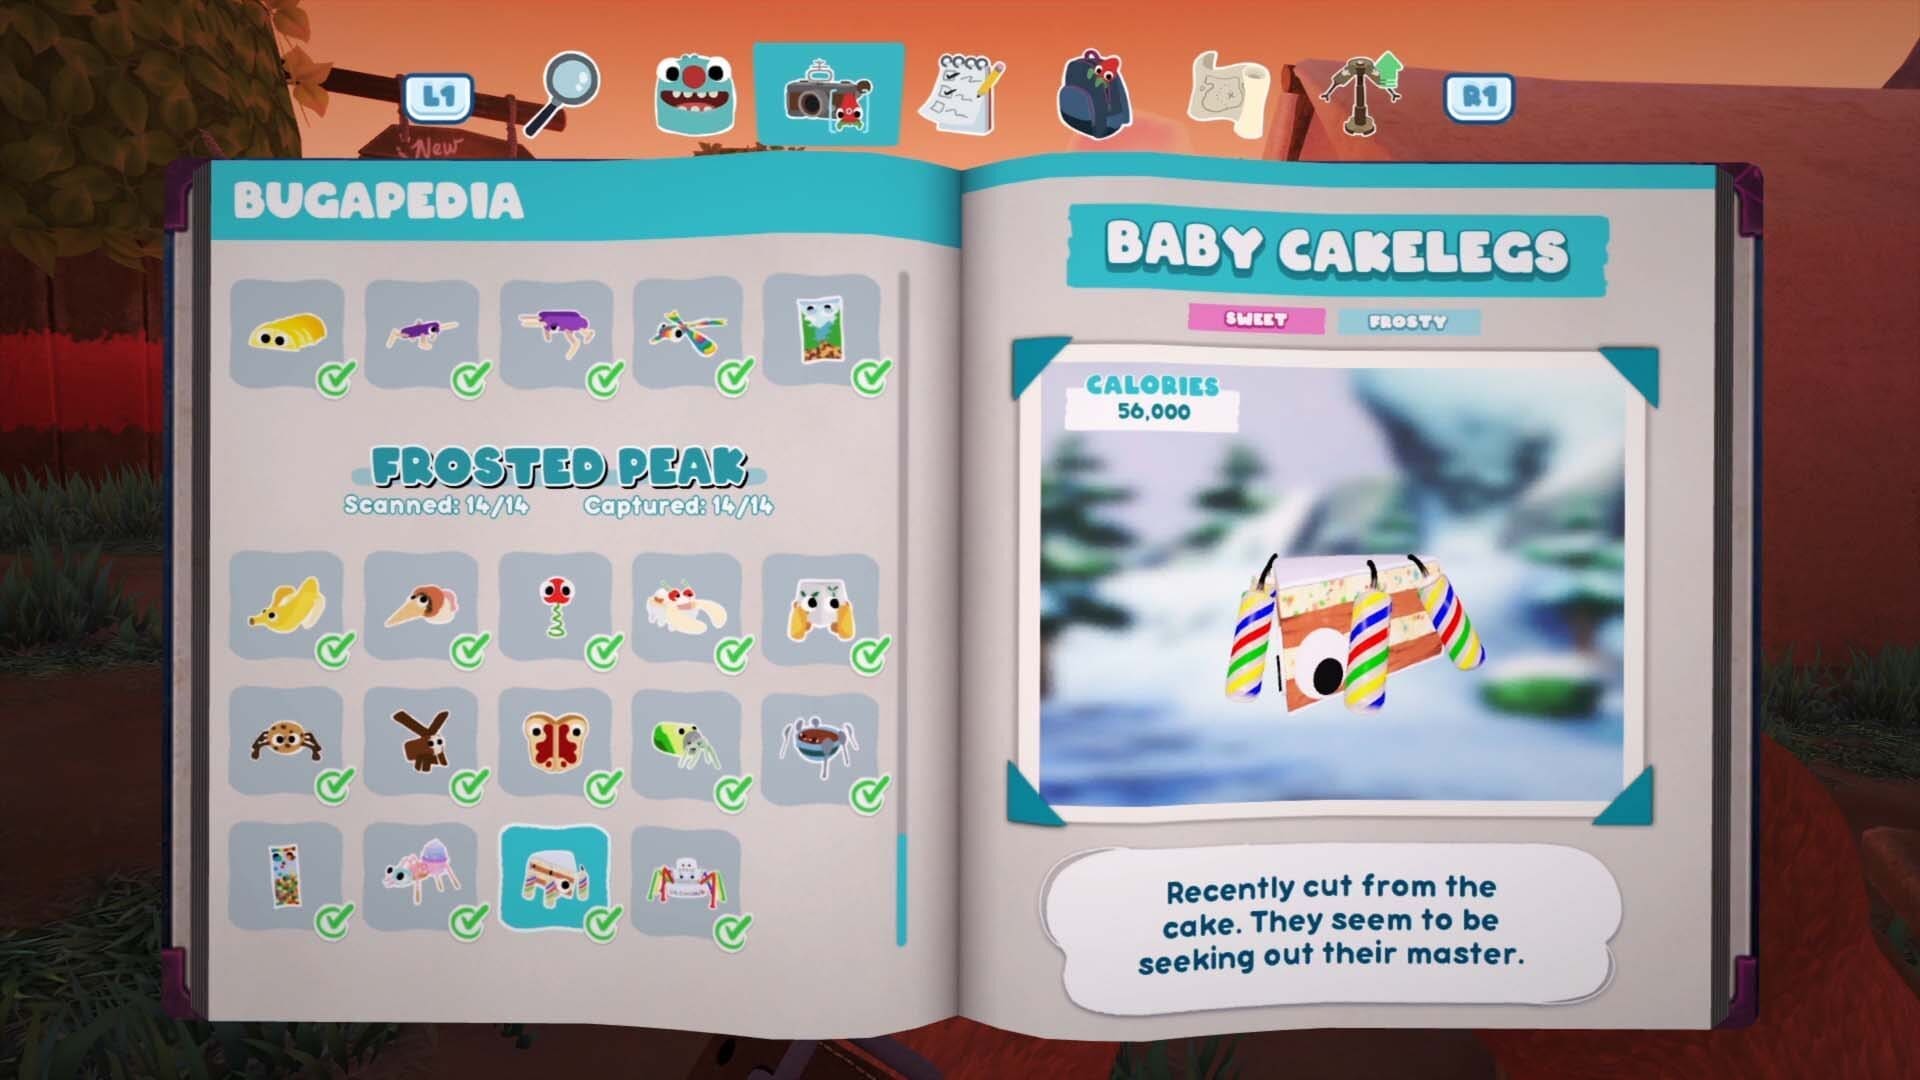
Baby Cakelegs
You can capture one of these while fighting the final Legendary Bugsnax quest (see below).

Daddy Cakelegs
The final Legendary Bugsnax quest in the game comes from Snorpy Fizzlebean. You’ll capture the Daddy Cakelegs at the end of the quest.
For more help with the Legendary Bugsnax check out this guide.